During a recent Horizon View proof of concept, a customer wanted to use Persistent Disks so they had the ability to take desktops offline and keep all the relevant user settings.
The proof of concept went well, however the users wanted to keep all of their settings but the pool needed to be destroyed as it didn’t meet certain criteria for the internal IT team such as the naming convention.
So in this scenario we had a requirement to delete the pool, but keep the users persistent disk and add it to another pool. VMware have a KB called ‘Moving a persistent data disk to another View desktop‘ however the internal IT team wanted something which could be performed without using ESXCLI.
We thought about using Persona Management but we hadn’t installed it on the template. So what did we do? Well after a few tests, we came up with a workable scenario.
Scenario
We have two desktop Pools:
A – Pool A is where the persistent disks currently reside and contain all the users data
B- Pool B is the pool target for Pool A’s persistent disks
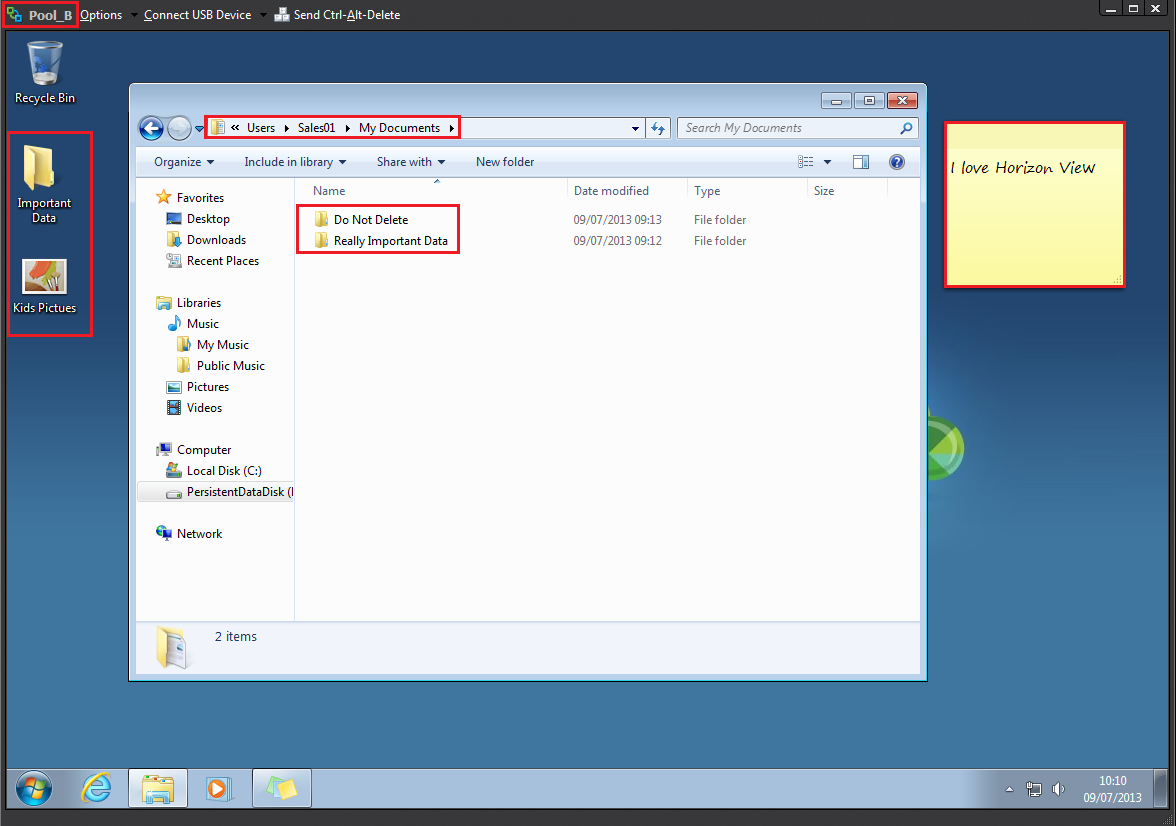
Pool A and Pool B have the same AD Security Group allowed to access both desktops which is Sales. The user Sales01 has been accessing desktop VMF-PA01 and has various desktop icons and data in his My Documents.
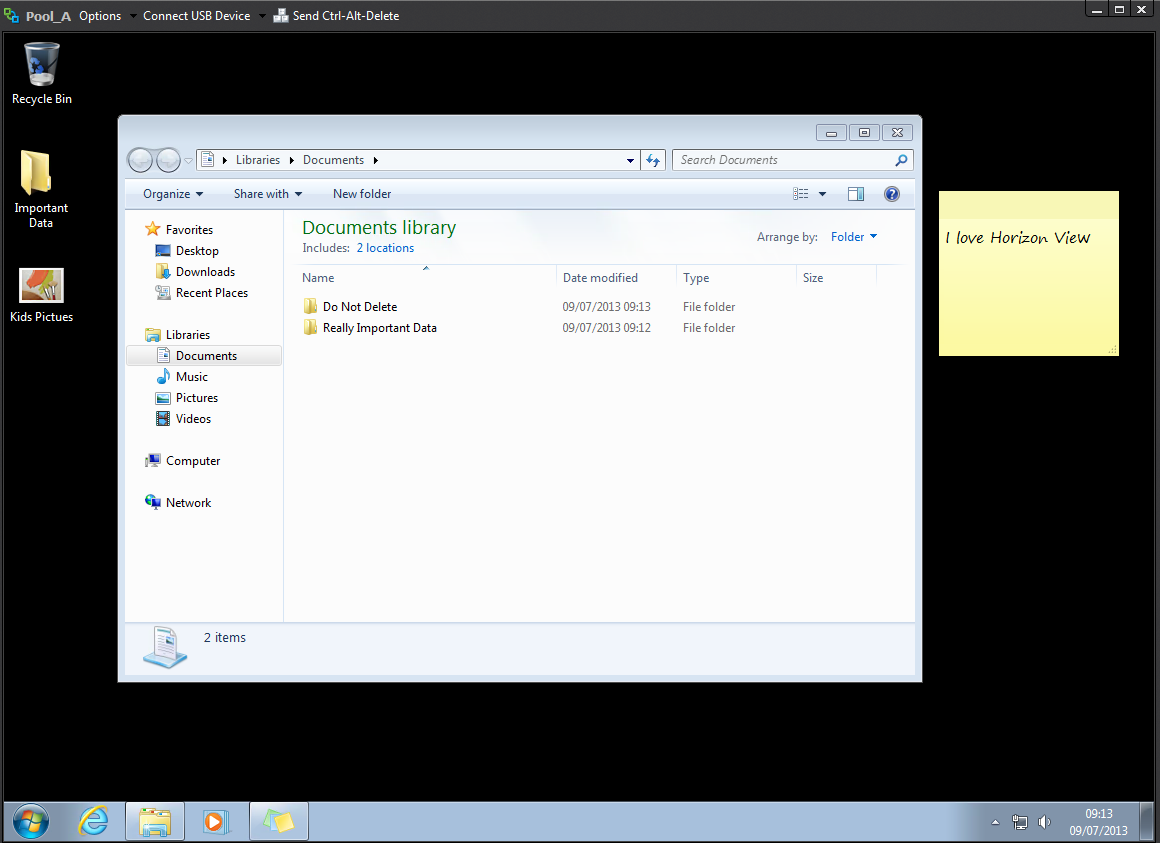
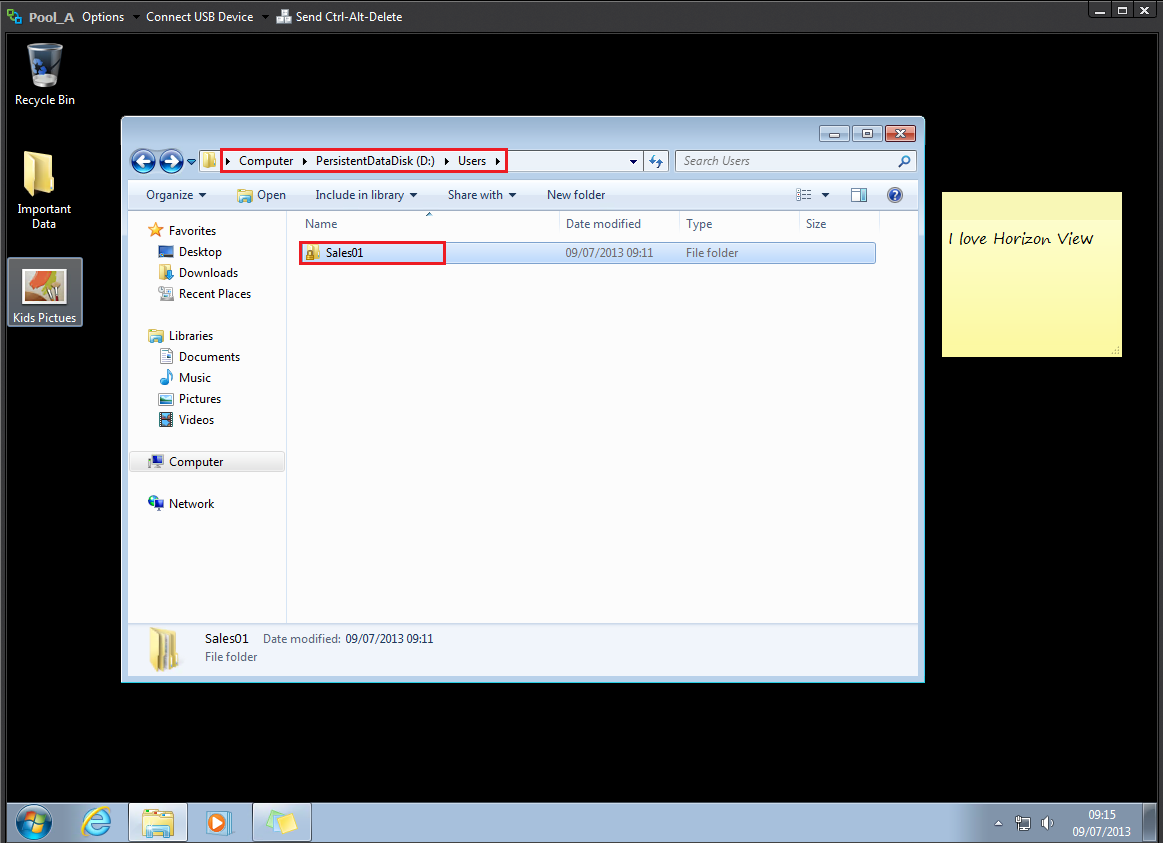
A quick check to make sure everything is tickety boo, let’s examine the Persistent Disk which is Drive D and we should see a Sales01 under the Users Folder
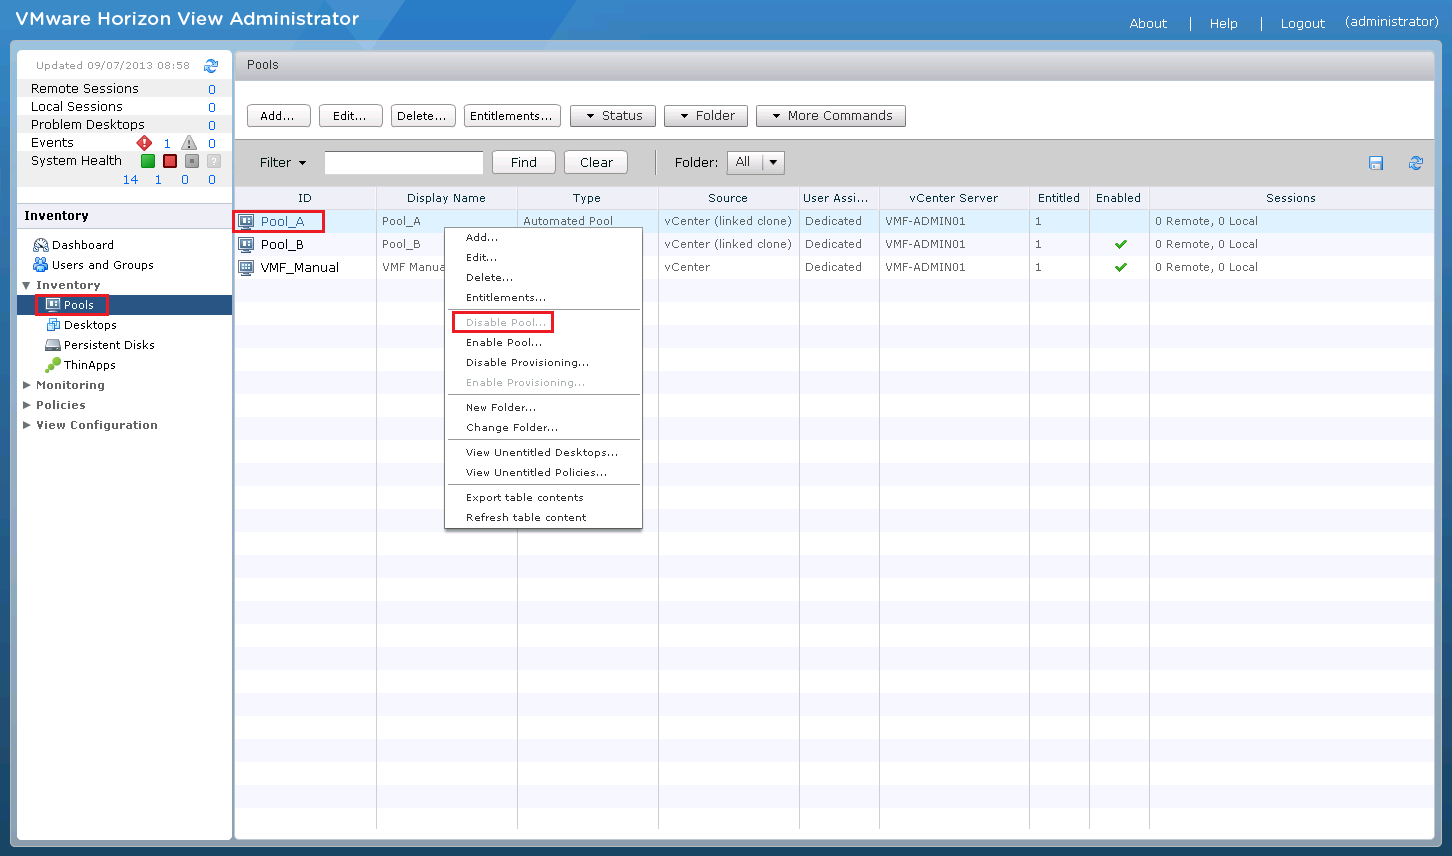
Next, I’m going to disable Pool A as I don’t want any access or data changing.
Step 1
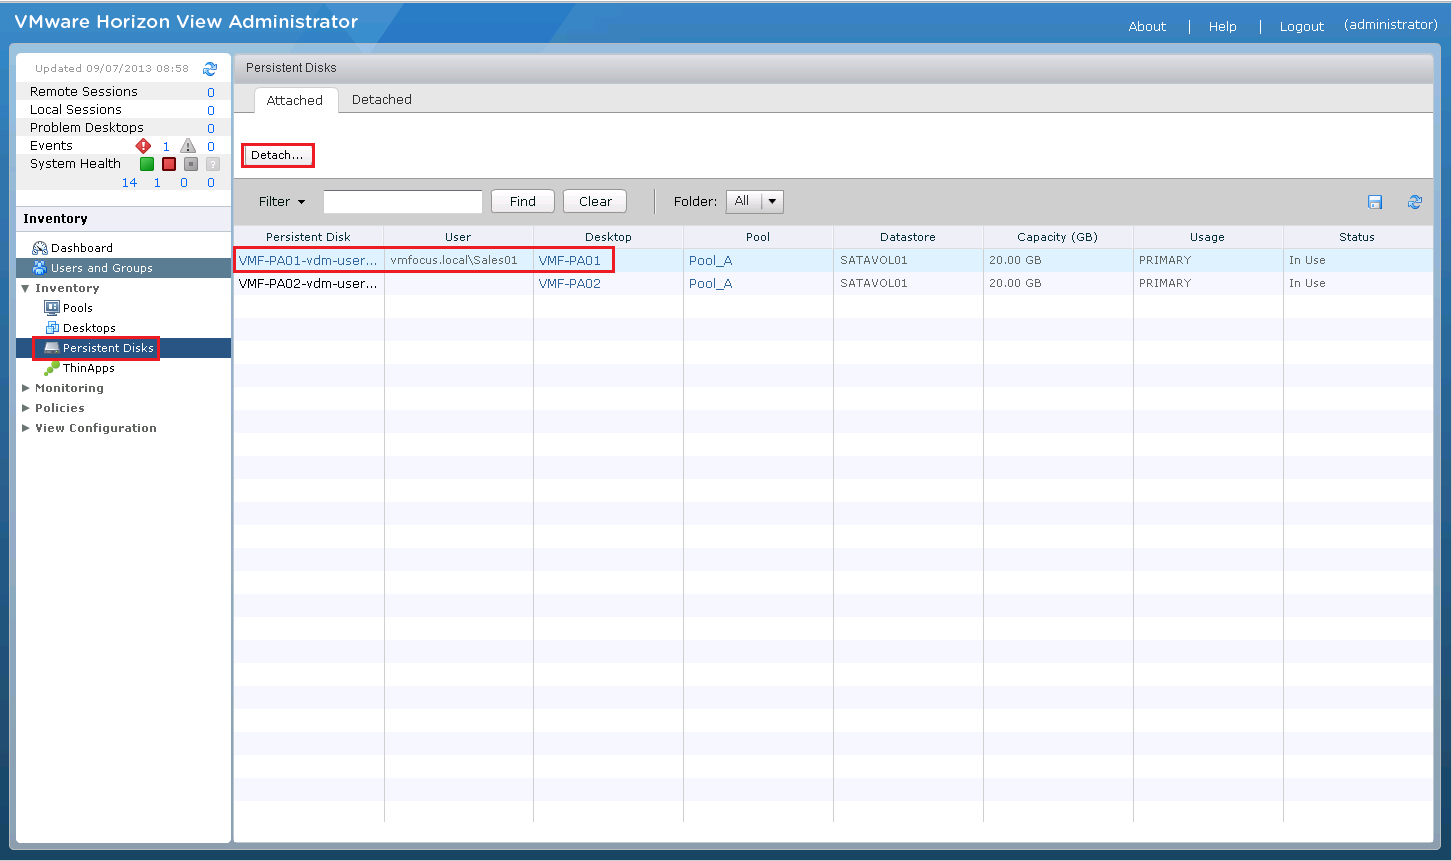
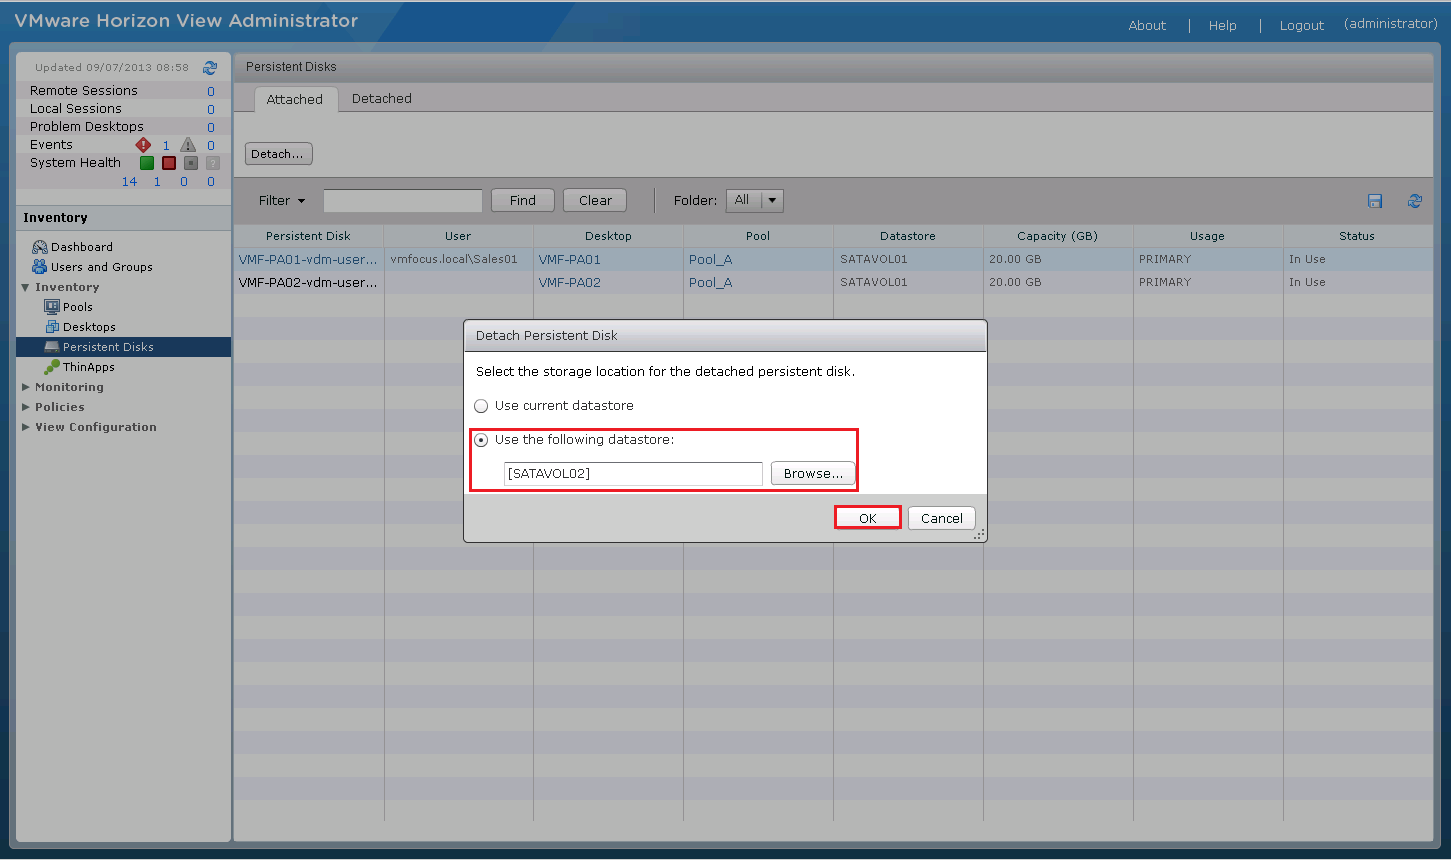
The first step is to Detach the Persistent Disk from the desktop VMF-PA01. This can be found under Persistent Disk > VMF-PA01 and then select Detach
Choose where you want to store the Persistent Disk, I’m rolling with a different Datastore as Pool B resides in SATAVOL02
After a few minutes you should see the Persistent Disk under the Detached Tab
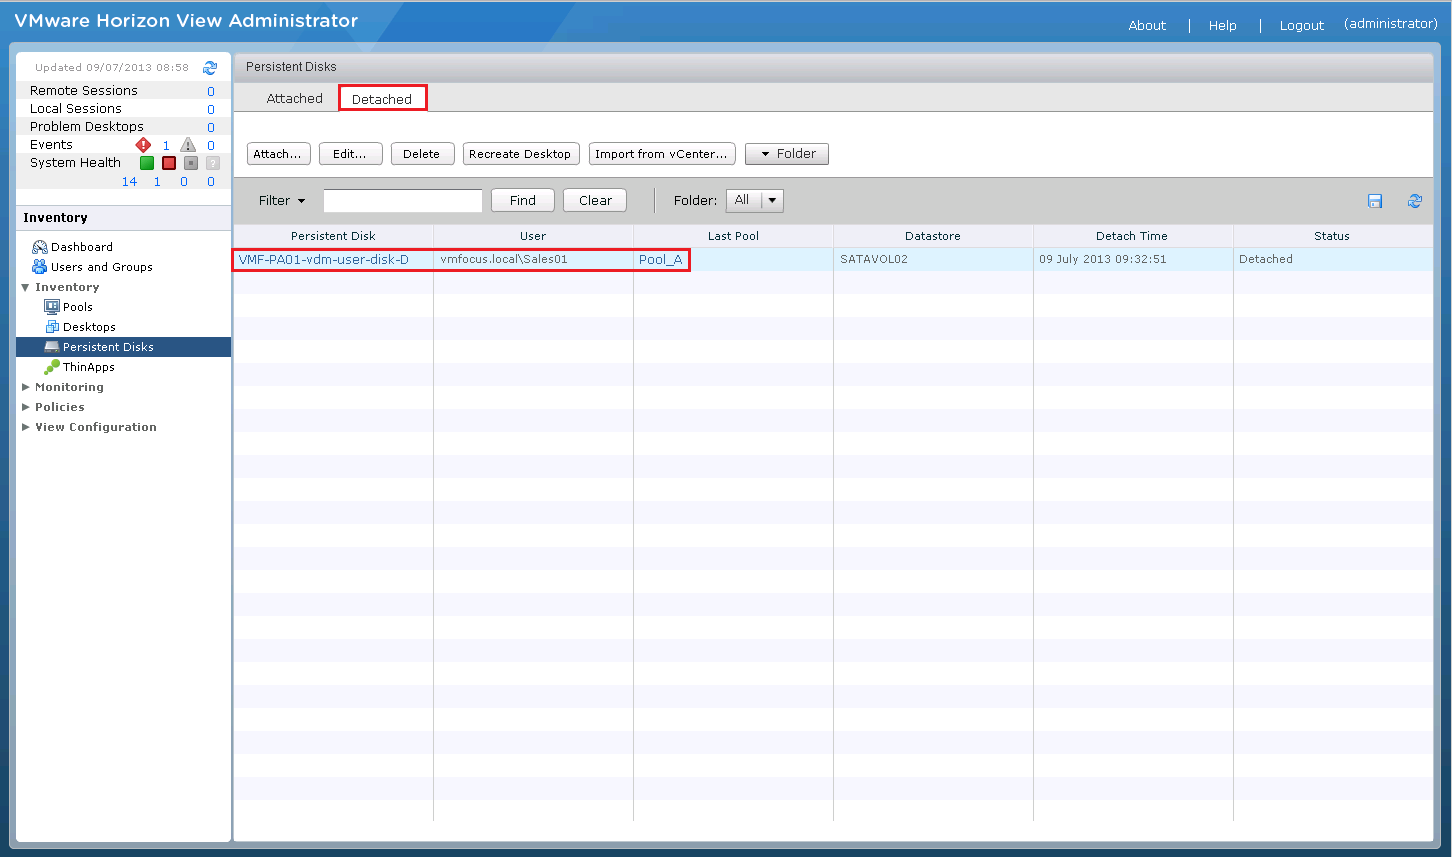
Note that the Persistent Disk Last Pool is A
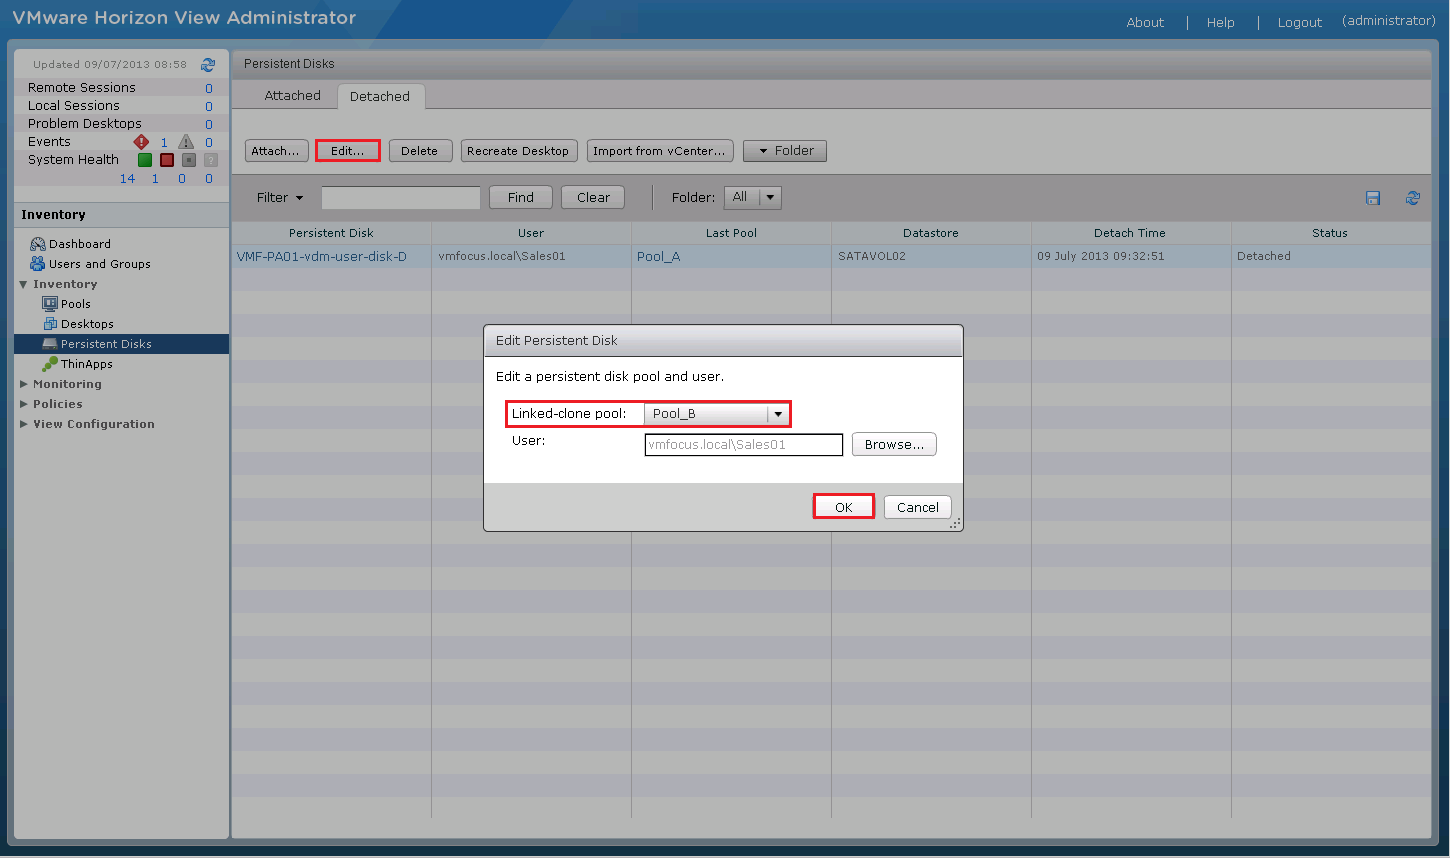
Step 2
Edit the Detached Disk and change the Pool to B (our target)
Next we need to Recreate Desktop
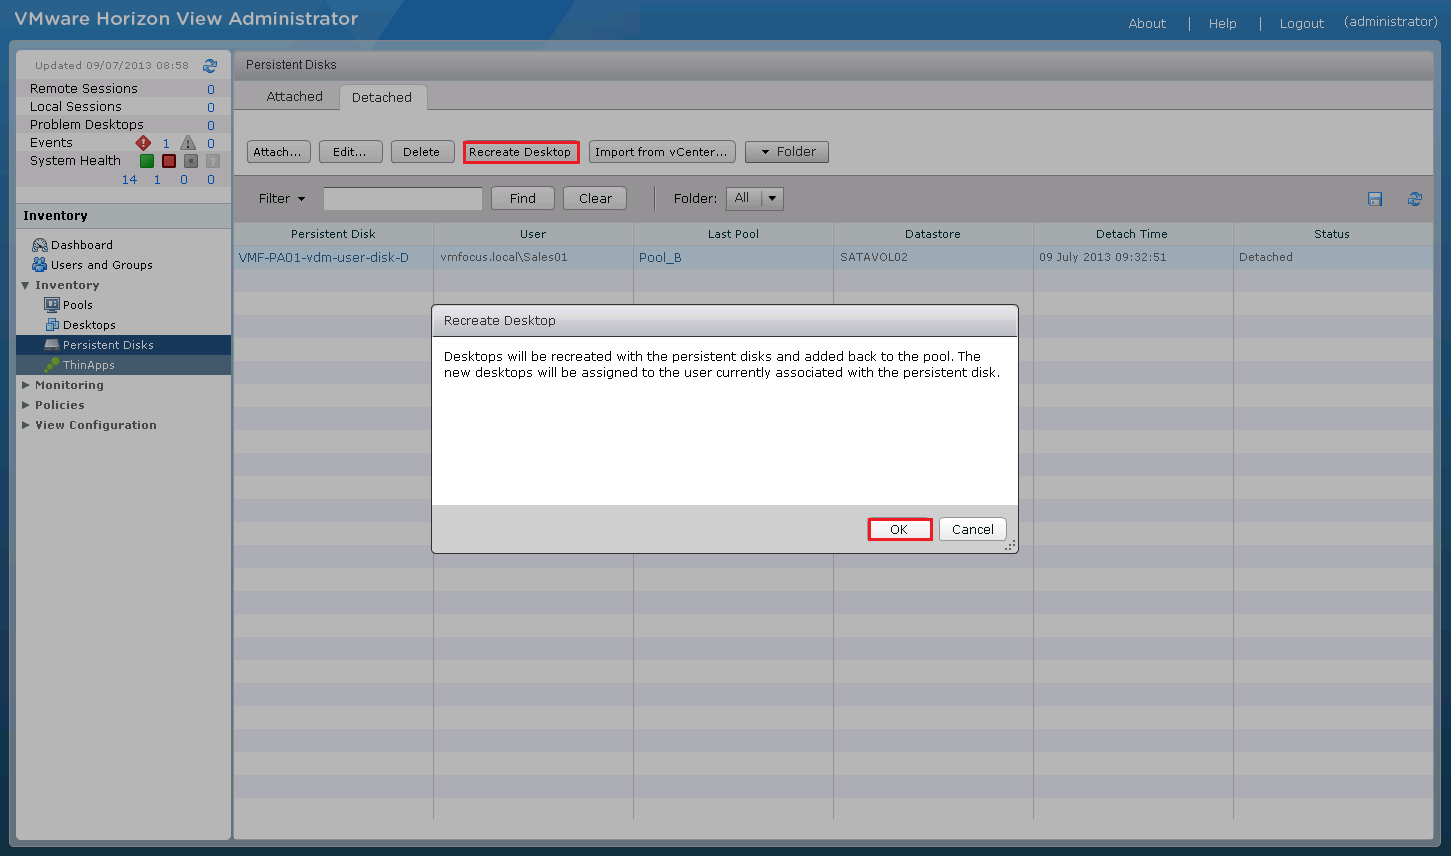
If all is working as expected you should see a new Desktop being provisioned in Pool B with the user Sales01 attached to it
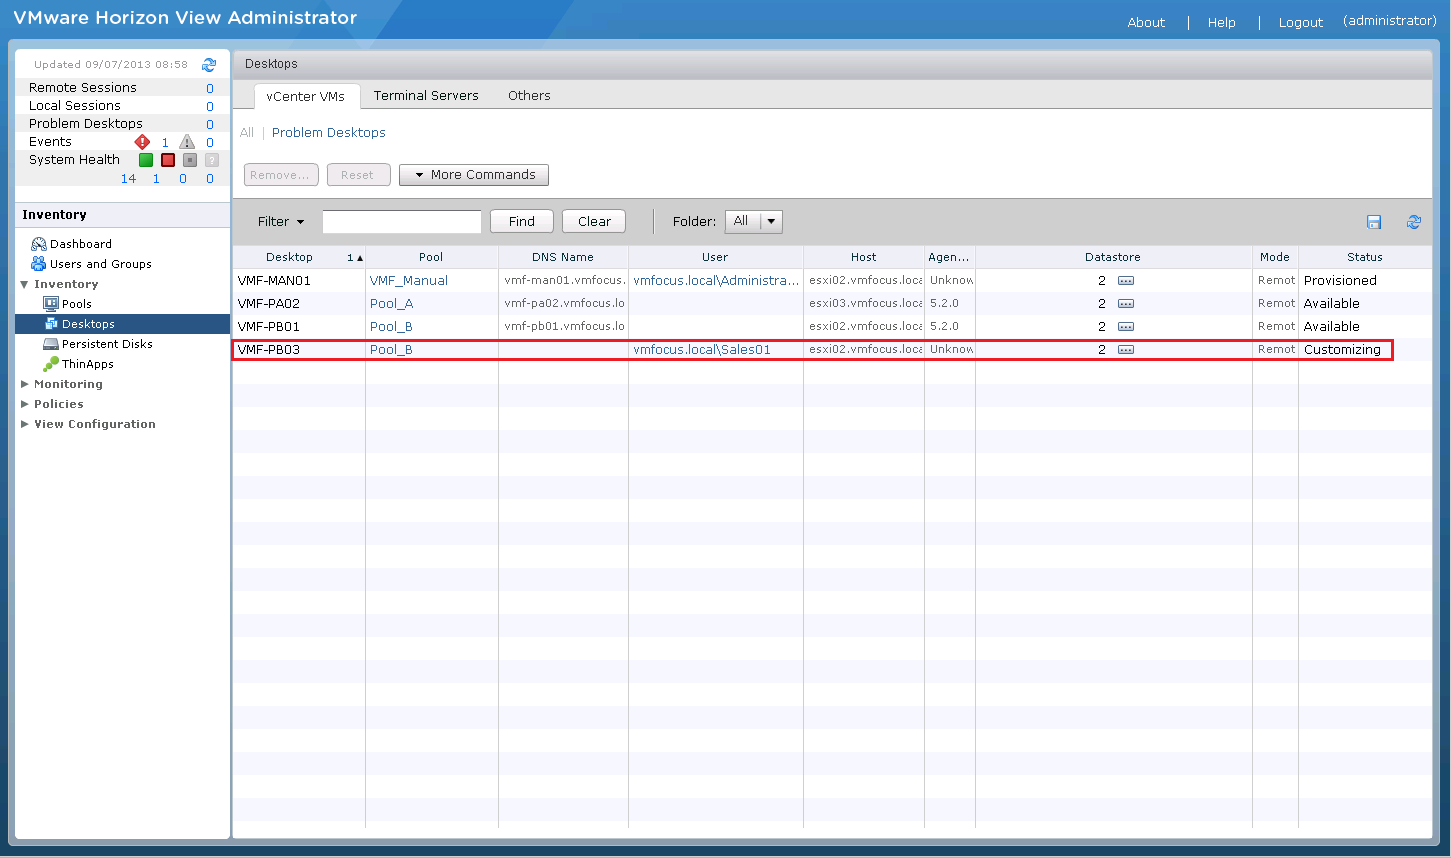
The Result
Once your desktop in Pool B has been composed, log back in as the user, in my case Sales01 check out your desktop which has all the relevant settings.
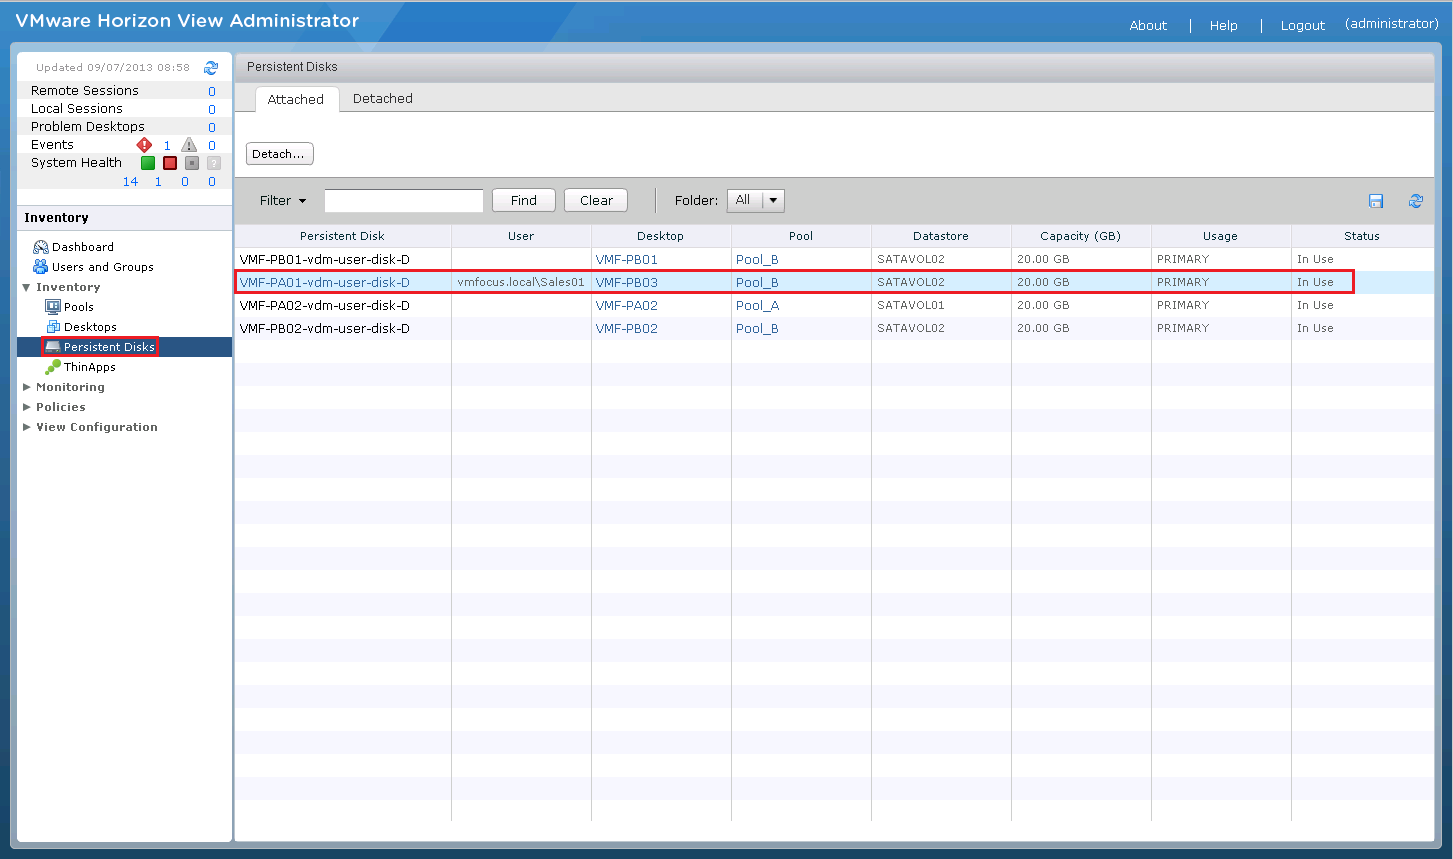
If we check the Persistent Disks you will see that VMF-PA01-vdm-user-disk-D is now associated with Pool_B and Desktop VMF-PB03.

You ought to be a part of a contest for one of the highest quality blogs online.
I most certainly will highly recommend this website!
Really great “howto”. Thank you for your work
very useful article , thanks very much