Part one of this blog series was a ‘First Look: App Volumes‘ in this post, I’m going to install App Volumes. As with all things it’s best to start with the pre-requisites.
App Volumes Manager
- Windows 2008 R2
- Windows 2008 2012 R2 if using App Volumes 2.7
- .NET 3.5
- Internet Explorer 9 or 10
- 4GB RAM
- 2vCPU
- 1GB Disk Space
- ESXi 5.x and vCenter 5.x (note ESXi and vCenter version must match)
App Volumes Agent
- Windows 7 32/64 Bit
- Windows 2008 R2 64 Bit
- Windows 8.1 32/64 Bit if using App Volumes 2.7
- Windows Server 2008 R2 and 2012 R2 for RDSH if using App Volumes 2.7
- Windows Server 2008 R2 and 2012 R2 for VDI if using App Volumes 2.7
SQL Database
Windows 2012 R2 with SQL 2012 if using App Volumes 2.7
Step 1 – App Volumes Manager
Download the installer App Volumes from here
You will notice two files, one is an ISO which contains the application and licence key file. The license is EULA based, so you need to promise to be good!
App Volumes Manager and App Volumes Agent use the same installer, we need to make sure that we install App Volumes Manager first.
Launch the App Volumes Setup > Click Next

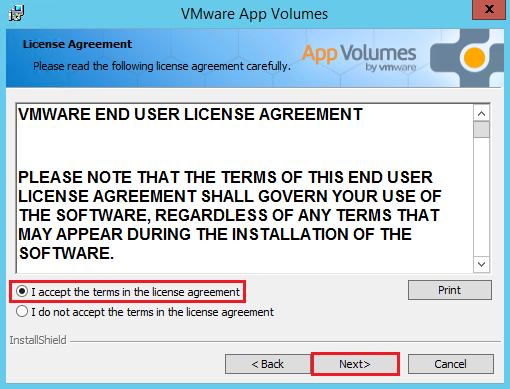
I’m sure you will read the EULA before accepting it then click next
Select > Install App Volumes Manager > Install

Click Next

Select whether you wish to use SQL Express or SQL Database Server > Next

I’m using a SQL Database Sever so have entered in the relevant details > Click Next

Select your Firewall Ports > Click Next

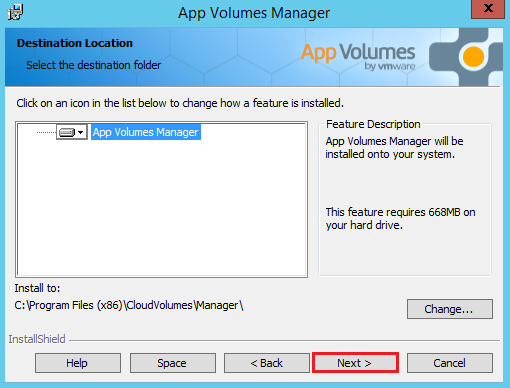
Select you install path > Next
We are ready for the install
 Finally Click Finish

Step 2 – Initial Config
When you launch App Volumes Manager you should be greeted with the getting started guide. The first thing we want to do is upload and apply our license key file. Once done it’s time to configure Active Directory.

This was probably one of the easiest Active Directory integrations I have done, other vendors pay attention!
Next select the Active Directory Security Group which will be allowed to access App Volumes Manager.

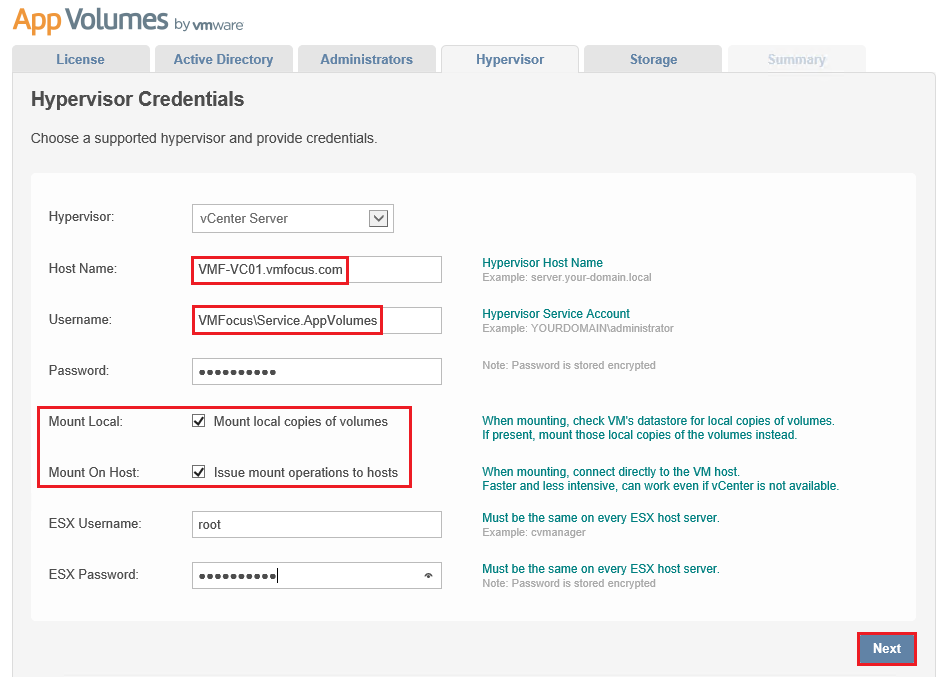
Next we need to plumb in our vCenter details, couple of points to note:
- Mount Local – can be useful for testing applications on local storage before using production storage
- Mount On Host – Avoids having vCenter as a SPoF
Select your Default Storage Locations for AppStacks and Writeable Volumes.

Next choose if you want to upload any pre-packaged volumes.
Finally Select Storage & Upload Prepackaged Volumes from an ESXi Host

Final Thoughts
I have to say that I’m seriously impressed with the initial configuration of App Volumes. It really is a breeze, they even go as far as telling you vCenter permissions during the configuration wizard. Other vendors should take note!
