Installing SRM 5.1.1 & vSphere Replication – Part 2

In the previous post Installing SRM 5.1.1 & vSphere Replication – Part 1 we got to a point where SRM was installed and our Production and DR site are now connected.  So let’s crack on with installing vSphere Replication.

Installing vSphere Replication

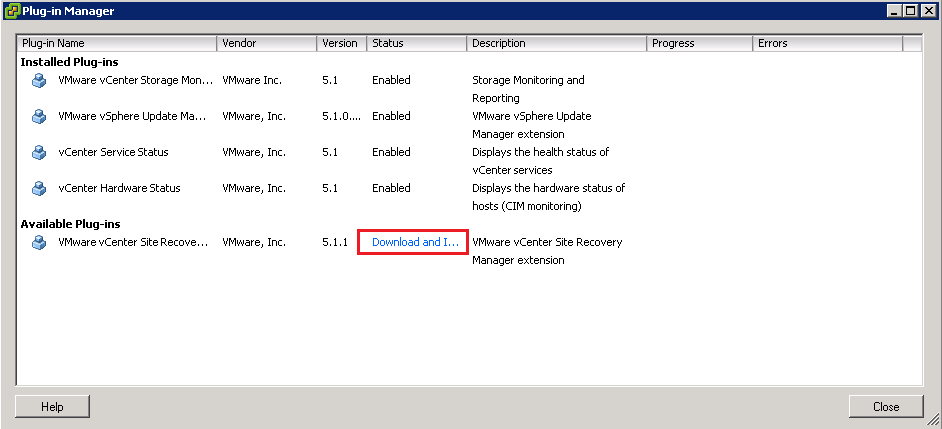
Go into your vSphere Client > Home > Solutions and Appliances > Site Recovery and Select vSphere Replication from the left hand menu

vSR12

The good news is that because we chose vSphere Replication as part of the install, we have a copy of the OVF already, which is located in C:Program FilesVMwareVMware vCenter Site Recovery Managerwww

So click on Deploy the VR Appliance and Select OK

vSR13

All you will that SRM has already located the OVF, so hit Next

vSR14

Guess what, hit Next again and go through the following steps:

  1. Give your vSphere Replication Appliance a name.
  2. Choose your Datacenter
  3. Choose your Cluster
  4. Choose your Storage
  5. Choose your Disk Format (I’m rolling with Thick Provisioned Lazy Zeroed)
  6. Select your Network Mapping
  7. Enter an Administrator Password
  8. Enter your Network Information
  9. Finally ensure your vCenter Extension is correct

Ta da, that is now done, we need to go through the same procedure at the DR site.

vSR15

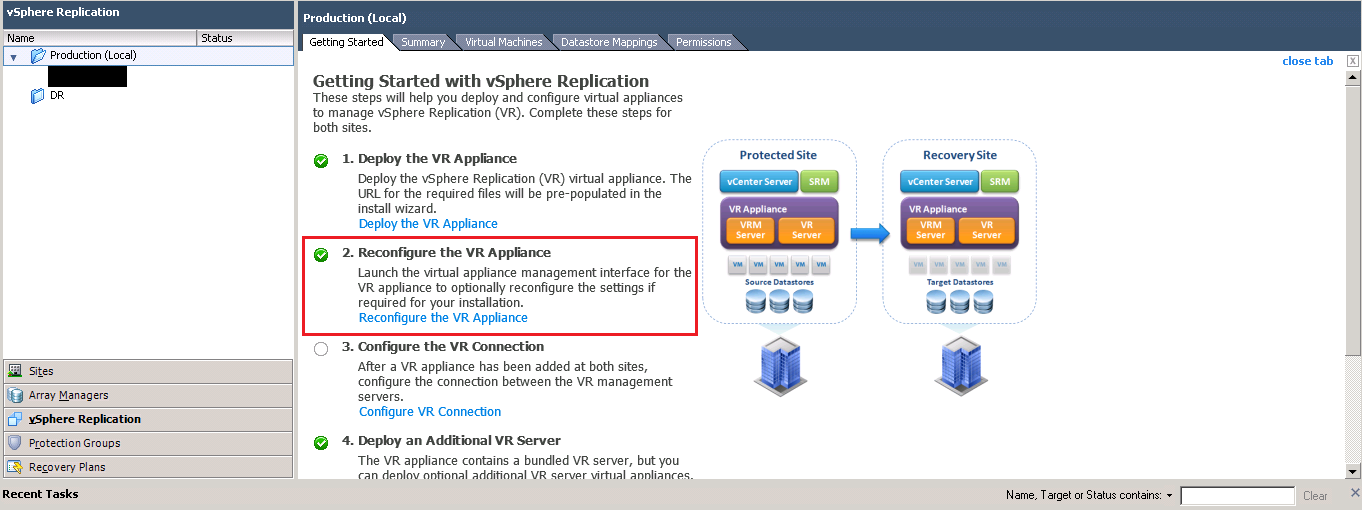
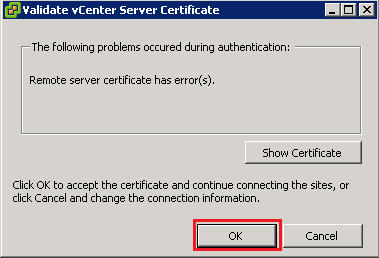
Next up we need to configure the connection between vSphere Replication, to do this hit ‘Configure VR Connection’

vSR16

Select Yes and that’s it, your vSphere Replication Appliances are now connected.

Virtual Machine Protection

Now everything is in place we can configure Virtual Machine Protection.  I’m really impressed with how easy this is to do with vSphere Replication.  All you need to do is Right Click the VM you want to protect and select vSphere Replication

vSR18

After this it really is as simple as choosing:

  1. Your Recovery Point Objective
  2. Guest OS Quiescing
  3. Target Datastore
  4. Choose your Disks for Replication and whether to keep the same formatting (thick or thin)
  5. Choose your vSphere Replication Appliance

Using vSphere Replication you won’t see the VM automatically protected by SRM (with the lighting bolt) in your DR site.  For this to happen you need to ensure that you have configured your Protection Group for the VM’s.

Select Protection Groups in your vSphere Client and choose Create Prtoection Group > vSphere Replication

vSR19

Select the Virtual Machines that you want to be part of the Protection Group

vSR20

Give your Protection Group a name
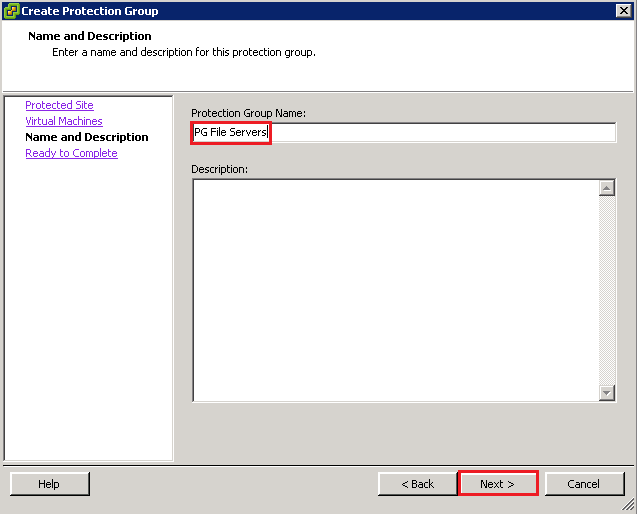
vSR21

Then hit finish.

You will see in your DR site, that the Virtual Machines are now protected using SRM.

vSR22

If you would like some more information on performing test fail overs, recovery and actual fail overs, please see Part 5 – Configuring Site Recovery Manager (SRM) With HP StoreVirtual VSA

Attention All New vExperts

So you have become a vExpert for the first time and you are basking in your awesomeness, but what happens now?

Well the answer to that is I’m not 100% sure, I think are meant to receive an email from John Troyer @jtroyer team at VMware at some point, but in the meantime, you can do a few things to get your name on the ‘list’.

I was catching up on my twitter feed late last night and I saw a couple of tweets by Larry Gonzalez @virtualizecr in relation to the vExpert program.  You may or may not be aware that their is a vExpert Directory.

To add yourself to the vExpert Directory, first of all login to VMTN and make sure that your handle has the vE symbol beside it

VMTN

Then go back to the vExpert Directory and click on Create new vExpert Entry

VMTN 2

Fill out your details and if you want a vExpert Appreciation Gift, give the box a tick!

Once again, thanks to Larry Gonzalez @virtualizecr for this information.

But wait we have more, a number of awesome companies are giving away free gifts or exclusive access to vExperts, these are the ones I currently know about:

Installing SRM 5.1.1 & vSphere Replication – Part 1

I have been installing and configuring vCenter Site Recovery Manager 5.1.1 and vSphere Replication this week, so thought I would document the process for future reference.

The cool thin with vSphere Replication is that it is array agnostic, meaning that you do not have to have a SAN/NAS which is on VMware’s HCL for the SRA (Storage Replication Adapter).  So it will run pretty much any storage solution.  In this case at the Production Site we are using a P2000 G3 iSCSI and at the DR Site locally attached storage.

Before I go through the installation steps, I have already configured the following:

  • Production SQL 2008 R2 Standard
  • DR SQL 2008 R2 Standard
  • Production vCenter
  • DR vCenter

I have confirmed that I can ping both vCenters using NetBios and FQDN’s.

At both Production and DR vCenter I have created an 64 Bit ODBC Connection to the SRM SQL Database and also the vSphere Replication Database

ODBC

TOP TIP: Before you can use vSphere Replication with SRM, we must configure SRM first

Installing SRM

Hopefully on your desktop or other random location, you have an icon called SRM-5.1.0-820150

vSR01

Hit this bad boy to launch the installer, select your language and click OK.

vSR02

Now this bit takes a while, so I suggest you go make yourself a cup of tea!

Once it finally pops up you will get the Welcome to the installation wizard for VMware vCenter Site Recovery Manager, click Next

vSR03

I’m not going to insult your intellect, as I’m sure you can Click Next, Accept the License Agreement and Click Next.

The next screen is the installation folder, as with nearly all installs these days you can change the destination folder.  I would recommend accepting the defaults unless you have a specific reason not too.

vSR04

We need to select Install vSphere Replication

vSR05

Now enter in your vCenter address as a NetBios name e.g. VMF-ADMIN01.  I tend to use a Service.SRM account for installing SRM as I prefer to keep individual vSphere components seperate.

vSR07

If your credentials are correct then you will see a certificate warning unless you have a PKI infrastructure in place.  We are going to accept the SHA1 thumbprint by clicking Yes

vSR08

Select Automatically generate a certificate and hit Next

SRM Part 7

Select Automatically generate a certificate and hit Next

SRM Part 8

Now we are cooking on gas, enter your Local Site Name, in my case this is Production, email address details and select your Local Host.  You can also change default ports if you need to.

SRM Part 9

Next select your ODBC connection for your SRM Database, mines originally named ‘SRM’ and enter the credentials required to access the database.

vSR09

If everything has gone to plan, you should be able to hit Install

vSR10

Boom, we have gotten the Finish screen and after clicking it, amazing things happen? Err no, we get nothing.

SRM Part 18

Hop into vCenter and we need to install the SRM plug in to allow us to manage  it.   This is found from the top menu Plug Ins

vSR11

It’s a pretty straight forward Next, Next install job, so I haven’t included screenshots for this.

I have performed the same installation at the DR site,  so now both sites have SRM installed and also the vSphere Plug In for SRM.

SRM Site Connection

Before we can install vSphere Replication we need to connect the Production and DR sites.  To do this Click Home and you will see a new Icon under Solutions and Appliances ‘Site Recovery’  I don’t know why but it reminds me of a super hero logo, must be the lightening bolt.

SRM Icon

Launch Site Recovery and we are at the landing page, this is where you will spend alot of time.

SRM Landing Page

You will notice that we can only see one site being Production (Local) as we have yet to configure the connection between both vCenters and SRM.

To do this, select Configure Connection from the ‘Commands’ menu on the right hand side

Site Connection Part 1

Then enter the address and port of the remote vCenter Server, in this case VMF-ADMIN02 and hit Next

Site Connection Part 2

We get another question about certificates, this time we need to validate the vCenter Server Certificate at our DR site, Click OK

Site Connection Part 3

We now need to enter the credentials of a user who has rights to access VMF-ADMIN02

Site Connection Part 4

Amazing, we have another certificate warning, click OK again.  Hopefully, if all goes well, you should see all green ticks and then hit Finish.

Site Connection Part 5

Time to authenticate into VMF-ADMIN02, oh by the way, get used to entering your credentials a lot!

Click OK, and ignore the next security warning (I swear VMware is now trying to wind us up).  Voila we should now see both site Production (Local) and DR.

Site Connection Part 6

Next you need to configure the rest of your SRM installation which includes:

  • Resource Mappings
  • Folder Mappings
  • Network Mappings
  • Placeholder Datastores

A bit like Blue Peter, I have created a guide to this previously which can be found under Configuring Site Recovery Manager (SRM) With HP StoreVirtual

Cool now this is done, we are ready to install vSphere Replication, which will be covered in Part 2.

vExpert 2013

vmw-vexpert

A little over a year ago, I decided to start a blog and vmfocus.com was born.  The purpose of the blog was two fold, one to have a place for my notes when I was learning a new technical subject matter and also to give back to the community the odd issue that I managed to resolve.

I stumbled upon this award called vExpert after seeing some cool Tintri shirts in VMworld Barcelona 2012 and wondered what it was.  A quick google later revealed that VMware had the same kind of program as Microsoft for the MVP.

The annual VMware vExpert title is given to individuals who have significantly contributed to the community of VMware users over the past year. The title is awarded to individuals (not employers) for their commitment to sharing their knowledge and passion for VMware technology above and beyond their job requirements.

VMware announced the vExpert awards for 2013 and I’m excited to say that I featured among 580 individuals who received the title.  Tintri have carried on the tradition and if you are a vExpert you can claim your free shirt for being a vRockstar!

With anything you do, having a little ‘pat on the back’ is always great to make sure you are on the right track.

We have a great community within VMware and a special well done goes to the London VMUG vExperts 2013 (some of who I have and haven’t had chance to meet yet).

Alaric Davies @alaricdavies

Alex Galbraith @alexgalbraith

Chris Dearden @ChrisDearden

Darren Woollard @dawoo

Ed Grigson @egrigson

Gregg Robertson @greggrobertson5

Jane Rimmer @Rimmergram

Jeremy Bowman @jeremyjbowman

Julian Wood @julian_wood

Michael Poore @mpoore

Ricky El-Qasem @rickyelqasem

Rynardt Spies @rynardtspies

Sam McGeown @sammcgeown

Simon Davies @EV_Simon

Simon Gallagher @vinf_net

Simon Long @simonlong_

Simon Seagrave @Kiwi_Si

Steve Bruck @vColossus

Stuart McHugh @stu_mchugh

If I have missed anyone please let me know via twitter @vmfcraig

Strange SRM Use Case

Today we had rather a strange request, which was resolved by ‘thinking outside of the box’ using Site Recovery Manager.

Scenario

Client required an exact copy of an 8TB VM to be available in an alternate location over 50km away.  I’m not exactly sure why, but we had been explicitly told that the VM could not be logged into, so this ruled out using any items inside the VM such as robocopy.  Another constraint was that the original VM had to stay in it’s same location and it needed to be accessed by the in house IT team in the alternate location!

The engineer working on the ticket, originally used Veeam to restore the VM from backup which was fine, but we couldn’t alter the original backup files, therefore a restore to an alternate device at the same location seemed the next logical step.  The only downside was we only had the spare capacity to bring the VM up on the NAS it was backed up to, which meant two things:

  1. It was thrashing the disks as it was reading the backup files, and then writing the restore, plus it then had to deal with the normal Veeam backup duties.
  2. The VMDK’s still needed to be copied from the NAS onto removable media, taken to the alternate location and copied onto the target device and then booted up as a new VM.

With the above in mind, the engineer gave me a call and asked if we could do something with SRM!

Solution

We know the VM could not be accessed and that trying to restore from backup wouldn’t meet the clients time requirements, so we discussed using SRM.

The VM in question was protected by SRM and is replicated on a 15 minute basis.  So the plan was to

  1. Run a Test Failover creating a Read/Write snapshot of the Read Only copy in the target location in an isolated environment.
  2. Shutdown the Read/Write copy and copy the VMDK’s to another datastore.
  3. Create a new VM and attached VMDK’s

The first step worked like a dream, however we received an error when trying to copy the VMDK’s to another datastore ‘the specified key, name, or identifies already exists’.  We thought about removing the VM from inventory and re-adding it back again, but didn’t know the risks in terms of SRM cleanup.  We knew we could force a cleanup, but knowing the sensitive case of the request we couldn’t afford any unknown errors.

Instead we decided to ‘clone the VM’, once completed we disabled the NIC, changed the server name and IP address.

It worked, everyone was happy in the ‘ranch’ and we used SRM for a different purpose than intended.  Understanding how something work’s makes the difference to putting forward solution to resolve a time sensitive problem.