We have received a number of requests to replace the Default Certificates on vCenter 5/VUM/vCOPS to prevent ‘man in the middle attacks’. Due to this I thought it would be a good idea to go through the process myself manually (not using the vCenter SSL Automation Tool) so that I understood the gotchas and caveats.
I wanted to document the process as a number of articles, whitepapers and blog posts helped me to replace the default certificates for vCenter 5, VUM, vCOPS & Horizon View.
Resources Used
I started with the official VMware Guide and quickly found this lacking especially when it comes to OpenSSL, this is when both Julian’s and Michael’s blog posts where invaluable in my road to replacing the default certificates.
Prerequisite
To start on the path of replacing your Default Certificates, you will need the following in place:
Internal Certificate Authority
This should have the Certification Authority and Certificate Authority Web Enrollment services installed, mine is Active Directory integrated so that the my Internal Certificate Authority is automatically trusted by any domain members.

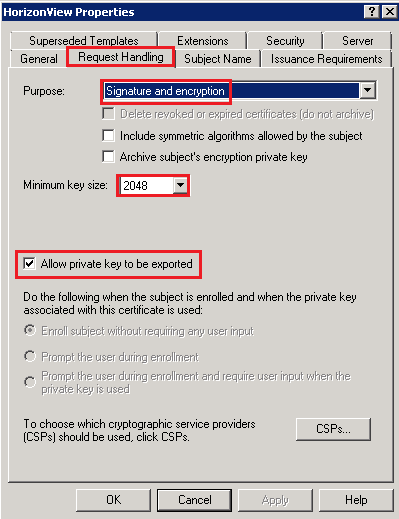
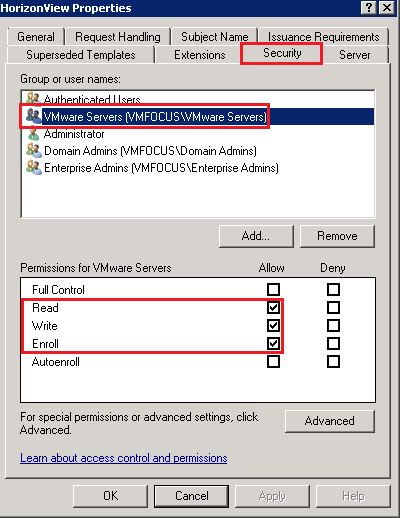
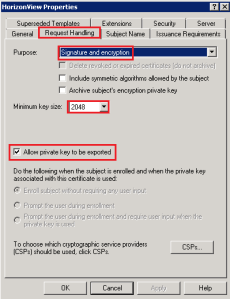
Load your Internal CA and go to Certificate Templates > Manage and create a copy of the Web Server Certificate with the following details:
- Windows Server 2008 Enterprise Certificate
- Minimum Key Size 2048
- Allow Private Key To Be Exported
- Create an Active Directory Security Group for your vCenter Servers and add these to the Security Tab and give them Read, Write and Enroll Permissions

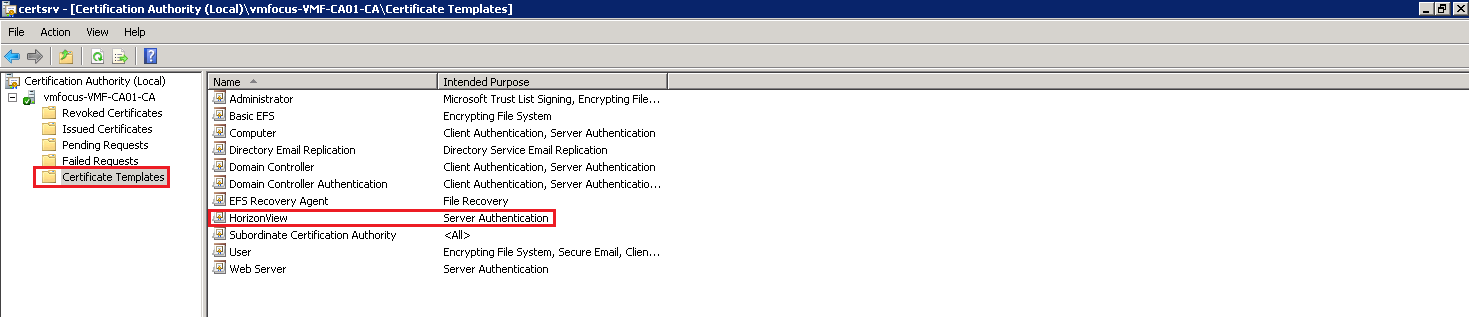
Close the Certificate Template Console and Right Click > Certificate Templates > New > Certificate Template to Issue > Select your Certificate and it should appear in the Certificate Templates.
Mines called Horizon View

Web Enrollment
From any server which is on your domain, but NOT your Internal Certificate Authority go to http://CANAME/certsrv
Perform a ‘Request A Certificate’ > Advanced Certificate Request > Create and s ubmit a request to this CA if you receive the error message ‘In order to complete the certificate enrollment, the Web site for the CA must be configured to use HTTPS authentication’.
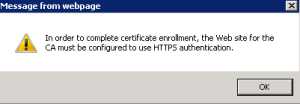
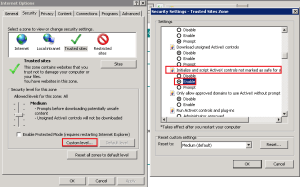
Then go to Internet Options > Security > Trusted Sites > Sites and add deselect ‘Require server verification (https:) for all sites in this zone) and add your Internal CA

Next click on Custom Level and Enable ‘Initialize and script ActiveX controls not marked as safe for scripting’
Double check that your Web Enrollment now works correctly.
OpenSSL
I’m a Windows guy and therefore I needed to use a version of OpenSSL that worked in my Windows environment.
Download and install Win32 OpenSSL v1.0.1.e select the appropriate version if you on a x86 or x64 system. During the installation select ‘The Windows System Directory’
Drop into CMD and CD into C:OpenSSL-Win32bin and run the following command:
set OPENSSL_CONF=C:OpenSSL-Win32binopenssl.cfg

Backups
Perhaps the most important thing is to have a backup of your vCenter server and any related servers before you do any more work. I can’t state how critical this is, as the chances are something is going to go wrong!
Step 1 – vCenter 5
Use Windows Explorer and navigate to C:OpenSSL-Win32bin and make a backup of openssl.cfg

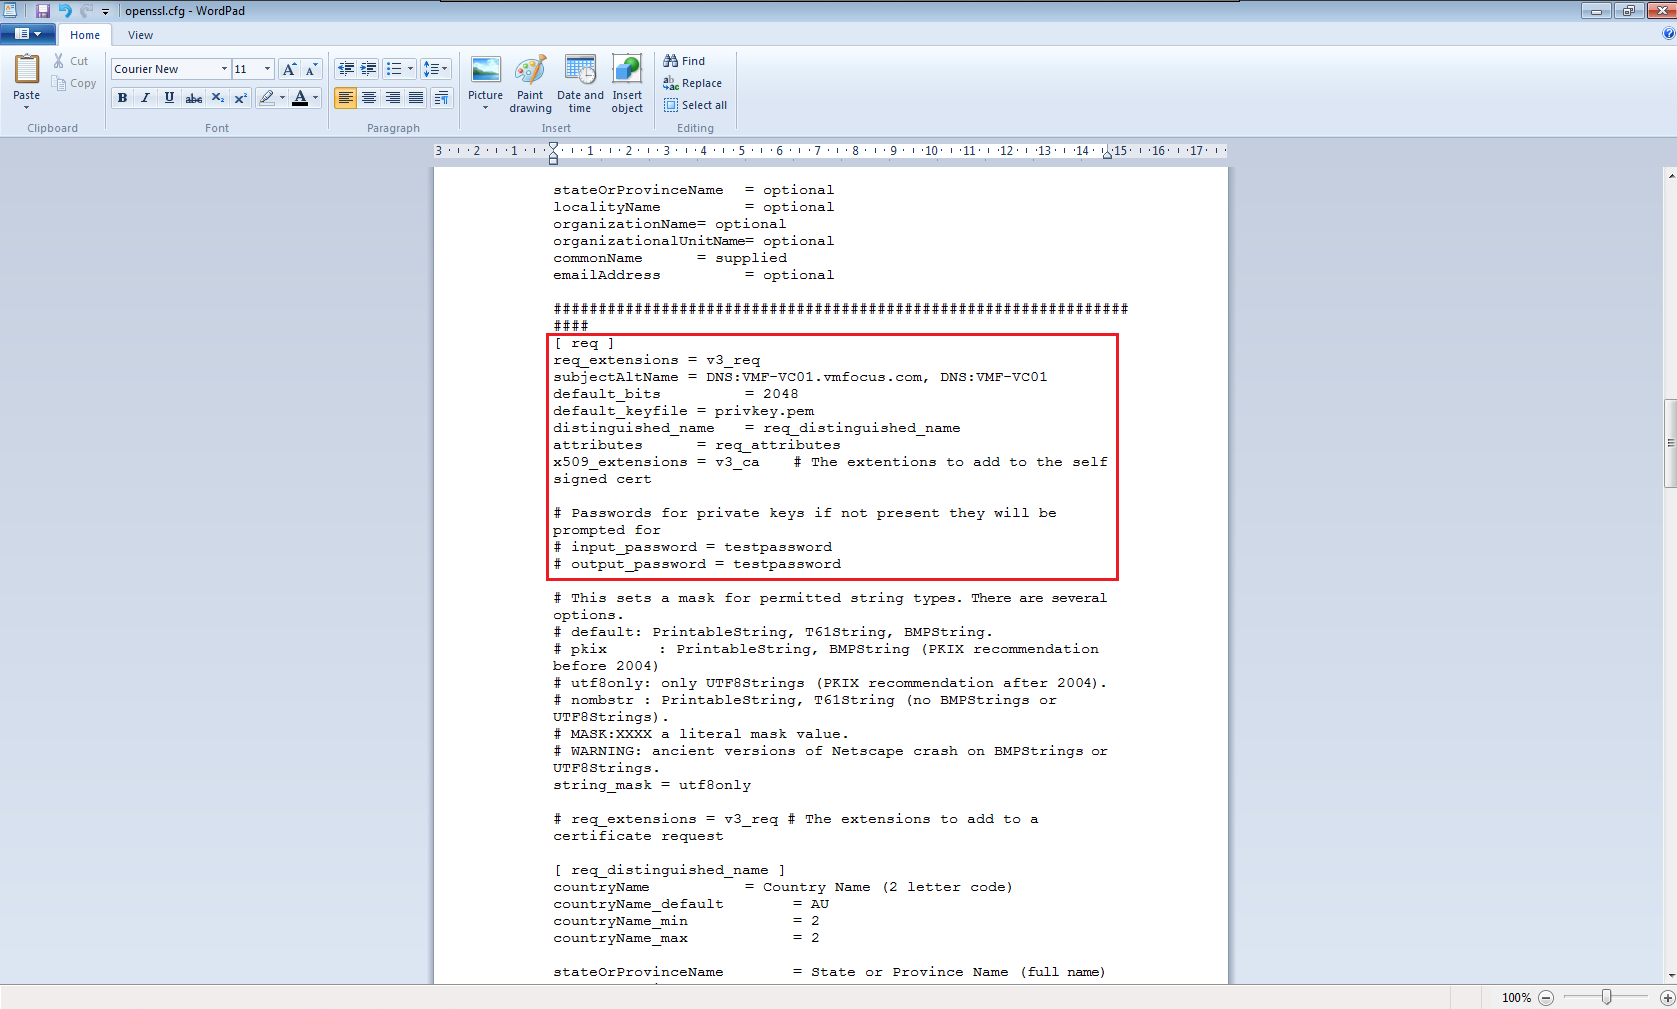
Now openssl.cfg using Wordpad and find [ req ] and insert these two lines directly underneath
req_extensions = v3_req
subjectAltName = DNS:VMF-VC01.vmfocus.com, DNS:VMF-VC01
Next change the default_bits to 2048
default_bits = 2048
After this change the input_password and output_password to ‘testpassword’
# input_password = testpassword
# output_password = testpassword
It should look like this
[ req ]
req_extensions = v3_req
subjectAltName = DNS:VMF-VC01.vmfocus.com, DNS:10.3.2.203
default_bits = 2048
default_keyfile = privkey.pem
distinguished_name = req_distinguished_name
attributes = req_attributes
x509_extensions = v3_ca # The extentions to add to the self signed cert
# Passwords for private keys if not present they will be prompted for
# input_password = testpassword
# output_password = testpassword

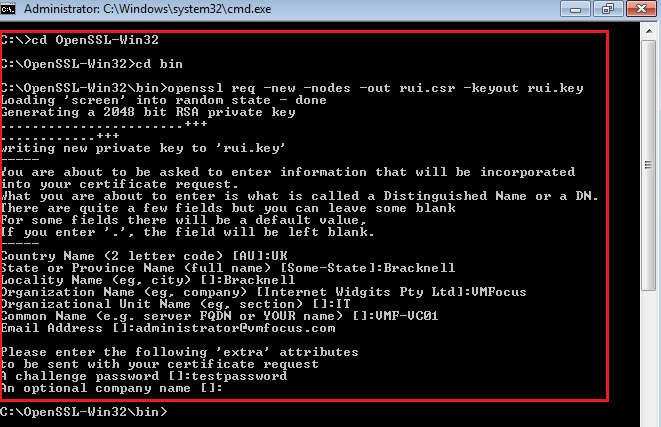
Drop into CMD and CD into C:OpenSSL-Win32bin and run the following command:
openssl req -new -nodes -out rui.csr -keyout rui.key
Complete the details presented

In the C:OpenSSL-Win32bin folder you will now have a rui.csr file

Open rui.csr using Notepad > Select All > Copy
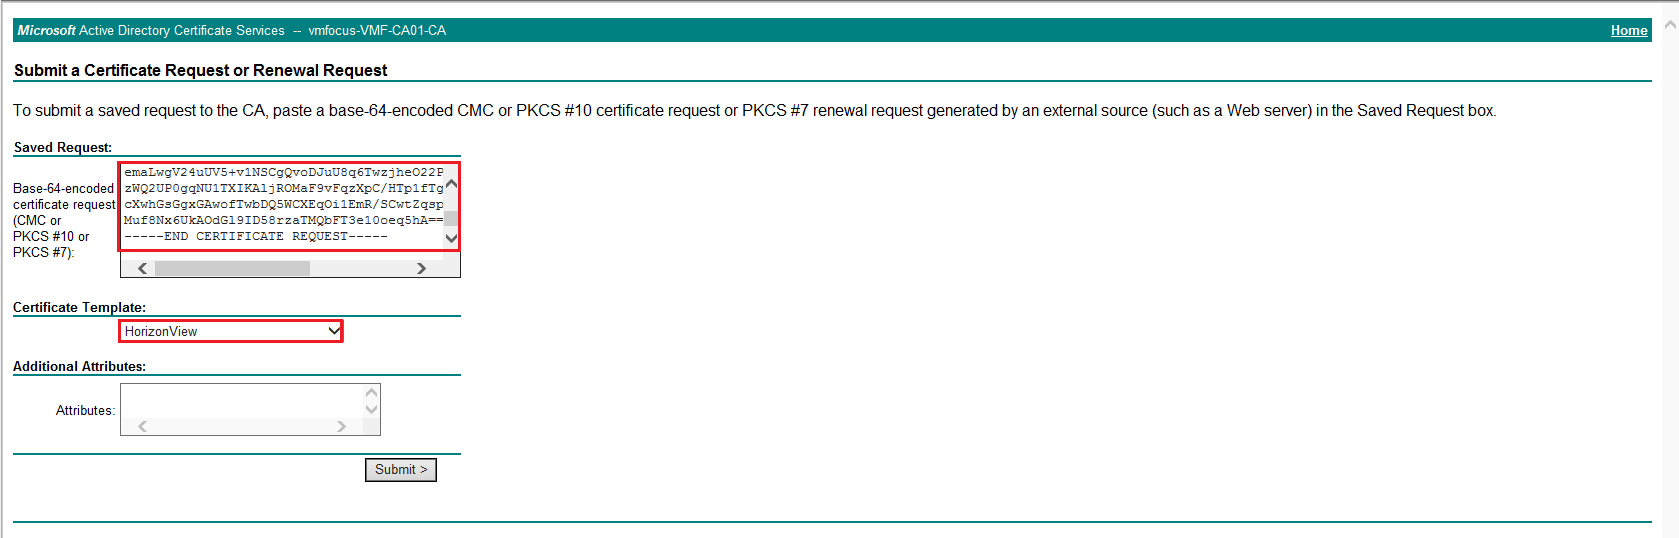
Fire up Internet Explorer and got to http://InternalCA/certsrv and Select > Request Certificate > Advanced Certificate Request > Submit a certificate request by using a base-64-encoded CMC or PKCS #10 file, or submit a renewal request by using a bae-64-encoded PKCS #file
In the space Base-64 encoded paste the contents of the rui.crt then change the Certificate Template to the one you published earlier

Hit Submit and then Select ‘Base 64 encoded’ and Download certificate

Rename the certificate to rui.crt and drop it into the C:OpenSSL-Win32bin folder. You should now have three files called:
- rui.crt
- rui.csr
- rui.key
Before going any further check your certificate by double clicking rui.crt and make sure it has the correct Subject Alternative Names

Back into CMD and CD into C:OpenSSL-Win32bin and launch the following command:
openssl pkcs12 -export -in rui.crt -inkey rui.key -name rui -passout pass:testpassword -out rui.pfx

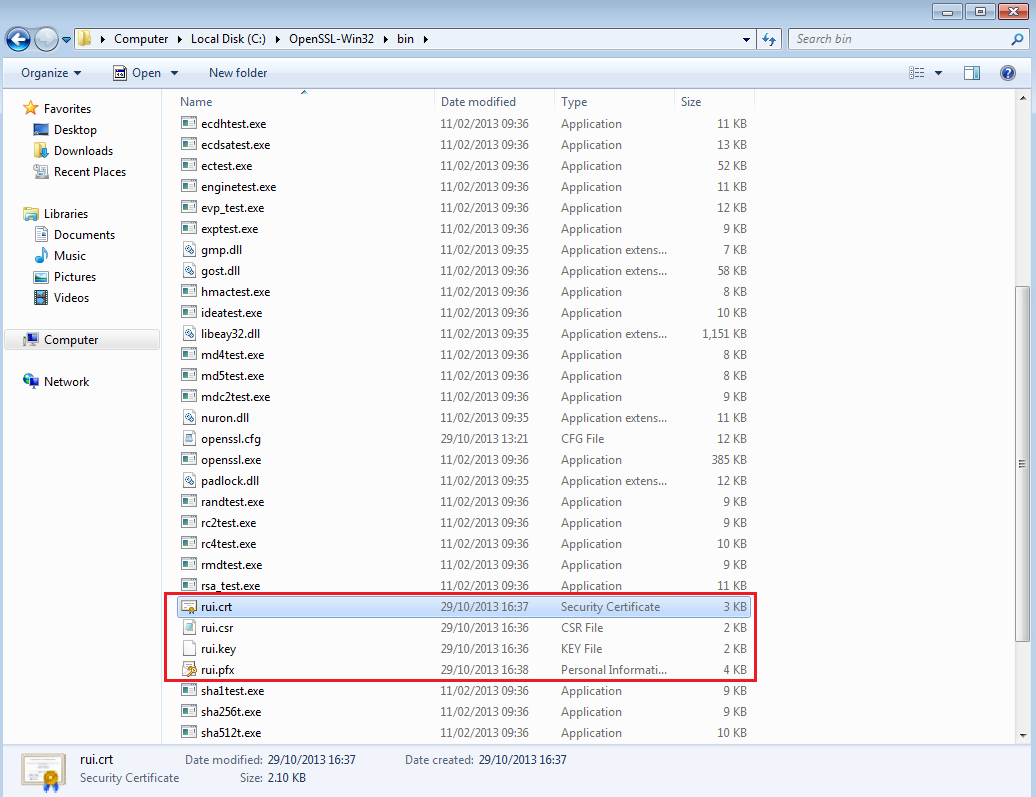
In the C:OpenSSL-Win32bin folder we now have four files:
- rui.crt
- rui.csr
- rui.key
- rui.pfx

Select rui.crt, rui.key and rui.pfx and copy these to your vCenter 5 Server
Jump onto your vCenter 5 Server and go to C:ProgramDataVMwareVMware VirtualCenter make a copy of the SSL folder

Paste the rui.crt, rui.key and rui.pfx into the SSL folder and overwrite the existing certificates.
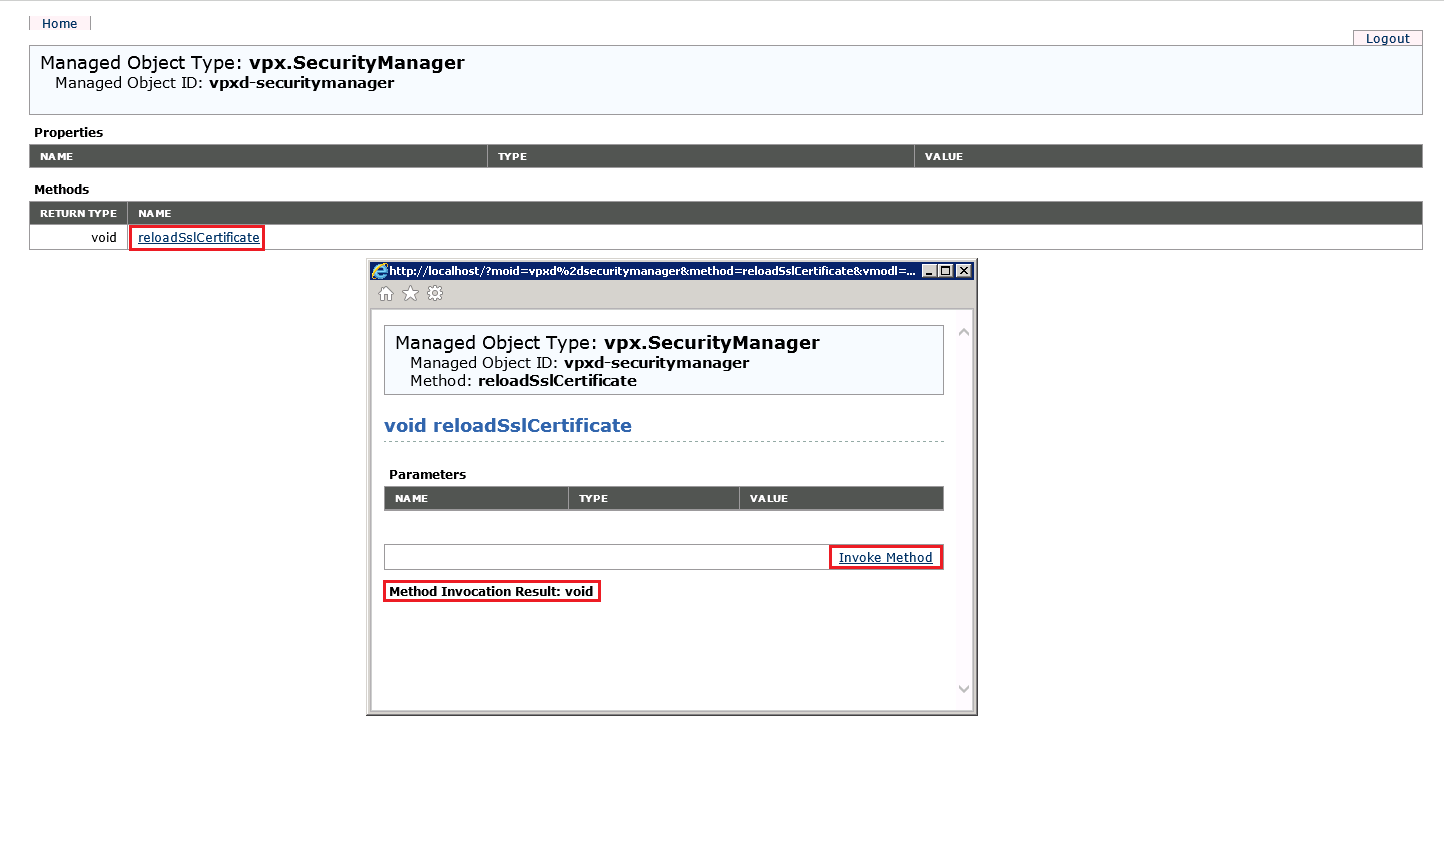
Fire up Internet Explorer and go to http://localhost/mob/?moid=vpxd-securitymanager&vmodl=1 (you might need to enable Compatibility Mode on Internet Explorer)
Enter credentials that have Administrator rights on vCenter

Select ‘reloadSlCertificate’ then Invoke Method
If all goes well, you should see the item displayed ‘Method Invocation Result: void’

Restart VMware VirtualCenter Management Webservices and browse to https://vCenter and you should see a trusted Certificate installed!

Step 2 – vCenter 5 Inventory Service
Navigate to C:Program FilesVMwareInfrastructureInventory Service and make a copy of the SSL folder

Paste the rui.crt, rui.key and rui.pfx into the SSL folder and overwrite the existing certificates.
Restart the vCenter Inventory Service
Step 3 – vSphere Update Manager
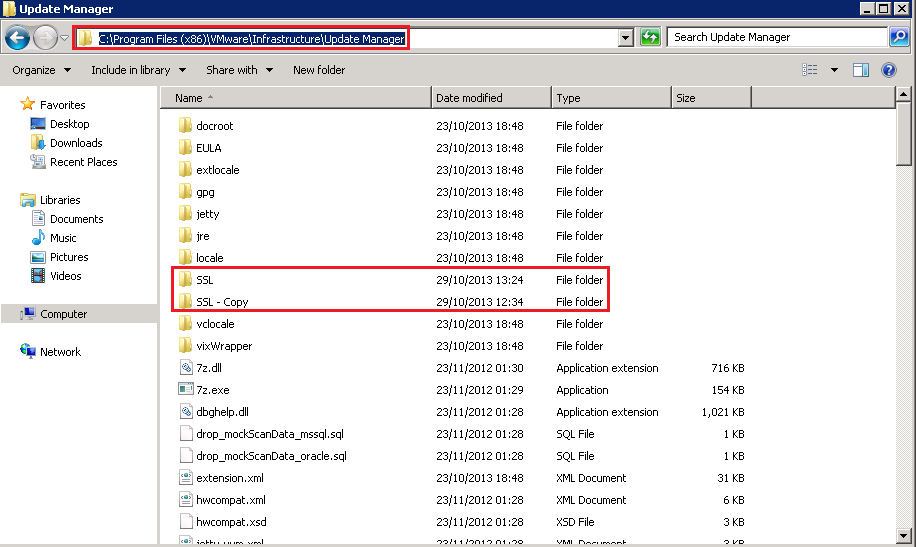
Navigate to C:Program Files (x86)VMwareInfrastructureUpdate Manager and make a copy of the SSL folder

Paste the rui.crt, rui.key and rui.pfx into the SSL folder and overwrite the existing certificates.
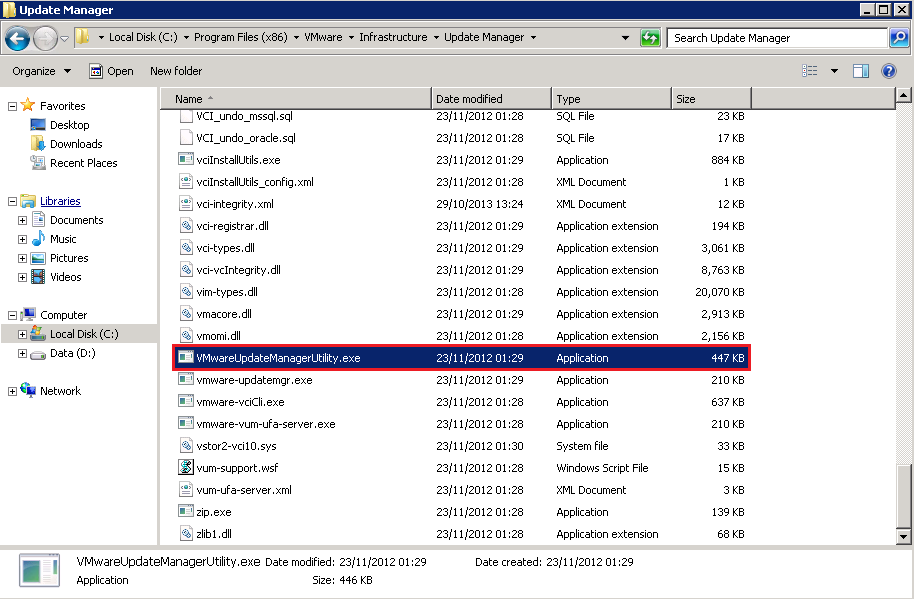
Go to C:Program Files (x86)VMwareInfrastructureUpdate Manager and launch VMwareUpdateManagerUtility.exe

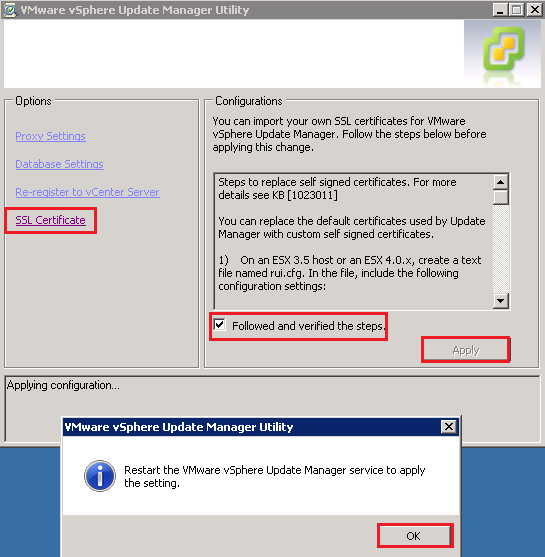
Enter your vCenter Server credentials then Select SSL Certificate > Tick ‘Followed and verified the steps’ > Apply

Restart the vSphere Update Manager Service
I recommend restarting your vCenter Server now, after this we get to the acid test which is does it work?
I’m sure it does!
Step 4 – Horizon View
Because we replaced the vCenter 5 certificates, we need to restart our Horizon View services. Once done log into Horizon View Administrator and check your system health, fingers crossed we get Green Boxes.

Step 5 – vCenter Operations Manager
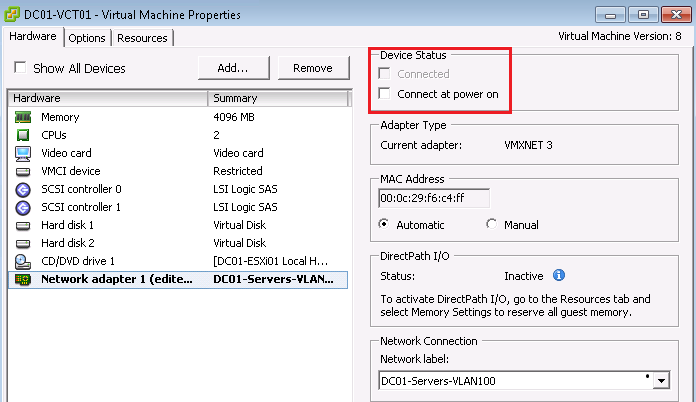
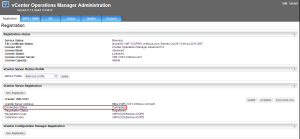
Because we replaced the vCenter 5 certificates, vCOPS will have lost connectivity. To address, login to vCenter Operations Manager Administration > Registration > vCenter Server Registration > Update > Enter Credentials & Accept Certificate
Once done you should see the the Connection Status as Connected
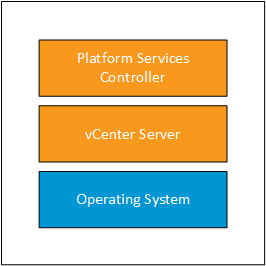
 In vSphere 5.x versions, the most common deployment topology was a vCenter with all the components installed on the same virtual machine. The design choices for using a single virtual machine with all services running on them included: