In this post we are going to walk threw the process of replacing our Horizon View Connection Server and Security Server Certificates, we are assuming that the prerequisites in How To: Replace vCenter 5 & VUM Certificates are in place.
Step 1 – Certificate Request
Make sure your Horizon View Connection Server has rights to request and enroll a certificate from your Internal CA and that on the Certificate Template the private key is able to be exported.
Click Start > Run > MMC > File > Add/Remove Snap-in
Select Certificates > Add > Computer Account > Next

Expand Personal > Certificates > Right Click > All Tasks > Request New Certificate
 Click Next > Select Active Directory Enrollment Policy

Select your Certificate Template (mines called HorizonView) then click on ‘More information is required to enroll for this certificate. Click here to configure settings’.

Change Subject Name to Common Value and enter the Fully Qualified Domain Name of your Horizon View Connection Server. In my case it is VMF-VCON01.vmfocus.com and Add this to the certificate request.
Next change the Alternative Name to DNS and enter the NetBIOS name
NetBIOS VMF-VCON01
Fully Qualified Domain Name VMF-VCON01.vmfocus.com
Next add in the Alternative Name to DNS for your Horizon View Security Server
NetBIOS VMF-VSEC01
Fully Qualified Domain Name VMF-VSEC01.vmfocus.com
Public DNS Record view.vmfocus.com

Next Select General Tab and enter ‘vdm’ under the friendly name

By putting in the DNS names of the Horizon View Security Server we can use one certificate to cover both servers. Note, in a production environment you may have to request two separate certificates to ensure that internal DNS names are not visible on the internet.
Click OK and Enroll the certificate

Once enrolled you will see the new certificate is in your Personal folder

Horizon View uses the vdm tag to identify which certificates it should use. As you can see I have renamed my original certificate. To do this, double click the certificate select Details tab > Edit Properties > General Tab

To start using the new certificate restart the VMware View Security Gateway Component on your Horizon View Security Server
![]()
To test that it’s in situ, browse to your Horizon View Connection Server URL and you should see a Trusted Certificate.

Step 2 – Security Server Certificate Replacement – Trusted Public CA
In a production environment you would put a request into a Trusted Public CA such as GeoTrust SAN SSL Certificate from your Horizon View Security Server.
To do this Click Start > Run > MMC > File > Add/Remove Snap-in > Select Certificates > Add > Computer Account > Next > Finish
Expand Personal > Certificates > Right Click > All Tasks > Request New Certificate

Click Next > Select Proceed without enrollment policy > Next

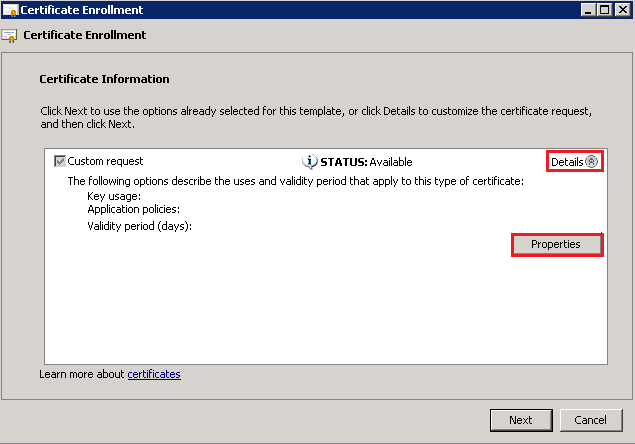
Click Next > Details > Properties
As per our Horizon View Connection Server, enter ‘vdm’ as the friendly name
Change Subject Name to Common Value and enter the Fully Qualified Domain Name of your public resolvable DNS record to access your Horizon View Security Server. In my case it is view.vmfocus.com and Add this to the certificate request.
Next change the Alternative Name to DNS and re-enter the public resolvable Fully Qualified Domain Name

Onto the Private Key Tab > Key Options > Change the Key size to 2048 and tick ‘Make private key exportable’

Click OK > Click Next and then select a destination and name for your Certificate Request.

Open the Certificate Request file with Notepad and copy the contents and paste them into the CSR for your Trusted Public CA Provider.

After passing the validation checks you will receive your SAN SSL Certificate, ready to install into your Horizon View Security Server. The details on how to do this can be followed below as they are the same as installed certificates from an Internal CA.
Step 3 – Security Server Certificate Replacement – Internal CA
I don’t have this luxury in the VMFocus.com lab, therefore we are going to use our Internal CA.
Our Horizon View Security Server should be in a workgroup in the DMZ, which means that it won’t automatically trust our Internal CA as its not part of the Active Directory domain.
First of all we need to export our Internal CA Root Certificate. This can be found on your Horizon View Connection Server under Trusted Root > Certification Authority > Certificates

Right Click the Certificate > All Tasks > Export > Select ‘DER encoded binary X.509 (.CER)

Hit Next and enter a destination and file name, then Next > Finish.

Copy this certificate to your Horizon View Security Server and Import it into the Trusted Root Certification Authorities > Certificates Folder.
This is achieved by Right Clicking > Import and following the wizard. Once down it should look like this

Now we need to export the Horizon View Connection Server Certificate which contained the DNS entries for our Security Server. Jump back onto your Connection Server and Click Personal > Certificates > Right Click Certificate > All Tasks > Export

Click Next and ensure that you choose Yes, export the private key

Select Personal Information Exchange – PKCS #12 (.PFX)

Enter a password and Click Next to Finish.
Copy the Certificate to your Horizon View Security Server and Import it under Personal Certificates and you should see the following

Rename the old Security Server certificate friendly name to something different like we did earlier with the old Connection Server certificate.
Last of all restart the service VMware View Security Gateway Component
![]()
Then for the moment of truth, login to your Horizon View Administration Console and bask in your awesomeness!


One thought on “How To: Replace Horizon View Connection & Security Server Certificates”