
Knowledge
- Identify minimum hardware and software requirements for installation
- Identify required firewall rules
- Navigate the View Connection Server installation wizard
Hardware Requirements
Processor 2 vCPU
Memory 4GB RAM Minimum Server 2008 R2 and 2GB RAM Minimum Server 2003 R2
SCSI Controller LSI Logic Parallel
Operating System – Software Requirements
Windows Server 2008 R2 64 Bit Standard or Enterprise
Windows Server 2003 R2 32 Bit Standard or Enterprise
Storage Requirements
The Transfer Server connects to the ‘image library’ which is essentially the holding place for all virtual desktop images which have been configured to run in ‘Local Mode’.
With the above in mind, the Transfer Server must have:
- Enough space to hold a copy of the ‘image library’
- Access to the datastore that hold the virtual desktop disks
Firewall Rules
It is important to note that the Transfer Server does not secure TCP transactions. So we might want to think about configuring ‘Local Mode’ to only allow updates when the user is connected to the LAN.
The ports that are required to be opened inbound to the Transfer Server are:
- Port 80
- Port 443
Transfer Server Installation
As with previous posts, it’s a good idea to start with what the Transfer Server does. In a nutshell it allows users to take there Virtual Desktops offline and use them in what’s known as ‘Local Mode’.
The Virtual Desktop is downloaded to the users machine (which you probably would want to do on the LAN) and is then available offline. Any changes are held in a snaphot. When the user is back online, the data is synched back to the Transfer Server.
A couple of items before we go over the installation process:
- Transfer Server has to be installed on it’s on VM
- You can have multiple Transfer Servers for load balancing
VMware have an excellent KB 2032741 which covers how Local Mode works.
I haven’t followed the specification guidelines as I’m installing it in my lab, instead I have created a server called VMF-TR01 with the following specification:
1 x vCPU
4 GB RAM
1 x vNIC
1 x LSI Logic Parallel SCSI Controller
1 x 30GB Thin Provisioned HDD for Operating System
1 x 100GB Thin Provisioned HDD for Image Repository

The VMware View Transfer Server is part of the VMware View Connection Server installation, which can be downloaded from here. As at the time of this blog post, the most recent version is VMware-viewconnectionserver-x86_64-5.1.2-928164.exe
Launch the View Connection Server installer on your Transfer Server and click Next

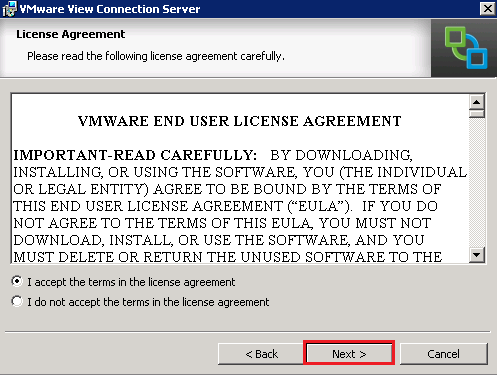
Accept the EULA and Click Next
Choose the installation location, in most setups I tend to leave this as the default.

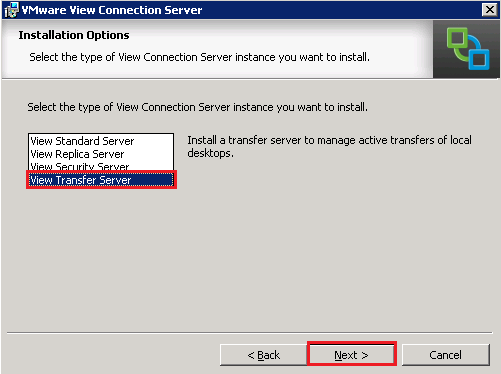
We are going to install a View Transfer Server, click Next
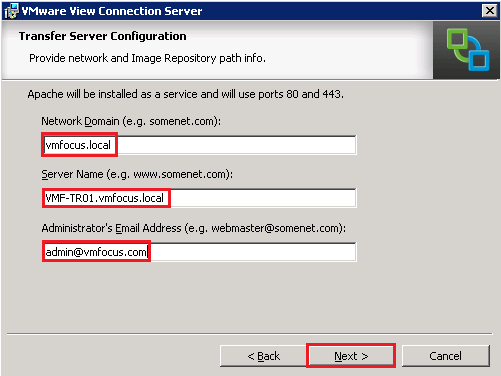
We now need to enter the following details:
- Network Domain, in my case vmfocus.local
- Server Name, I’m rolling with VMF-TR01.vmfocus.local
- Administrators Email Address, mine is admin@vmfocus.com
Once you are happy these are right, Click Next
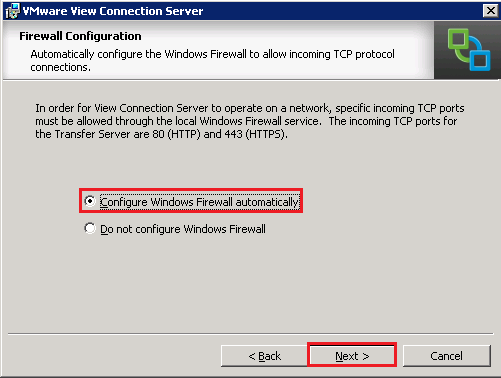
Good old Windows Firewall makes an entrance, select ‘Configure Windows Firewall Automatically’
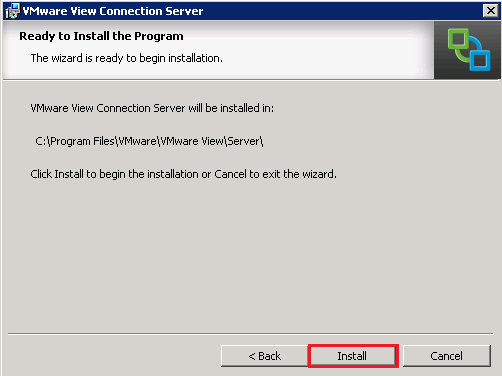
That was rather quick, we can Click Install
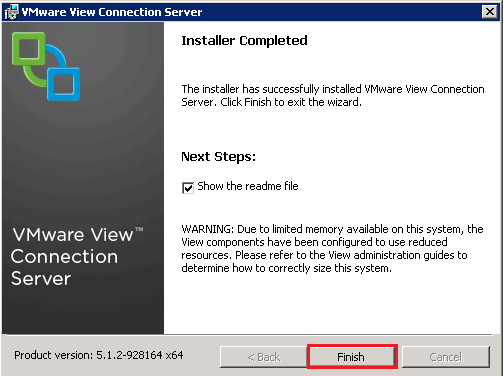
Boom, the Transfer Server installation is complete
Naturally, we have to configure the Transfer Server, but we will leave that for Objective 2.5

If (like me) you built your Transfer server with the default LSI Logic SAS SCSI Bus then its worth knowing you can change this with the following procedure. (You can’t just change it, not surprisingly that causes a BSOD)
1. Power off the VM.
2. Add a second SCSI adapter as LSI Logic Parallel
3. Boot VM, pop into Device Manager and confirm the device is there. This means the correct driver is now loaded in the OS too.
4. Shutdown the VM
5. Change the original SCSI Adapter to LSI Logic Parallel and remove the second one. (or change the disk to the new controller and remove then first one, the choice is yours!).
6. Boot back up and bob’s your uncle.