In the previous blog post, I covered an introduction to Azure Site Recovery and the components that make up the solution. In this post I will cover the initial configuration in the Azure Portal.
If you don’t have one already, I would suggest signing up for an Azure Free Trial, this includes £125 worth of credits.
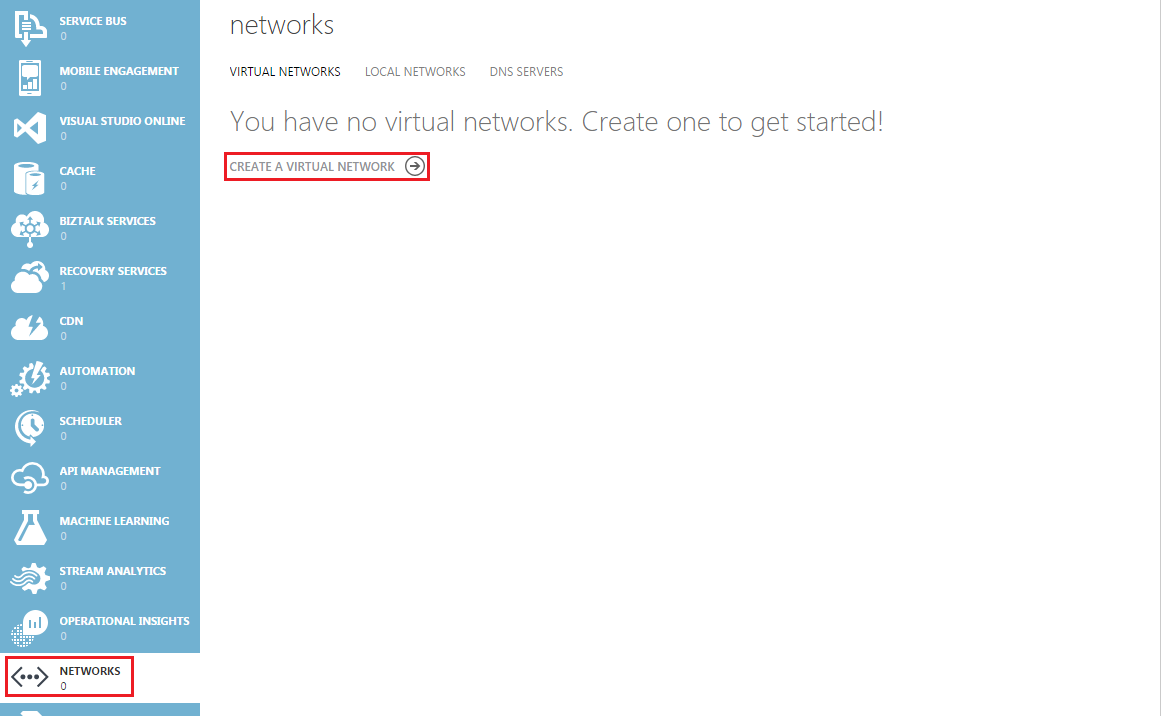
Once you are logged into the Azure Portal, the first thing we want to do is create out virtual networks. I’m going to create two:
- VMFocus_DR_L2 – Layer 2 network extension from on-premises, to keep same IP Address
- VMFocus_DR_L3 – Layer 3 network, to force VM’s to change IP Address
Select Networks > Create a Virtual Network
Provide a name and select the location for the network

Next enter in your DNS Servers and and VPN details. I’m not federated against my local domain, nor do I have any domain controllers deployed so for now I will leave this part blank.
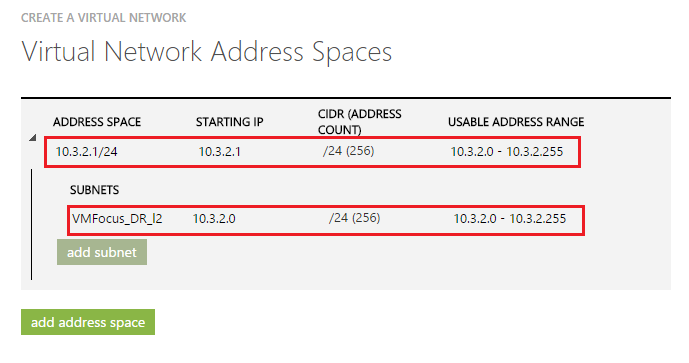
Finally complete your address space and subnets then wait for the network to be created.
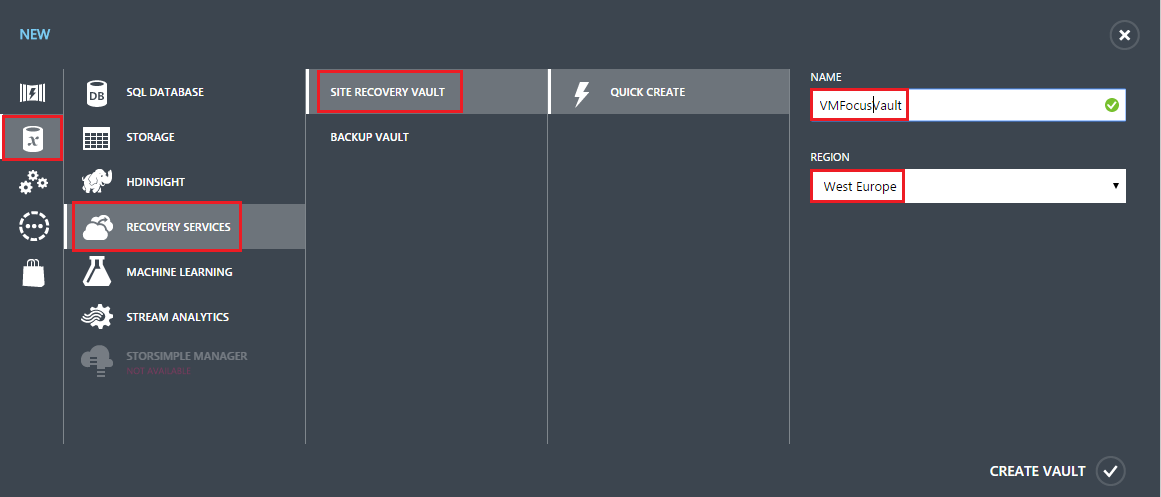
Next we need to create a vault for recovery services. The process is straight forward. Select Recovery Services > Site Recovery Vault > Quick Create > Enter Name & Region
Now that the Site Recovery Vault is created. We can move onto deploying our Configuration Server.
Select Quick Start and select your Recovery Type. In this deployment, I will be using VMware to Azure. Next select Deploy Configuration Server

Enter the required details ensuring that the required Azure Virtual Networks is selected.

As I will be replicating data over the public internet, we need to take note of the external IP address of our Configuration Server. This can be found on the Virtual Machine status panel.
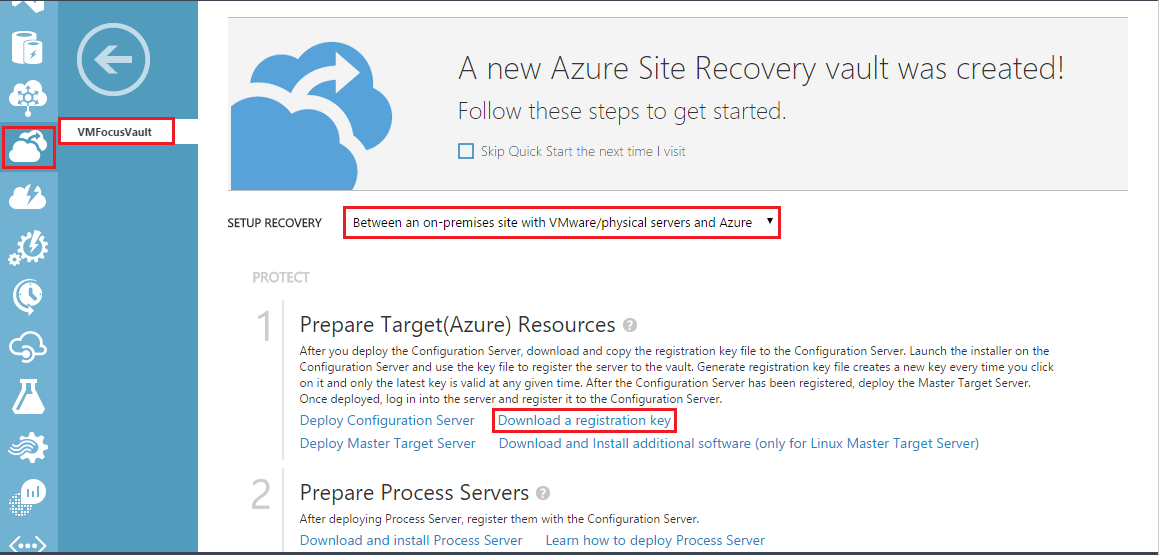
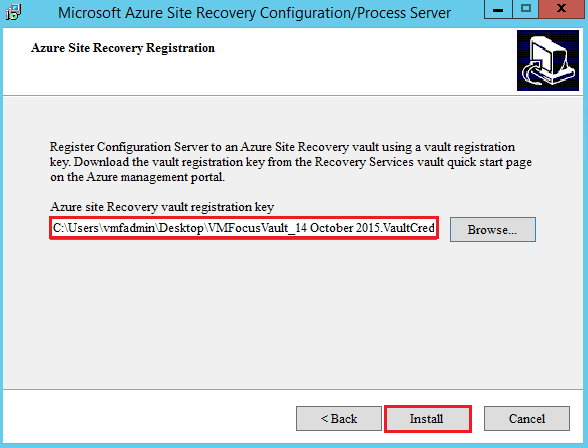
The next step is to download a registration key. This is found on the Recovery Services > Select your Vault > Download Registration Key
Log into your Configuration Server and the automatic deployment process will prompt you to start the installation process. Click Next and Accept the MySQL license terms.

Enter your MySQL credentials and click next.

Select your proxy settings and hit next. Now we need to install our Configuration Server Key. Browse to the saved location and select the key.
Click Finish to exit Setup.
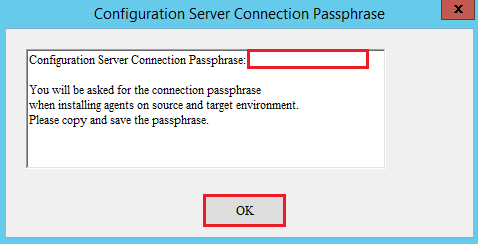
This next part is really important, ensure that you capture the passphrase for the Configuration Server.
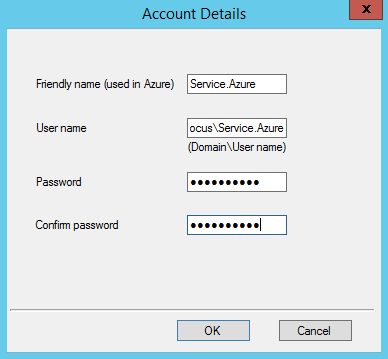
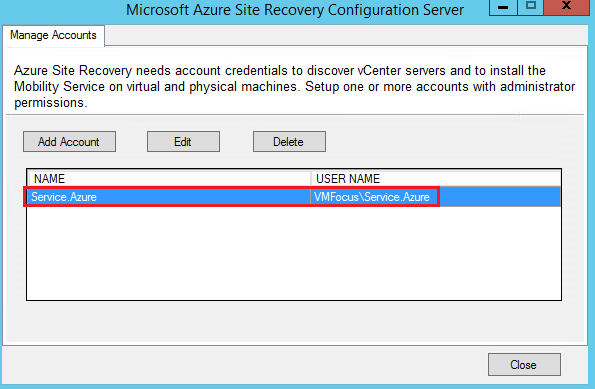
Onto credentials now. We need to add an account that has the credentials to install the ‘Mobility Service’ onto virtual machines. I have created an account called Service.Azure as per the dialog box below.
Always best to ensure that your account displays correctly.
In the next blog post we will move onto deploying the Master Target Server.

Great series so far.
You talk about setting up an L2 VLAN for network extension and also it seems like you’re not using a VPN tunnel. How would your network extension work?
Thank you Eugene you would need to use a product like Cisco InterCloud Fabric to provide layer 2 extensibility into Azure.
hi. i am facing issue “Registering server to the Azure Site Recovery vault failed. Please ensure the following and try again”,
– System time configured on the server is correct ( i am using domain conttroler time)
– Internet connectivity on the server (any spesific port must opened in proxy? )
Vault registration key file is valid. You could try downloading a new registration key from the Azure management portal. i am in processing do offline backup, could you please suggest me which correct for get registering key?
thanks
I would download the vault registration key file again and check the settings on your on-premises ASR Server