Presenting at Technology User Group – London on 5th May

LogoThis is going to be my first time attending the Technology User Group event in London on 5th May at Grange St Paul´s Hotel, 10 Godliman Street, EC4V 5AJ.

For those of you who don’t know, TechUG is a independent community of IT Professionals spread around 8 cities in the UK & Ireland. Focused on technology areas such as Virtualisation, Cloud, Storage, Data Centre, Open Source and DevOps, communities are run locally by a group of volunteer committee members and supported by a central team. TechUG runs free community events twice yearly in each city and also collaborate with other user groups.

For the London gathering on 5th May, the event team, have lined up a great group of presenters, including Chris Kranz, who will bring his insights on AWS and it’s use cases apart from IaaS. Also Peter von Oven, author of Mastering VMware Horizon 6 who will be sheep dipping us in the key areas of a desktop transformation project.

I’m also lucky enough to be presenting and if you are their from the kick off, you can hear my dulcet tones covering the topic ‘What’s Azure Site Recovery All About?’ which will provide a look at Microsoft’s DR platform.  In this session I will cover the challenges around traditional disaster recovery and Microsoft’s answer to these challenges.

If you haven’t already I suggest you register to attend over here.

Azure Site Recovery – Lessons Learnt

Purpose

The purpose of this blog post is to give you an insight into the lessons learnt during a recent installation of Azure Site Recovery.

Background

Existing on-premises environment runs vSphere 5.5 Enterprise Plus and has a 500Mbps ExpressRoute connection into Microsoft Azure.

Active Directory Federation Services is deployed in Microsoft Azure providing authorisation and authentication services.

Design

The design was quite straight forward, to meet customer requirements, we needed to:

  • Protect three seperate vSphere VM’s three tier application (web, middleware, database)
  • Perform a test failover using two groups protection groups
  • Perform a planned failover and planned failback
  • Perform an unplanned failover and planned failback
  • Perform an unplanned failover and planned failback to an alternative datacentre

A logical overview of the topology used is shown below.

Azure Site Recovery Components v0.1

Lessons Learnt

Enable Protection Fails

Installation of the Mobility Service will fail if the virtual machine you are trying to protect as a restart pending.
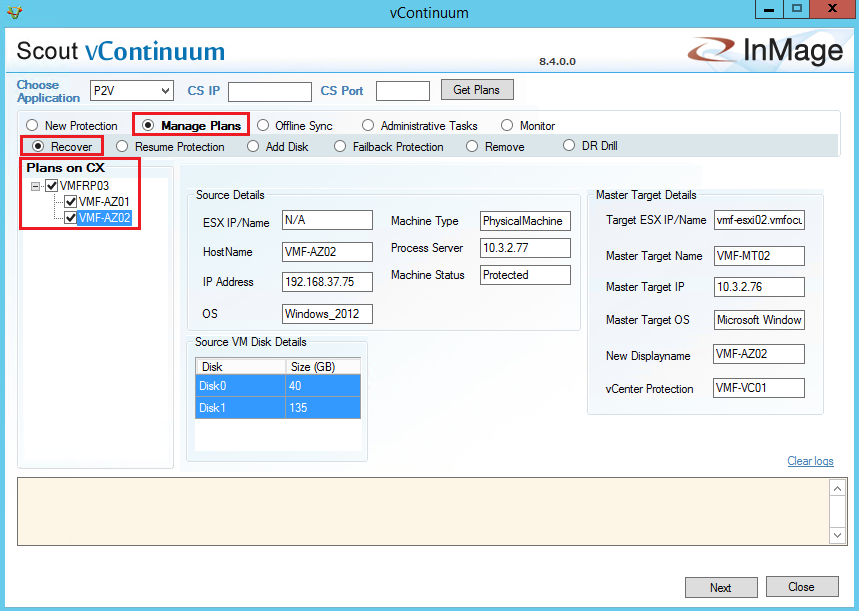
Re-Protect Fails

To protect workloads for failback the on-premises Azure Site Recovery Process Server needs to be the same as the workloads it’s protecting.  For example if you use a physical Process Server, you cannot failback from Azure.

Cache Disk

The installation location of Azure Site Recovery cannot be used as a cache disk.

Add Credentials to Process Server

Launch cspconfigtool from C:Program Files (x86)Microsoft Azure Site Recoveryhomesvsystemsbin

Microsoft Documentation

Fail Back VMware VMs and Physical Servers shows ability to add Configuration Server when deploying an Azure Process Server.  This is incorrect, the correct procedure is to login to the Azure Process Server and  enter Configuration Server IP Address and Configuration Passphrase of your on-premises Process Server.

Once linked you can confirm this by selecting Servers > Configuration Servers and your Azure Process Server should be listed under the on-premises Process Server

Microsoft Planned Reprotect Workflow

On Reprotect workflow, you select you Cache Disk for example E:.

During monitoring, the Cache Disk on your on-premises Process Server is not used.  Instead a VMDK is added to your on-premises Process Server for each protected VM

Planned Test Failback

No option to perform a test fail back to on-premises

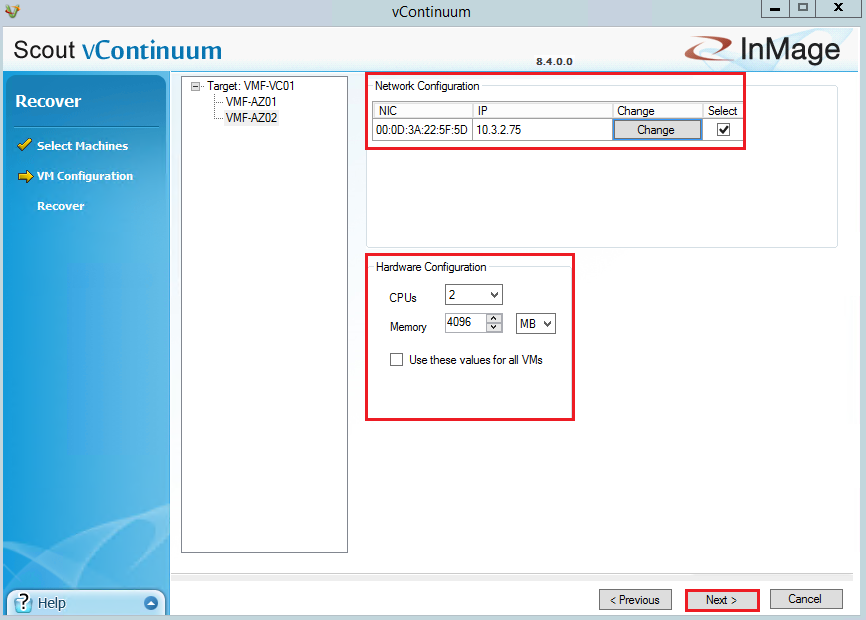
Planned Failback IP Address & Port Group

Failback no option to change target IP Address or Port Group

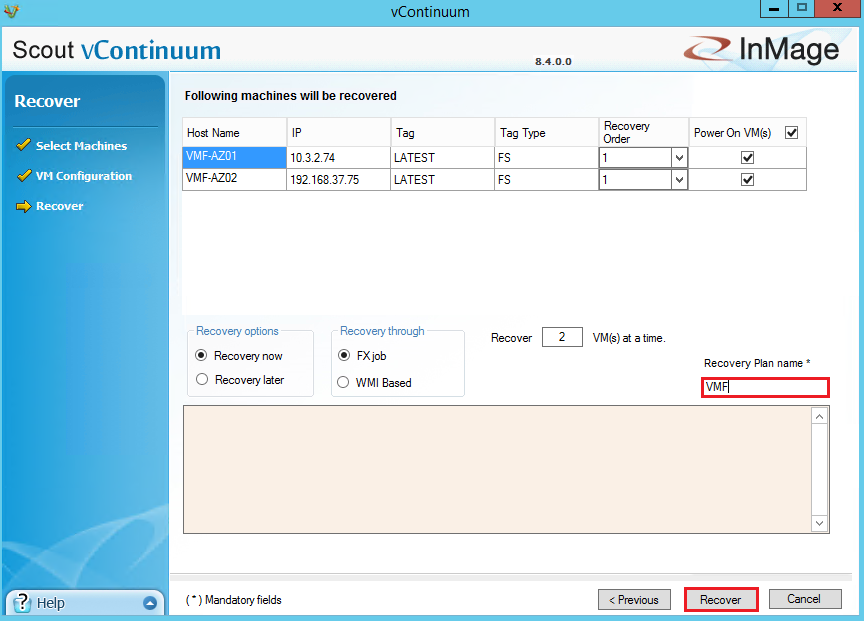
Planned Failback Recovery Plan

Planned failback cannot be ran at Recovery Plan level.

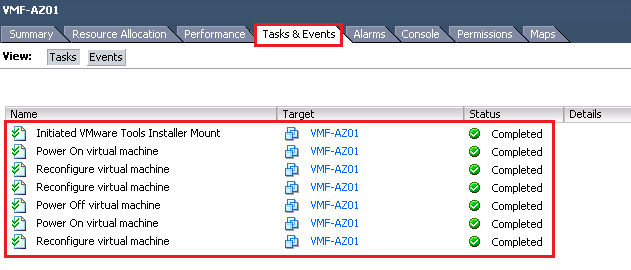
Planned Failback Start-up Order

As no recovery plan is available.  A manual list of VM start up orders and actions needs to be maintained.

IP Address

If a VM has been failed over to Microsoft Azure previously.  The IP Address it was assigned is not available for use.  Even thought the output from the PowerShell command shows that the IP Address is available.

#Check IP Address Available

Test-AzureStaticVNetIP -VNetName "VMF-VNET" -IPAddress 10.3.240.102

Failback New Location

Microsoft require the original on-premises Process Server to be available to perform a failback to a new datacentre.

Final Thoughts

Microsoft has improved the Azure Site Recovery product with the ‘Enhanced’ version.  However a limitation at the moment is that for each protected VM you are tied to original on-premises Process Server.  Hopefully, the ability to decouple this and change Process Servers is on the roadmap.

As the product evolves it would be good to see the ability to perform Test Failbacks and use a Recovery Plan to failback to on-premises.  Having to failback VM’s on an individual basis is cumbersome and error prone.

Azure Site Recovery – How Do I Add Credentials?

Azure Site Recovery uses two types of credentials, one for connecting to vCenter to discover virtual machines and the other for installing the Mobility Service into the virtual machines or physical servers you want to protect.

At the point of installation, you enter the credentials for both vCenter and the Mobility Service.  The question is how do you enter more credentials in the future?

The answer is to browse to your installation location E:Program Files (x86)Microsoft Azure Site Recoveryhomesvsystemsbin and launch cspconfigtool

ASR Add Credentials

This gives us the ability to add extra credentials

ASR Add Credentials 2

Final Thought

Azure Site Recovery is a work in progress and Microsoft have introduced some significant updates in the new version.  I would advise locating the cspconfigtool on your Windows desktop for future reference.

Azure Site Recovery – What’s Coming Next?

AzureI’m sitting at London Heathrow Terminal 3 with a little bit of time on my hands before heading out to Virtualisation Field Day 6. So thought I would share a quick blog post around some news that I may have heard (cough) which are coming up in Azure Site Recovery.

  • Lower total cost of ownership using vSphere to Azure Site Recovery with a PaaS model
  • vSphere to Azure Site Recovery test failover support
  • vSphere to Azure Site Recovery integrated fast failback
  • vSphere to Azure Site Recovery compression support
  • vSphere to Azure Site Recovery preview portal integration, along with with RBAC and PowerShell
  • All failure scenarios enabled for the IaaS CSP model
  • SQL Always On Native Integration

Microsoft are knocking it out of the park with this upcoming update, the ability to perform a test failover and integrated fast failback are great steps in the right direction.

Failing Back From Azure Site Recovery: Part 3

In the previous blog post we initiated protection, now we are ready to failback to our on-premises vSphere environment.

Before we proceed with the failback, lets just to make sure everything is working correctly.  To do this launch vContinuum and select Manage Plans > Recover and then select your Plan (in my case VMFRP03).

Azure 78

Select Monitor and ensure that all green ticks are displayed in the Protection Plan Status window.

Azure 79

Lets move on! Select Manage Plans followed by Recover and then tick your Recovery Plan and finally hit Next

Azure 80

Before you run the recovery plan, I suggest you click Run Readiness Check and verify everything is OK.  In the example screenshot below you can see that my virtual machines haven’t finished replicating back to on-premises yet, so I need to wait a while.

Azure 81

After several cups of tea, we are now in a position where our ‘Run Readiness Check’ has been successful.  Let’s Click Next!Azure 83

Verify that you are happy with the network and hardware configuration and Click Next.

Azure 85

Finally, provide a Recovery Plan name and click Recover

Azure 86

When the Recovery Plan commences, you will see the Recovery Status window showing you the stages of the failback.

Azure 87

The failback process is fairly quick, once all the VM’s have been powered on we can verify the failback process.

Azure 88

vCenter Check

In vCenter we can see that the VM’s VMF-AZ01 and VMF-AZ02 have been powered on and have had VMware Tools Installed by checking the Task’s & Event’s Tab

Azure 89

We can also see that the on-premises Master Target no longer has extra hard drives added.  Note that the extra SCSI Controllers are still attached.

Azure 90

I also confirmed the IP Addresses match up to what was expected and that the credentials to login to the VM’s where maintained.

Azure Check

The original VM’s VMF-AZ01 and VMF-AZ02 are still running, these should be shutdown and deleted to avoid a split brain scenario.  I imagine the reason for keeping this is in case anything goes wrong with the failback to on-premises you have a fall back position.

Azure 91

Once the VM’s have been deleted, I also recommend checking your Recovery Plans and Protection Groups and deleting these to avoid any confusion.

Final Thoughts

Azure Site Recovery is a good product which is fairly straight forward to configure and use.  I’m sure that in future versions that failback will be slightly more elegant.