In the previous blog post we initiated protection, now we are ready to failback to our on-premises vSphere environment.
Before we proceed with the failback, lets just to make sure everything is working correctly. To do this launch vContinuum and select Manage Plans > Recover and then select your Plan (in my case VMFRP03).
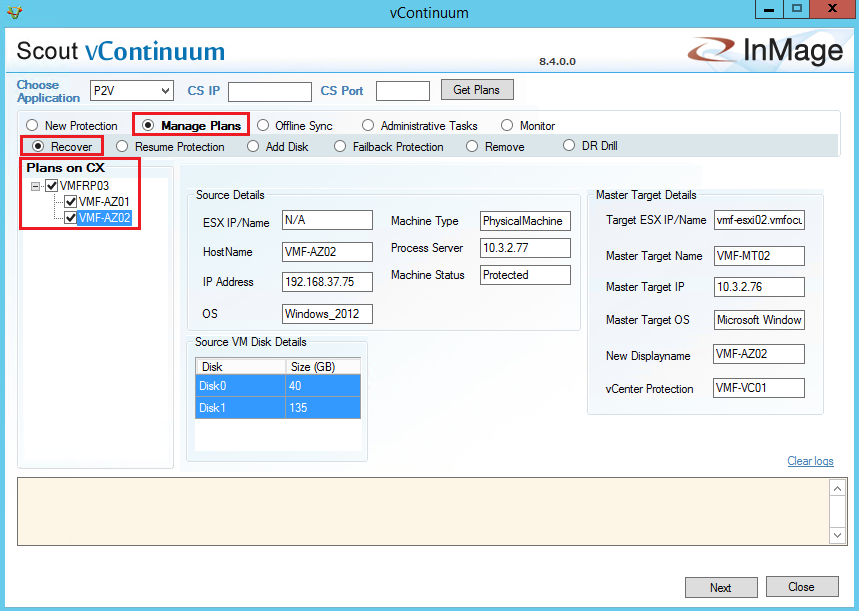
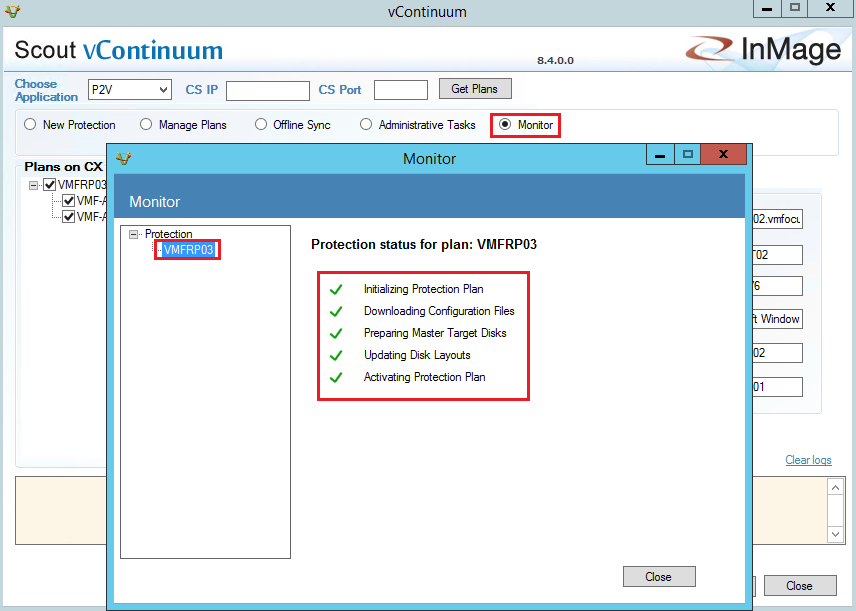
Select Monitor and ensure that all green ticks are displayed in the Protection Plan Status window.
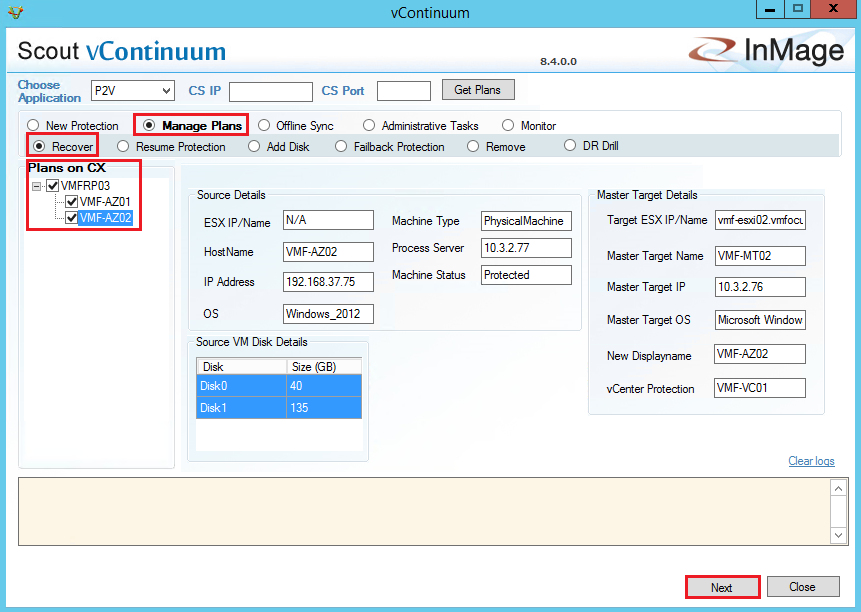
Lets move on! Select Manage Plans followed by Recover and then tick your Recovery Plan and finally hit Next
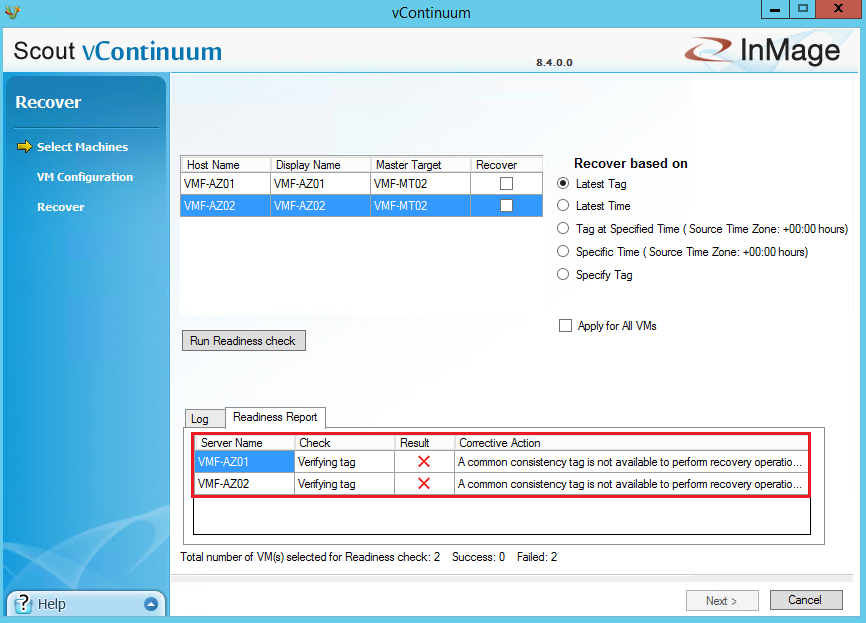
Before you run the recovery plan, I suggest you click Run Readiness Check and verify everything is OK. In the example screenshot below you can see that my virtual machines haven’t finished replicating back to on-premises yet, so I need to wait a while.
After several cups of tea, we are now in a position where our ‘Run Readiness Check’ has been successful. Let’s Click Next!
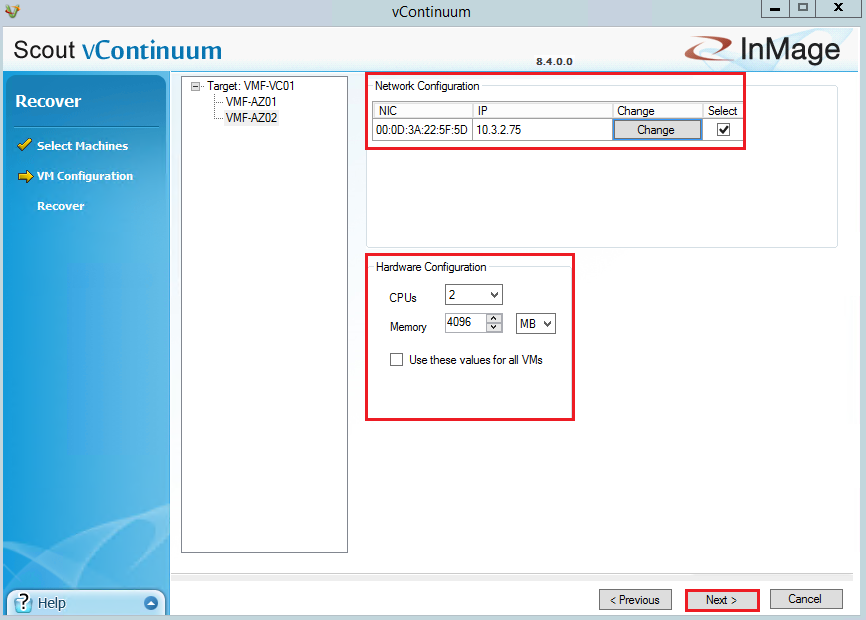
Verify that you are happy with the network and hardware configuration and Click Next.
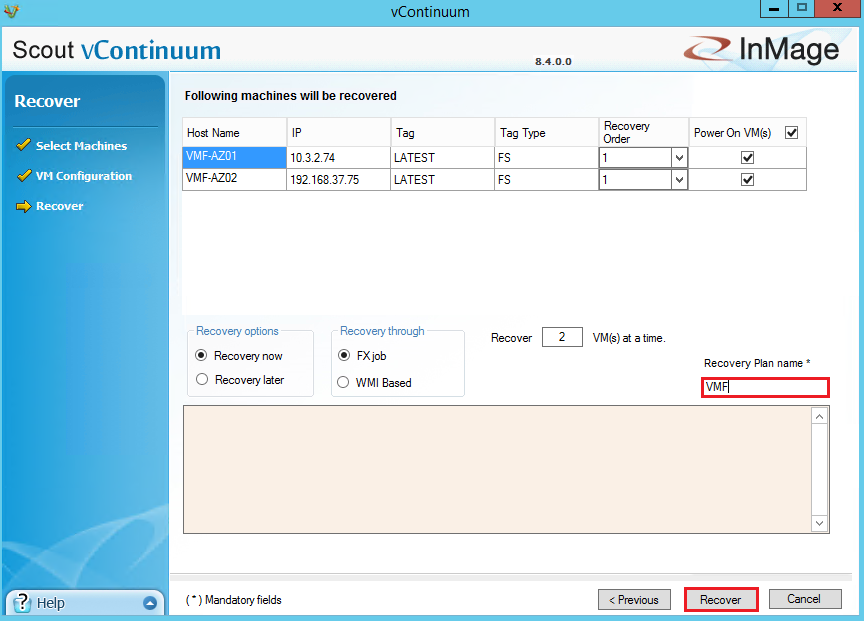
Finally, provide a Recovery Plan name and click Recover
When the Recovery Plan commences, you will see the Recovery Status window showing you the stages of the failback.

The failback process is fairly quick, once all the VM’s have been powered on we can verify the failback process.

vCenter Check
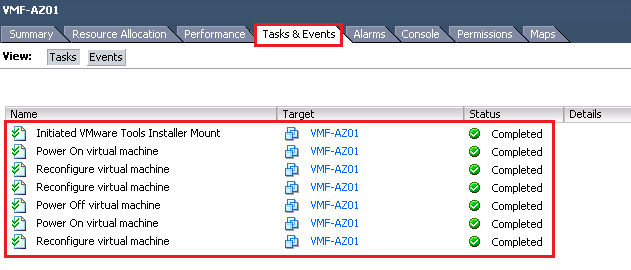
In vCenter we can see that the VM’s VMF-AZ01 and VMF-AZ02 have been powered on and have had VMware Tools Installed by checking the Task’s & Event’s Tab
We can also see that the on-premises Master Target no longer has extra hard drives added. Note that the extra SCSI Controllers are still attached.

I also confirmed the IP Addresses match up to what was expected and that the credentials to login to the VM’s where maintained.
Azure Check
The original VM’s VMF-AZ01 and VMF-AZ02 are still running, these should be shutdown and deleted to avoid a split brain scenario. I imagine the reason for keeping this is in case anything goes wrong with the failback to on-premises you have a fall back position.
![]()
Once the VM’s have been deleted, I also recommend checking your Recovery Plans and Protection Groups and deleting these to avoid any confusion.
Final Thoughts
Azure Site Recovery is a good product which is fairly straight forward to configure and use. I’m sure that in future versions that failback will be slightly more elegant.

So this restores the whole VM back on-prem and not just changes back into the original VM?
Depends on the failure scenario.