In the previous blog post we performed the initial installation for failing back to on-premises vSphere. Now it’s time to configure our on-premises Master Target Server.
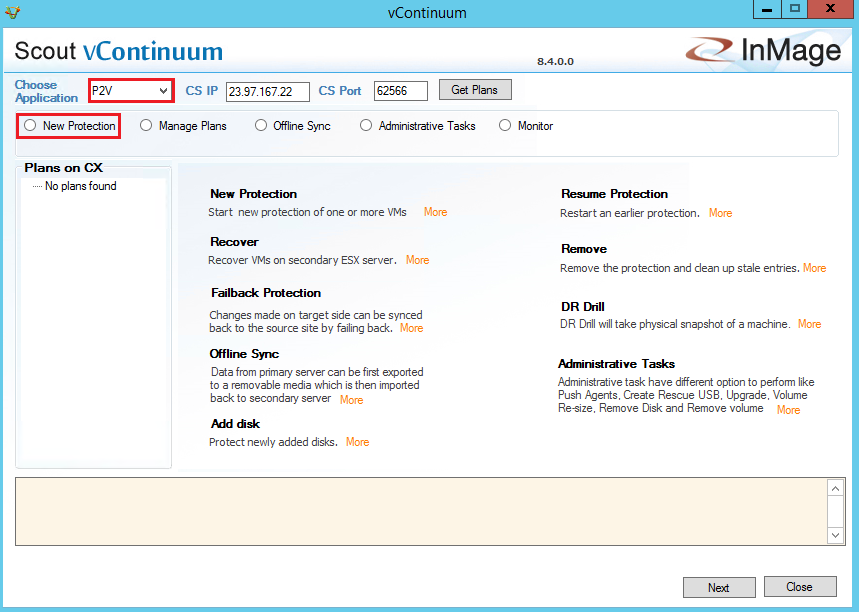
Login to your on-premises Master Target Server and launch vContinuum. Change the Application Type to P2V (this is how vContinuum sees Azure VM’s) and select new Protection
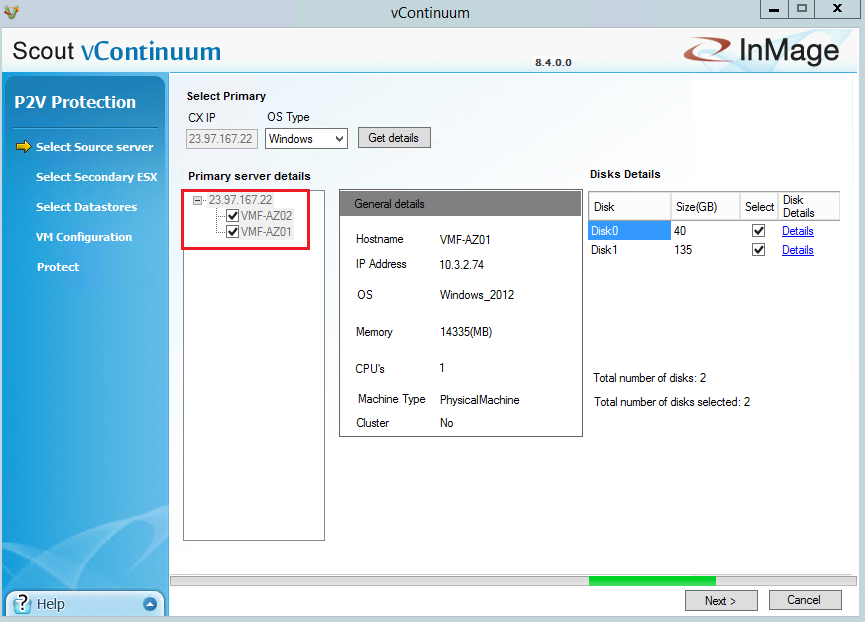
Select your Azure Virtual Machines.
If you have performed several failovers and failbacks (like I have) you will be greeted with a remove duplicate entries dialogue box.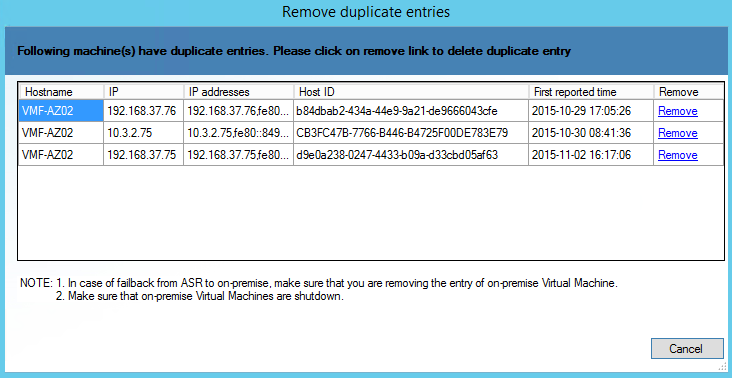
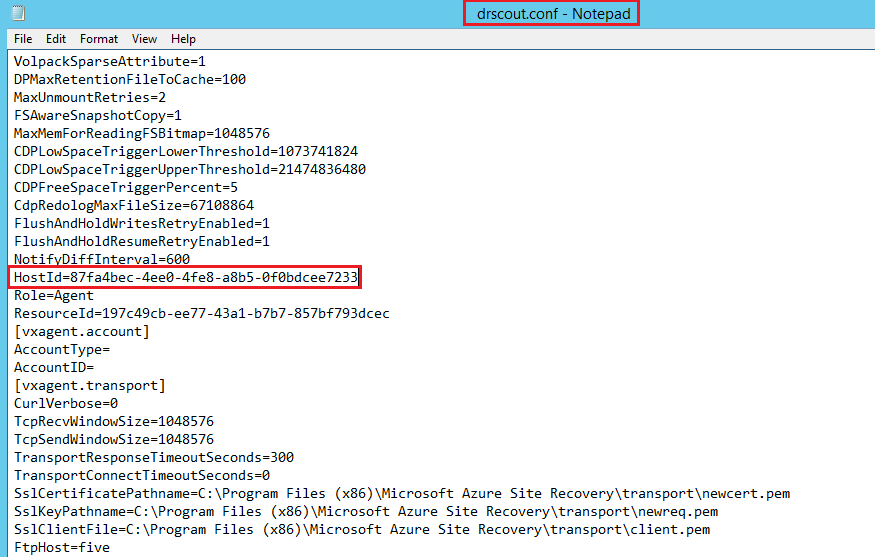
Azure Site Recovery uses the context of ‘Host ID’. To identify which entry should be kept, login to your protected VM and go to C:Program Files (x86)Microsoft Azure Site RecoveryApplication Dataetc and open the file drscout.conf using notepad. Locate the Host ID and remove all other entries from the duplicated entries screen.
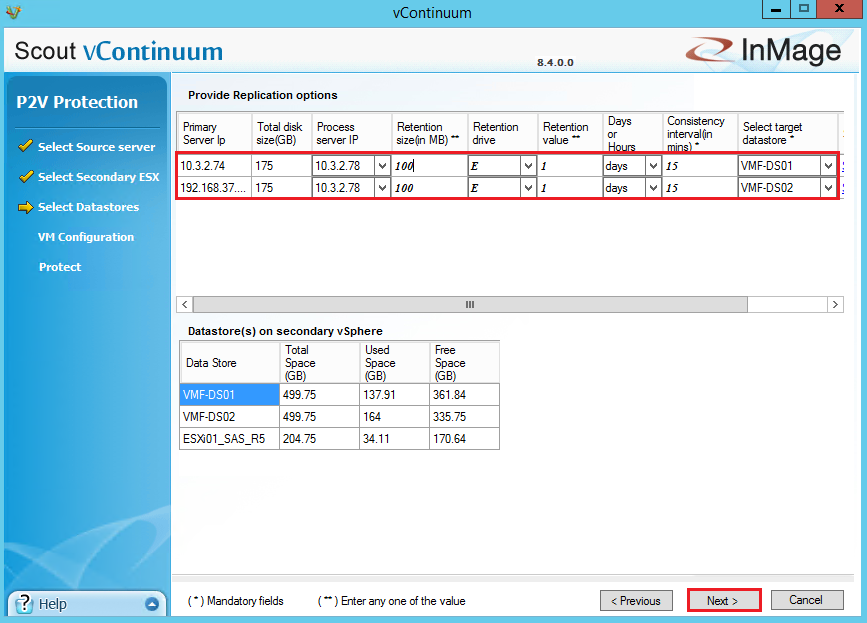
Click Next and enter the following details:
- vCenter Name
- Username
- Password
Then select Get Details and select the your Master Target Server and Click Next

I have chosen the following settings:
- Retention Size – Size of log disk E Drive.
- Retention Value – Up to 2 logs of 100MB will be stored
- Days or Hours – Logs will be stored for up to 2 days
- Consistency Interval – Replication interval will be checked every 15 minutes to ensure it is in line with this target
- Datastore – Target datastore
Next onto the network settings, these are pretty straight forward:
- Network Configuration – Select IP Address and Port Group the VM should be attached to on failback
- Hardware Configuration – CPU and Memory the VM will have when failed back
- Display Name – Hope I don’t have to explain this
- NAT Configuration – This is how each item communicates with each other. A little more details below.
Use PS NAT IP between source and process server for data transfer – This is between the Azure Protected VM and the Process Server. If they are on the same Azure subnet then this can be left blank. If on different subnets then tick the box.
Use PS NAT IP between process server and target for data transfer – This is between the Azure Process Server and our on-premises Master Target. If they are on the same subnet or using a Site to Site VPN this can be left blank. If transfering data over the public internet via SSL then tick the box.
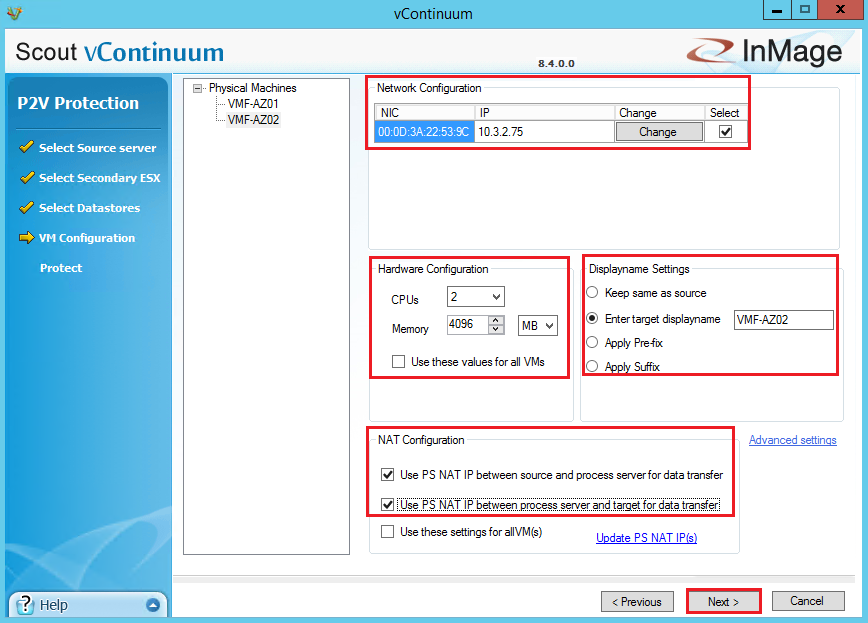
Note: If using PS NAT IP between Azure Process Server and target for data transfer you will need to enter the public IP address of the Azure Process Server under ‘Update PS NAT IP(s)’

Now we are ready to run the ‘Readiness Check’. Figures crossed it goes smoothly. Click ‘Run Readiness Checks’
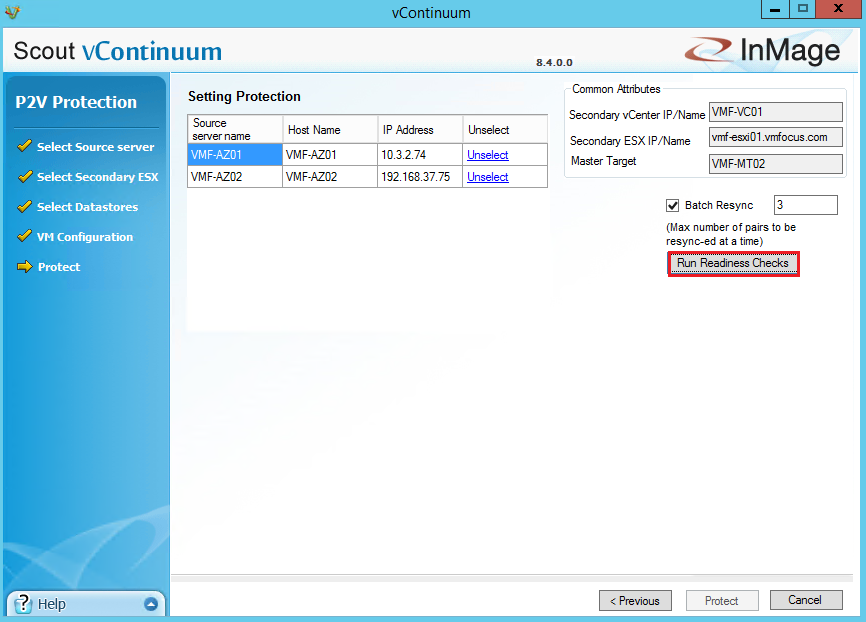
If you pass correctly you should be in a position to create a New Failback Plan. Enter a name and Click Protect

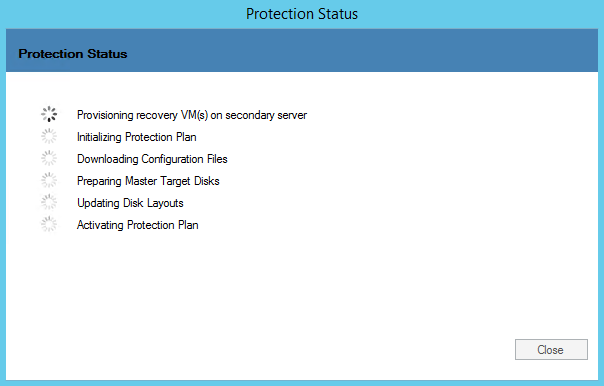
The Protection Status window is displayed which shows the steps which are being performed.
Final Thought
At the moment, it is a manual process to update the IP Address and hardware configuration from Azure to on on-premises. It would be great if the Azure team could introduce:
- A bulk subnet change for example every VM on 192.168.3.0/24 in Azure should go to 10.3.1.0/24 on premises with a default gateway of 10.3.2.1254 and DNS Servers 10.3.1.1
- A bulk hardware change by grouping VM’s for example tick a group of VM’s and they have 2 vCPU and 4GB RAM
In the next blog post we will perform the failback to our on-premises vSphere environment.
