In the last blog post we covered failing over to Azure. Let’s take a moment to be honest, Microsoft want you to stay in Azure when you have failed over. However for some customers this isn’t going to be a reality and they will want to move back to their on-premises vSphere environment.
So in this blog post we are going to failback to our on-premises vSphere environment. Before we start we need to look at the architecture to ensure that we understand how it fits together.
Components of Azure Site Recovery (Failback to vSphere)
- Azure Process Server – This receives replication data from the Mobility Service (in-guest agent) using disk based cache. It is used to compress and encrypt data on-premises before sending it over internet/VPN/Express Route to the Master Target Server on-premises
- Azure Mobility Service – This can be pushed out automatically by the Process Server or performed manually. Essentially it is an IO splitter that takes a write to disk, holds it in memory and sends it across to the Azure Process Server
- Azure Configuration Server – This is the brains, it co-ordinates communication between all components both on-premises and in Azure. Each Configuration Server can support up to 100 source virtual machines.
- On-Premises Master Target – Receives incoming replication traffic from the Azure Process Server. Each protected VM is added as a VMDK.
- On-Premises vContinuum Server – Performs the management and configuration of the failback from Azure to vSphere.
The diagram below shows the relationship between all the components.
As you have probably guessed, we have a couple of servers that need to be deployed onto our on-premises vSphere infrastructure which are the vContinuum Server and Master Target Server.
The requirements for the vContinuum Server and Master Target Server are shown below:
- Master Target Server – Windows Server 2012 R2, 8 Cores, 14GB RAM and at least 600GB HD
- vContinuum Server – Windows Server 2012 R2, 8 Cores, 8GB RAM and at least 160GB HDD
On-Premises vContinuum Server Installation
Log onto your vContinuum Server and download the vContinuum software from here. You should be greeted by a download prompt for ‘Microsoft-ASR_vContinuum_MT_8.4.0.0_Windows_GA_28Jul2015_release.exe’.
Launch the .exe and Click Next

If you haven’t already download and installed vSphere CLI. Instructions on how to do this are covered in this blog post.
Next we need to enter the following information:
- Configuration Server IP Address
- Configuration Server Port
- Configuration Server Passphrase
This blog post covers details on how to obtain this information.

Click Install

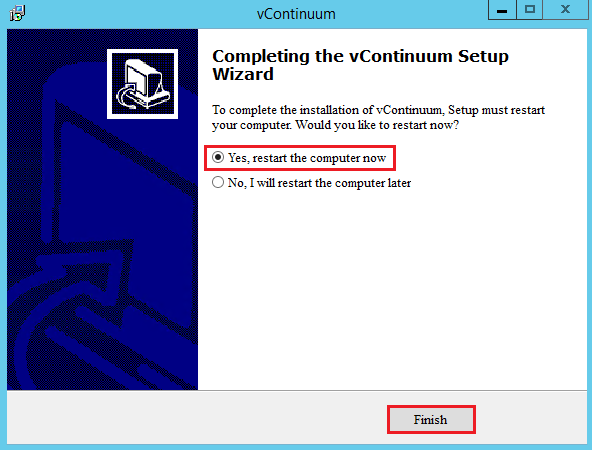
This can take a while so suggest you head off and grab a cup of tea. Once completed select Yes to restart your computer.
On-Premises Master Target Server Installation
Before installing your Master Target Server, it is recommended to have a secondary SCSI Controller and Hard Disk for your Retention Drive.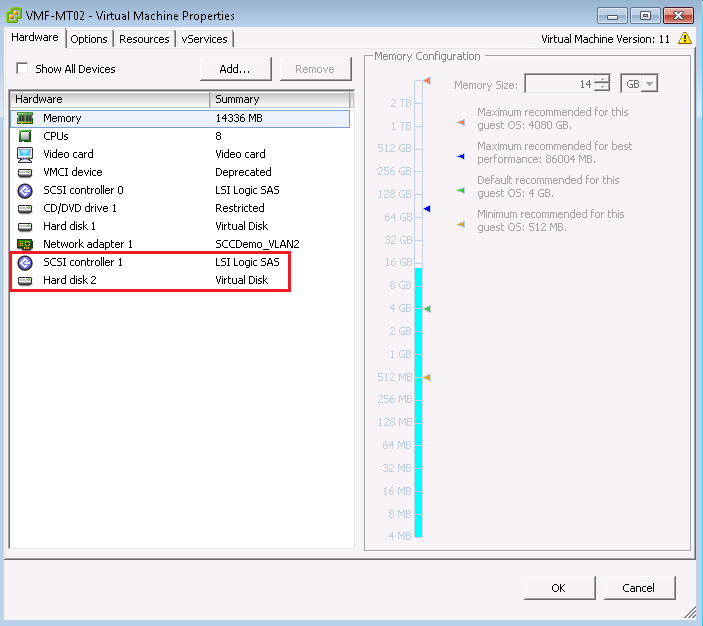
The installation for the Master Target is included in the vContinuum .exe. So the procedure is exactly the same as the vContinuum Server installation.
Azure Process Server
Next we need to ensure that we have a Process Server available in Azure so that it can send data to the Master Target Server on-premises.
Login to the Azure Portal and select Recovery Services > VMFocusVault > Servers > Configuration Servers > + Process Server

Enter the details for:
- Process Server Name
- User Name
- Password
- Configuration Server
- Azure Network
- IP Address

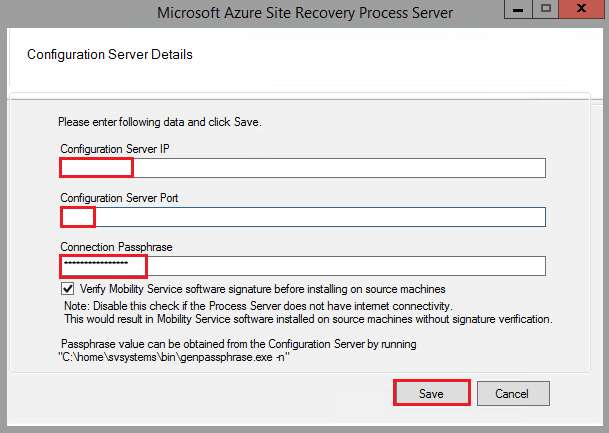
Once deployed login to your Azure Process Server enter the details for your configuration server and Click Save
Note: It is recommended to deploy your Azure Process Server on the same network as your Azure Configuration Server
Now that the initial installation is done we are ready to start configuring failback in the next blog post.

One thought on “Failing Back From Azure Site Recovery: Part 1”