Azure AD: Transfer Subscriptions or Directory?

With the increased uptake of Azure across both public and private businesses, we are starting to see identity gaps across business divisions creating pockets of isolation.

In the diagram below we have a single Enterprise Enrollment which has two Azure Accounts, one for Online Services and the another for Retail Stores.  Underneath these we then have two Azure Subscriptions, one for Development and the other for Production.

Azure Accounts & Subscrptions v0.1.png

You might wonder what the issue is?  Well in this scenario we have a single on-premises corporate directory that services ‘Online Services’ and ‘Retail Stores.

  • ‘Online Services’ have setup their on-premises corporate directory to integrate with Azure AD, so that their starters and leavers process is controlled using their existing directory service.
  • Whereas ‘Retail Stores’ have no integration to the on-premises corporate directory and are using the default on.microsoft.com accounts

Both business divisions have rolled out Production & Development services, but we need to close the security gap to ensure that both divisions are using the corporate directory as part of their identity model.

To achieve this we have two choices available to us, Transfer Directory or Subscription.

A subscription can only be associated to a single directory

The next part of this blog post has been written by my colleague Graham Lindsay, Lead Architect and one of our identity experts.

Transfer Directory

This will not change the Account Admin or the billing, it purely modifies which directory the subscription is linked and can be completed using portal.azure.com.

Create Guest B2B account in the receiving directory using the email address of the Service Admin of the subscription to be switched . This can be a standard non admin user.

Transfer 01

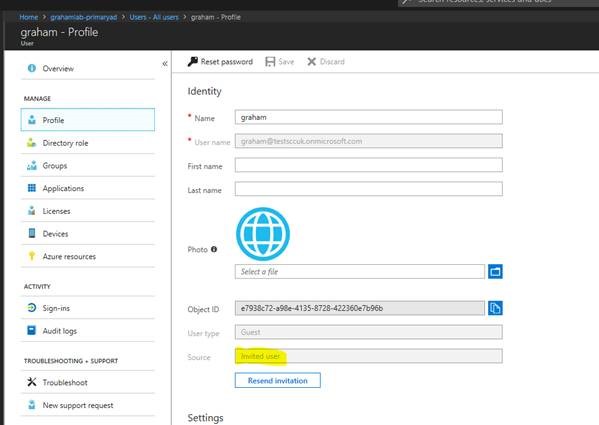
From the service admin account accept the B2B invite.

Transfer 02.jpg

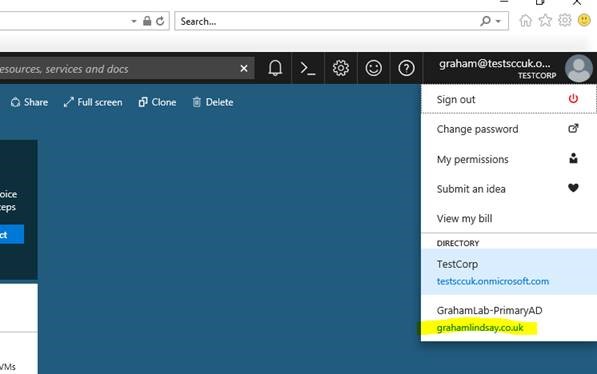
Once the service admin account has accepted the B2B invite it will now be able to view the receiving directory within the directory switcher.

Transfer 03.jpg

Staying within the subscription hosting directory (TestCorp) locate the subscription to be transferred and choose change directory.

Transfer 04.jpg

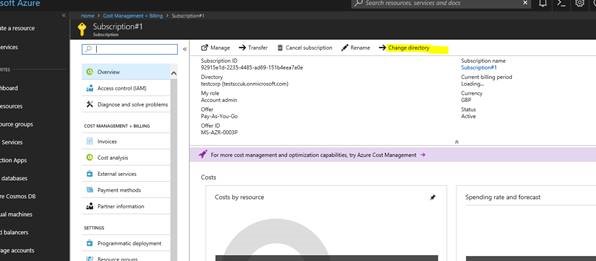
From the drop choose the receiving directory being (GrahamLab).

Transfer 05.jpg

Once the change has occurred, the subscription will no longer be accessible in the in the TestCorp Directory.
Transfer 06.jpg

Using the directory switcher specify the receiving directory.

Transfer 07.jpg


Open Subscriptions and you will now see that the subscription has now moved.  You can now rebuild the RBAC on the subscription.

Transfer 08.jpg

Transfer Subscription

First of all it’s worth noting that only the following Subscriptions can be transferred.

  • Enterprise Agreement (EA) MS-AZR-0017P
  • Microsoft Partner Network MS-AZR-0025P
  • MSDN Platforms MS-AZR-0062P
  • Pay-As-You-Go MS-AZR-0003P
  • Pay-As-You-Go Dev/Test MS-AZR-0023P
  • Visual Studio Enterprise MS-AZR-0063P
  • Visual Studio Enterprise: BizSpark MS-AZR-0064P
  • Visual Studio Professional MS-AZR-0059P
  • Visual Studio Test Professional MS-AZR-0060P

Subscriptions can only be transferred to someone in the same country

When transferring the subscription this changes the entire subscription including billing.

  • For Enterprise Agreements this is done in the EA portal
  • For Non-Enterprise Agreements this is done in the billing portal

Within the billing portal locate the subscription to be transferred and choose transfer subscription.

Transfer 09.jpg

From here you can just change just the Account Admin or you can change the Account Admin and where the subscription is linked to. To transfer the whole thing and change the service administrator as well untick the retain this subscription with my AzureAD.

Transfer 10.jpg

Enter the name of the account who will be taking over the subscription (I chose to switch the AzureAD directory too)

Transfer 11.jpg

The following screen is shown saying that the transferred has started.

Transfer 12.jpg

The receiving party will also receive an email will a link to initiate the transfer. Clicking this link the following is shown with the following screens shown.

Transfer 13.jpg

The subscription is now shown as transferred in the sending portal as transferred.

Transfer 14.jpg

The subscription is now showing as active in the receiving portal.Transfer 16.jpg


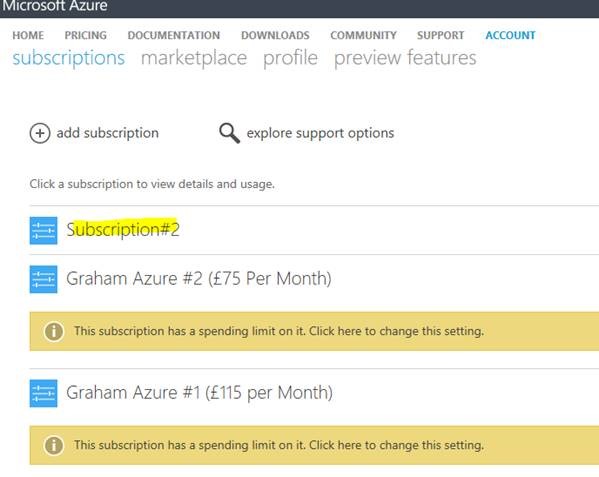
As you can see the service admin is updated too.Transfer 20.png

Resizing Azure Virtual Machines

Azure-VM

I’m regularly asked two questions when it comes to Azure virtual machines which are:

  1. Can I resize a VM to give it more CPU and RAM?
  2. What is the impact on the VM?

We are used to daily operations using on-premises features such as ‘hot add’  which can increase a VM’s RAM, CPU and HDD capacity without downtime, but can we do the same in Azure?

Can I Resize an Azure VM?

The answer is yes you can within the same series of VM e.g. an ‘A’ to a larger or smaller ‘A’.

When it comes to resizing a VM between different series of VMs the answer is it depends whether the resize is to same hardware or different hardware e.g. a change in chipsets

Undertaking a resize operation is a simple procedure, select your VM and then from the blade select size.Resize VM01.PNG

Select your desired size and finally hit select.  You will then see the Notification ‘Resizing virtual machine’

Resize VM02

Whats the impact to the VM if I can resize it?

The typical impact to resizing a VM is a restart which can take up to five minutes for the end to end operation to complete.  Therefore I would suggest an outage window is used and a known good working backup before you start!

If you are resizing to a VM onto new hardware (e.g. change in chipset), then the VM will need to be powered off first before the resize operation can begin.

It’s worth noting that if you are resizing VM’s onto new hardware which are in an Availability Set, then all the VMs need to be powered off for the operation to begin.

Final Thoughts

Microsoft have clearly made strides to ensure that resizing a VM within Azure is smoother and easier than ever before.  However ensure that you plan for downtime and perhaps more importantly have a known good working backup before you start work resizing VMs.

Azure Announcements March 2018

azure
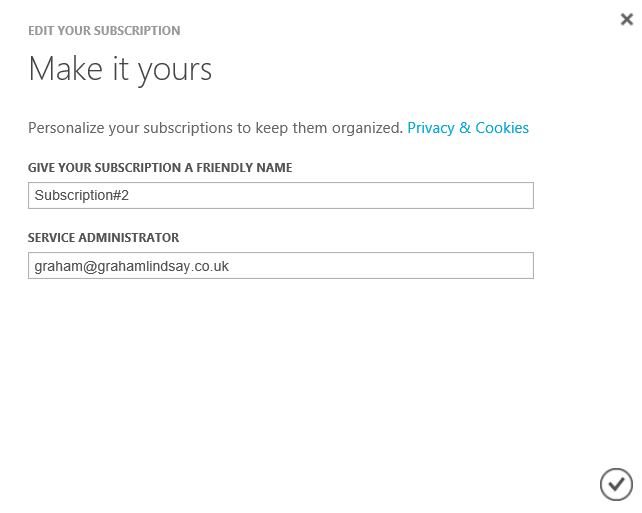
It’s been a few months since I wrote my last ‘Azure Announcements’ blog post so thought it would be worth sharing a number of features which I have my eye on.

Reserved Instances

VM’s we all love them, and guess what they will probably continue to be part of all public cloud deployments.

Certain IaaS VM’s that run applications such as Active Directory Domain Services will be on 24x7x365, why not reserve these instances and enjoy up to 82% savings versus Pay As You Go.

Essentially you commit to either a year or three years upfront.  The good news is, if anything changes you get an adjusted refund.

More details here.

Azure Network Watcher

Azure Network Watcher went GA on 29th January 2018.  A great tool to have in your toolkit, features include:

  • Connectivity Checks
  • Hop by hop latency
  • A graphical view from source to destination
  • Number of packets dropped

It also enables a connectivity check for ExpressRoute which is in preview.

More details here.

Cost Management

Monitoring spend in the cloud has always been a pain.  With the acquisition of Cloudyn last year, Microsoft have made consumption insights much easier.

  • Ability to schedule reports to be emailed to recipents
  • Carry Tags across to view application service or grouped component cost
  • Review ‘heavy hitters’ in terms of consumption

Great news is until June 2018, Cost Management is free.

More details here.

Azure Availability Zones (Preview)

This is a key features that customer have been crying out for (shame it’s still in preview).  Essentially Availability Zones protect from data centre level failures, something with Availability Sets do not currently do.

More details here.

Azure Migrate

To start the journey to public cloud services, you need to understand your application estate.  This is a process which should not be under estimated as many customer environments are poorly documented, application owners have left the business, operations and IT don’t really understand how an application is coupled together so trying to migrate anything but low hanging fruit often gets placed into the ‘too hard to deal with bucket’.

To counter act this, Microsoft have announced Azure Migrate which uses an application based approach for the following:

  • Discovery and assessment for on-premises virtual machines
  • Inbuilt dependency mapping for high-confidence discovery of multi-tier applications
  • Intelligent rightsizing to Azure virtual machines
  • Compatibility reporting with guidelines for remediating potential issues
  • Integration with Azure Database Management Service for database discovery and migration

More details here.

Just in Time Access (Preview)

Consider for a moment, the attack vector on your virtual machines.  You may have some ports exposed to the public internet , however these are likely to be protected using Next Generation Firewalls and perhaps even a DDoS scrubbing service from your ISP.

Perhaps the largest attack vector are your management ports such as SSH, RDP and WMI to name but a few.  When these ports are open, it allows anyone to try and obtain access  whether it is a authorised or not.

This is where ‘Just in Time Virtual Machine Access’ steps in to reduce your overall attack surface.  Access to management ports are closed and access is only granted from either trusted IP’s or per request.

More details here.

Part 2 – Configuring Azure Application Gateways with AD FS

In Part 1 of Configuring Azure Application Gateway with AD FS  we covered the existing architecture AD FS and the target AD FS architecture.  Finally we deployed an Application Gateway with a basic configuration.

So lets have a look at the logical configuration of what AD FS with a Application Gateway running a Web Application Firewall will look like.

Azure AD FS WAF Logical v0.1

Now we are ready to get cracking with some configuration work!

Backend Pools

This is where the Application Gateway will be delivering interesting traffic too.  In this case it will be the following virtual machines:

  • VMF-WE-WAP01
  • VMF-WE-WAP02

Select Application Gateway > Backend Pool and then add in your virtual machines.  It should look something like this.

WAF 03

Frontend Listener

This is the external port that the Application Gateway listens for interesting traffic.  In Part 1, we chose HTTP, the reason for this is so that we can configure HTTPS and go through the steps in more detail.  Plus we get to use our own naming convention rather than Microsoft’s!

Select Application Gateway > Frontend Listeners and enter out configuration details, which are:

  • Name 443_Listener
  • Front End Port Name 443_Port
  • Port 443
  • Protocol HTTPS

We now need our certificate in PFX format, so time to grab that before we move on.

The screenshot below shows the deployed configuration.

WAF 04

HTTP Settings

To ensure that we receive end to end SSL, we need to use a HTTPS setting under HTTP settings (I’m sure Microsoft could come up with a better name).   The HTTP setting which is the backend needs to be trusted by the Frontend, to do this we need to take our original certificate which was .pfx and make sure it’s .cer format.

Select Application Gateway > HTTP Settings and enter out configuration details, which are:

  • Name 443_Setting
  • Request Timeout: 30
  • Cookie Based Affinity: Enabled
  • Port 443

The configuration should look something like the screenshot below.

WAF 05

Rule

Next we are going to configure a Rule (which we are going to change, but we have to do things in a certain order).

Select Application Gateway > Rules and enter out configuration details, which are:

  • Name 443_Rule
  • Listener 443_Listener
  • HTTP Setting 443_Setting

WAF 06

Now we are cooking on gas and we can remove the default settings.

Remove Default Settings

Lets start with Rules, select ‘Rule1’ and click delete.  Once that has gone, select Listeners and then AppGatewayHTTPListener and click delete.  You will be prompted to confirm that it will make changes to the FrontEndIP and Port, which makes sense as it will no longer listen on Port 80.

Then last of all select HTTP Settings and then appGatewayBackendHttpSettings and click delete.

Sense Check

Right before we go any further we are going to perform a Backend Health Check to see what is occurring.

WAF 07

Man down, I repeat man down!  The reason for this is that the Application Gateway requires specific ports to be opened up for the Health Check API to work which are 65503-65534

I usually apply NSG to subnets as it makes all resources placed within the subnet then inherit the security rules.

As you can see I have created two rules, the first allows HTTPS traffic from the internet and the second allows the Health Check API inbound ports.

WAF09

If this was a production rollout of a WAF with AD FS I would strongly suggest you create some specific rules to limit traffic flow between subnets within the vNET.  As this is a lab environment which is only up temporarily I shall move on!

Time again for another sense check, lets verify the Backend Health.  Argh, we are still in a man down scenario.

WAF 07

The reason for this is the built-in Application Gateway probes our Web Application Proxies on ports they don’t respond on.  We need to create a Custom Health Probe.

Health Probe

So lets get Backend Health working.  Select Application Gateway > Health Probes > Add.  The configuration details we are going to use are as follows:

  • Name Probe_ADFS
  • Host adfs.vmfocus.com
  • Procotol HTTPS
  • Path /adfs/ls/idpinitiatedsignon.htm
  • Interval 30 Seconds
  • Timeout 30 Seconds
  • Unhealth Threshold 3

It should look like the picture below.

WAF10

Finally we need to apply the Custom Health Prove to our HTTP Setting.  Select HTTP Setting > 443_Setting and Tick ‘Use Custom Probe’ > Select Probe_ADFS.

WAF11

Now lets check the Backend Health one last time.

WAF12

Excellent the Application Gateway will now be passing traffic correctly to our Web Application Proxies.  All we need to do now is update DNS to point to the Public IP Address of the Application Gateway.


HPE StoreVirtual for Hyper-V .NET 3.5

VSAAs part of transitioning my lab to Hyper-V I’m using a HPE StoreVirtual VSA to provide shared storage to the Hyper-V Hosts.

When trying to load ‘HPE_StoreVirtual_VSA_2014_and_StoreVirtual_FOM_Installer_for_Microsoft_Hyper_V_TA688-10552’ I encountered the error ‘The Hyper-V for VSA deployment wizard requires version of .NET 3.5 to be installed on the system’.

Issue

Easy, I thought go into roles and features and add .NET 3.5.  However, you encounter the following error ‘Do you need to specify an alternate source path? One or more installation selections are missing source files on the destination’.

.NET 3.5 Error

Resolution

The first thing to do is mount your Windows Server 2016 Datacenter CD.  Once done, select ‘Specify an alternate source path’

.NET 3.5 Resolution 1

Type in G:SourceSxS and click OK, followed by Install.

.NET 3.5 Resolution 2