HP have announced the release of LeftHand OS 12.0 which finally includes T10 UNMAP which means we can now start and stay thin with StoreVirtual.
A list of feature enhancements are:
- Space Reclamation
- Reclaim space on thinly and fully provisioned volumes used by Windows Server 2012 or later, and vSphere 5 or later
- StoreVirtual Multi-Path Extension Module (MEM) for vSphere
- Provides data path optimization similar to StoreVirtual DSM for Microsoft MPIO
- REST API for StoreVirtual
- Enables automation and scripting of clusters, provisioning and volume management
- StoreVirtual VSA Term LicenseManagement
- Enforces term licensing for StoreVirtual VSA
So lets take LeftHand OS 12.0 for a spin and test out T10 UNMAP.
Centralised Management Console Upgrade
The first step is to upgrade your Centralised Management Console to LeftHand OS 12.0. Once done, you will be greeted by your new 12.0 screen. First impressions, it is a lot faster to discover StoreVirtual nodes and access Management Groups, well done HP!
StoreVirtual Node Upgrade
Just a word of warning, I would always recommend performing upgrades out of hours as when a StoreVirtual node reboots you will loose a percentage of your clusters performance e.g. if you have two nodes in your cluster and your reboot one, then you will loose approximately 50% of your performance.
The good news for those that are using physical StoreVirtuals, HP have reduced the reboot time.
When you are ready to upgrade, the procedure is as slick as always. Download your updates via the CMC and then apply them to your nodes one at a time.
Enable Space Reclamation
Space reclamation is enabled manually at the Management Group level. Right Click your Management Group and Select Enable Space Reclamation

Next we receive a warning that once upgraded you cannot downgrade to previous versions of LeftHand OS that do not support space reclamation.
Enter your Management Group name, in my case DC01-MG01 and accept the disclaimer and enable Space Reclamation.

I suggest checking your Device and RAID status to ensure everything is OK before moving forward. This is done by selecting your Cluster, followed by the Node and then selecting Storage. As you can see I have Adaptive Optimisation enabled and my RAID Status is normal.

Space Reclamation Test
Space reclamation can be performed either on vSphere after a Storage vMotion has taken place or when files have been deleted from with a guest operating system.
In this test I’m going to perform a Storage vMotion from one datastore another and then zero the space on the VMFS file system.
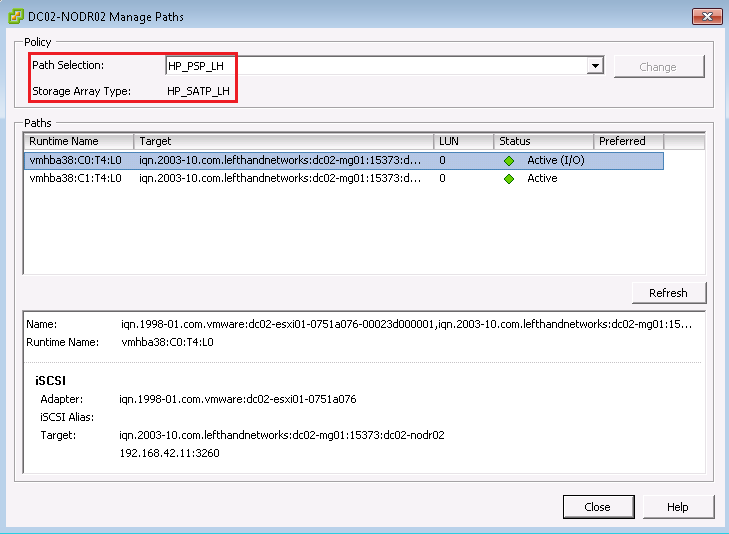
The test is going to be ran on the datastore DC02-NODR02 which has a single virtual machine inside of it, with the following storage storage characteristics:
- Datastore DC02-NODR02
- Capacity 199.75GB
- Provisioned Space 45.01GB
- Free Space 177.29GB
- Used Space 22.46GB

- Volume – 17.50GB consumed space
- 200GB Fully Provisioned with Adaptive Optimisation enabled

Next I’m going to perform a Storage vMotion of the virtual machine onto the datastore DC02-NODR03. Time to grab a cup of tea before we move on and run VMKFSTools to reclaim the space.
VMKFSTools
Now the Storage vMotion has finished, we need to run vmkfstools on the datastore to reclaim the space. Jason Boche has an excellent blog post entitled ‘Storage: Starting Thin and Staying Thin with VAAI UNMAP‘ on the vmkfstools command.
On an ESXi Host that can see the datastore DC02-NODR02, I’m going to run the command ‘vmkfstools -y 90’

Note in a production environment you would reclaim the space out of hours and use 60% of the available space
If we now check the volume DC02-NODR02 it’s consumed space is 0.46MB which is the VMFS file system

Monitoring Space Reclamation
HP have introduced some extra performance statistics to enable space reclamation to be monitored which include:
- IOPS Space Reclamation
- Latency UNMAP
These can be accessed by added to the Performance Monitor window so that you can verify the effect of space reclamation on your StoreVirtual node.

 As part of transitioning my lab to Hyper-V I’m using a HPE StoreVirtual VSA to provide shared storage to the Hyper-V Hosts.