In the previous how to, we configured layer 3 static routes and VLAN’s on the HP v1910 24G you will have noticed that all traffic can pass between VLAN’s without any restrictions. So why is this happening?
Well the answer is because we have turned on routing by giving an IP Address to each VLAN. This means the HP v1910 uses it’s own routing table to send traffic from VLAN 1 to VLAN 10.
Let’s test this. My laptop sits on VLAN 1 on IP Address 192.168.37.152 using the HP v1910G as it’s default gateway on 192.168.37.221

I have five VLAN Interfaces created which can be found under Network > VLAN Interface > Summary

Behind VLAN 10 is a device with IP Address 10.37.10.11, which I can ping

Next, I’m going to remove the VLAN Interface for VLAN 10

Don’t worry, the VLAN is still in play, we just have removed the ability to route between subnets. Now if we ping the same device we get an epic fail.

Notice we get a reply from 192.168.37.254 which isn’t an VLAN IP Address. The reason for this is that 192.168.37.254 is the default gateway for our HP v1910G. The HP v1910G is saying I haven’t got a clue how to get to 10.37.10.11, so let me send that traffic to my default gateway 192.168.37.254.
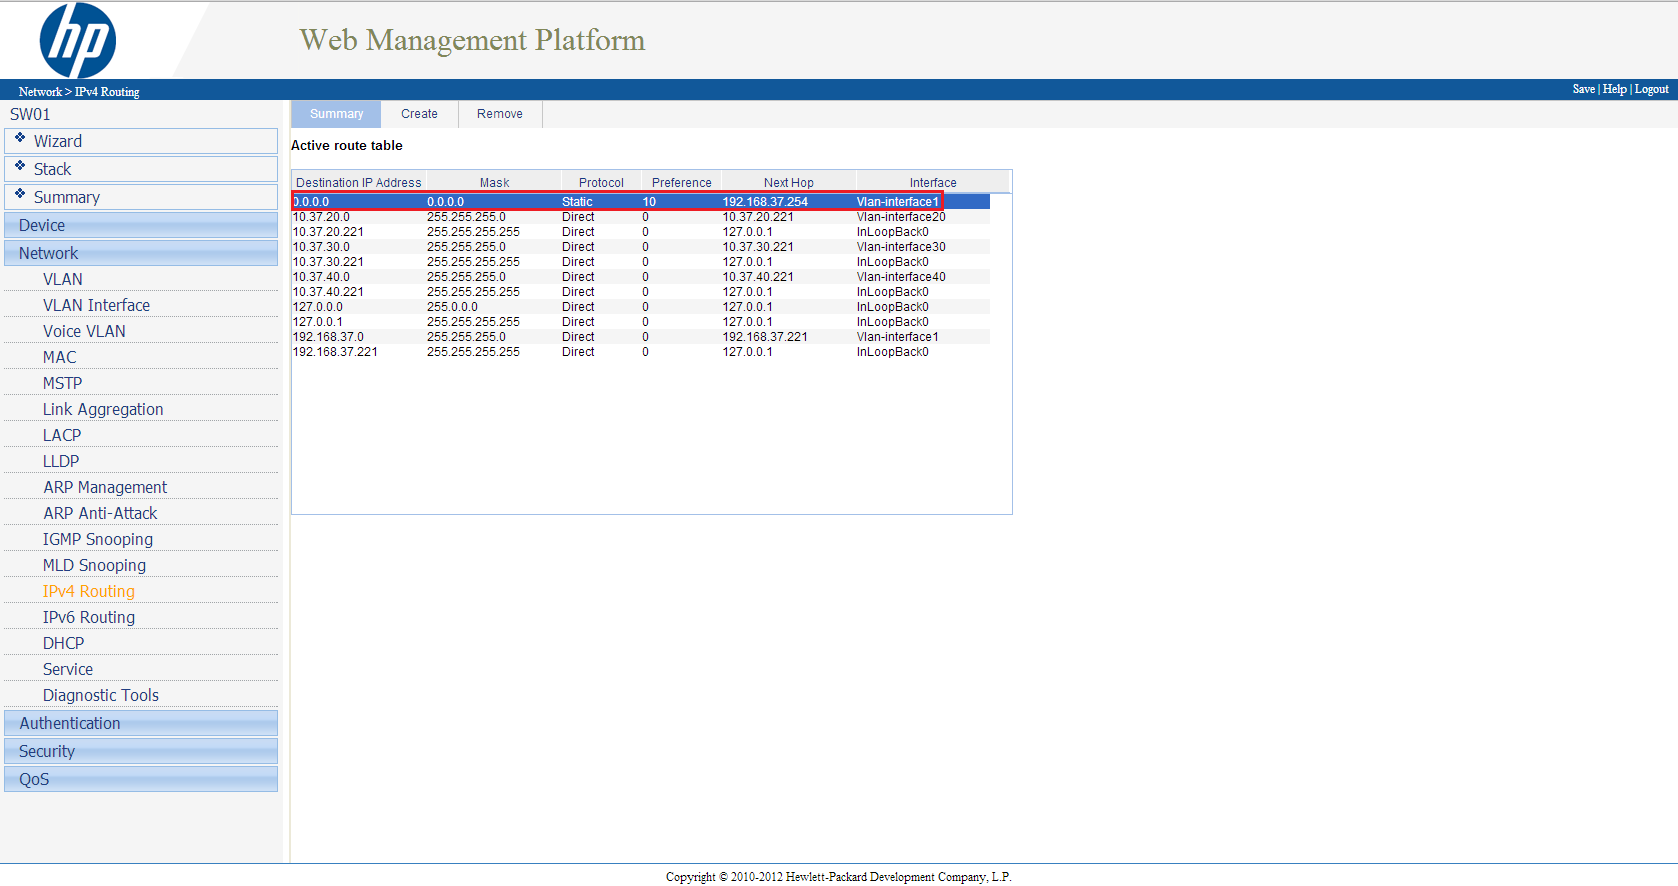
My firewall which is on 192.168.37.254 has a static route to 10.37.10.0 255.255.255.0 via 192.168.37.221 (VLAN 1 Interface on HP v1910G). When the HP v1910G receives the packet, it drops it as has no where to send the ICMP request.
So just to reiterate, that when we have an VLAN Interface, the HP v1910G will be able to route all traffic between VLAN’s, unless we do something about it.
Access Lists
This is where the Access List comes into play, an Access List specifies what source traffic is allowed to get to what destination traffic. Think of it as being in a hallway in a house and all the doors are locked. You then get given a key and you can get from the hallway into the lounge. The source is the hallway, the destination is the lounge and the key is the Access List.
So before we move any further, I want to give you a brief explanation of what I want to be able to achieve.
My laptop resides on 192.168.37.152/24 on VLAN 1 and I want to be able to connect to my HP StoreVirtual VSA which is on 10.37.20.1/24 VLAN 20.
I also have a Windows 7 machine on 10.37.20.211/24 VLAN 20.
I want to be able to get from my laptop to 10.37.20.1, but I don’t want to let any other traffic threw.
Let’s run a ping to both devices, you can see that I have connectivity to both 10.37.20.1 HP StoreVirtual VSA and 10.37.20.221 Windows 7.

So let’s create an Access List to do something about this.
Creating An Access List
We need to go to QoS from the left hand menu then onto ACL IPv4

Next we want to select Create

Now we have a choice from Basic ACL’s, Advanced ACL’s and Ethernet Frame Header ACL’s. OK what are the differences?
Basic ACL these only match source IPv4 address’s
Advanced ACL these match source and destination IPv4 address’s and also protocols on different port numbers e.g. TCP 80
Ethernet Frame Header ACL these match source and destination MAC addresses
With this is in mind, we are going to use Advanced ACL’s as we want to match interesting traffic from source to destination.
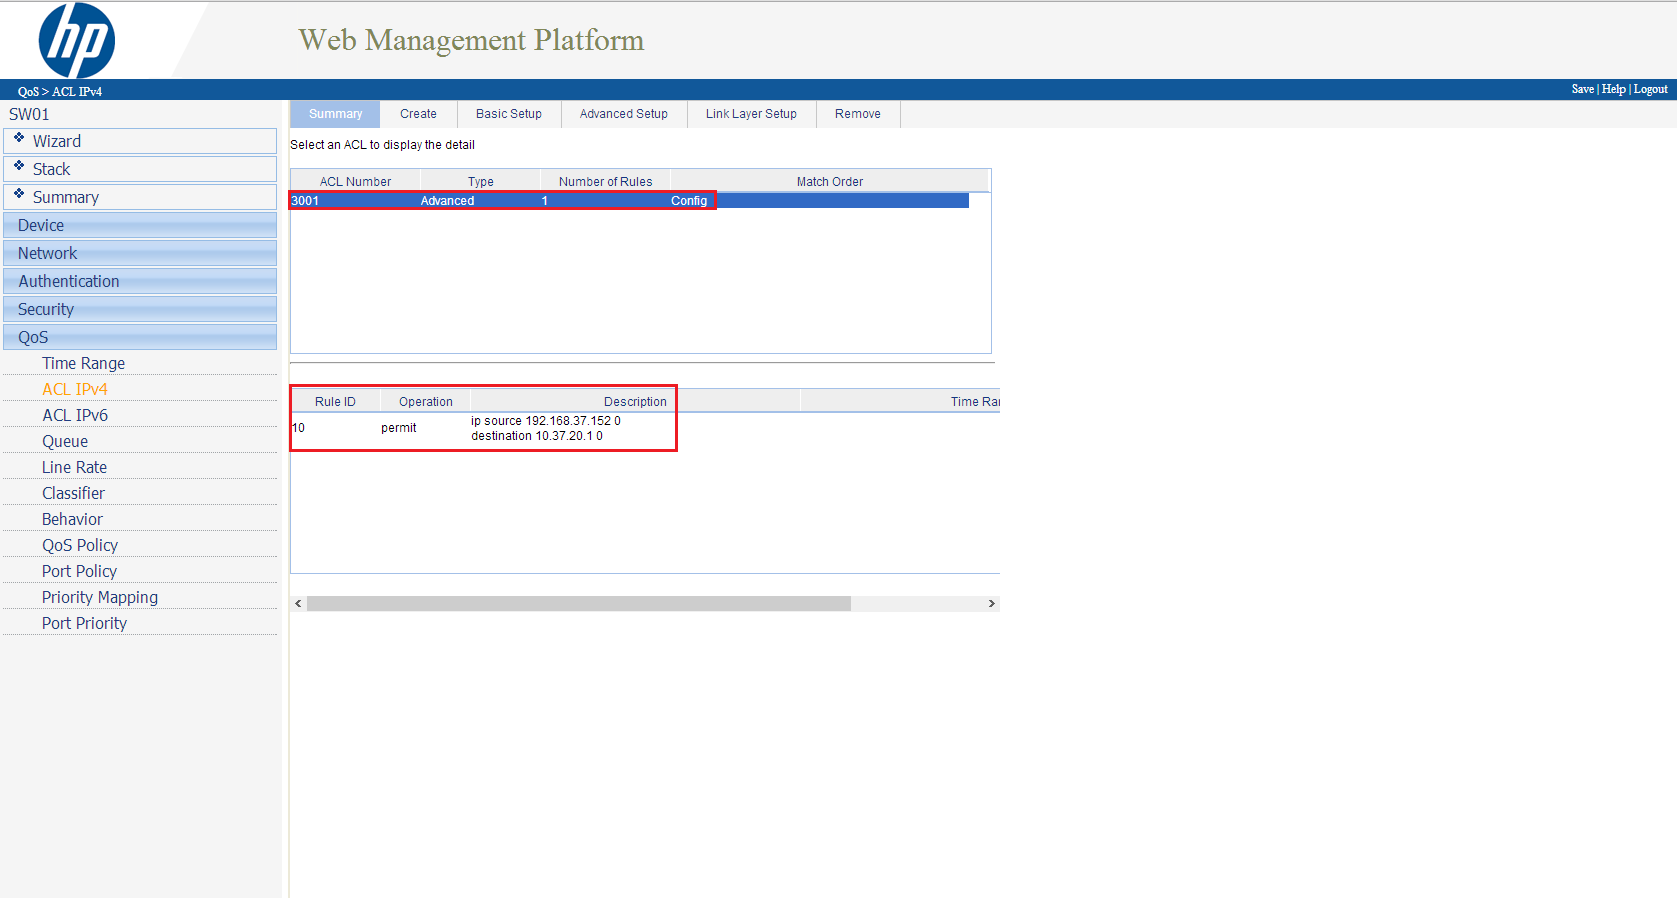
In the ACL Number section, type in 3001 and we want the match order to be Config and click Apply

You will see the ACL Number appear in the bottom table, notice we have no rules applied against it yet.

Next we want to go onto the Advanced Setup Tab at the top. We are going to enter the following information:
- ACL > Select 3001
- Rule ID > Select and Enter 10
- Action > Permit
- Source IP Address > 192.168.37.152
- Source Wildcard > 0.0.0.0
- Destination IP Address > 10.37.20.1
- Destination Wildcard > 0.0.0.0
- Protocol > IP
- Click Add
Now when you click on the Summary Tab you should see your rule in place!
I want to back track slightly on some of the entries we made into the Advanced ACL, to make sure you are clear on what we did.
Rule ID this is the order in which the rules are read we entered in number 10, so this rule is read first, if you added a rule ID 9 this would get read before rule ID 10.
Wildcard this is the reverse of a normal subnet mask e.g. 255.255.255.0 becomes 0.0.0.255
TOP TIP: At the end of every Access List is always a silent deny, which means you don’t see the traffic being dropped it just happens!
Let’s see if it works shall we? Let’s ping from my laptop to a HP StoreVirtual VSA 10.37.20.1 success, what about the Windows 7 on 10.37.20.211, err also success, that’s not right!
So what the heck is going on? Well as we haven’t applied the ACL3001 to an interface, everything carries on as per normal.
To be honest, applying an Access List to an interface on the HP v1910G is a royal pain. For most switches you just choose to apply the ACL to an interface either inbound or outbound. However, on the HP v1910G you have to perform the following:
- Create a QoS Classifier
- Create a QoS Behavior
- Create a QoS Policy using the QoS Classifier and QoS Behavior
- Apply the QoS Policy to a Port
I’m not going to run through how to do this, as examples can be found in the HP v1910G Manual page 465.