VMware View – Objective 2.7 Enable RSA/Smart Card

Knowledge

  • Import certificates
  • Turn on certificate based authentication
  • Identify RSA instance
  • Identify authentication requirements for RSA and Smart Cards

You may have noticed you have a couple of errors on your Events Dashboard every time you log into View Administrator.  This is due to  using the default Self Signed Certificates.

Not a problem you say, it doesn’t really concern me, however when we role out too production, your users might get slightly annoyed that they have to click on ‘continue’ constantly when connecting to the the View Security/Connection Server.

View Certificates 1

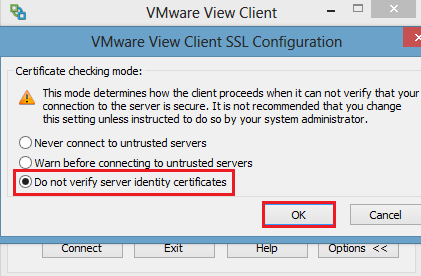
We could just turn off the SSL by turning checking ‘do not verify server identify certificates’.  However this isn’t very elegant and can pose a security risk.

View Certificates 2

A few prerequisites before we crack on:

  • Any Connection/Security Servers /Load Balancers which are client facing require an SSL certificate
  • If you use a load balancer which has an SSL certificate and you enable secure tunnel, then the Security Server or Connection Server requires an SSL certificate as well as the View Client makes a secondary tunnel directly to the Security/Connection Server.
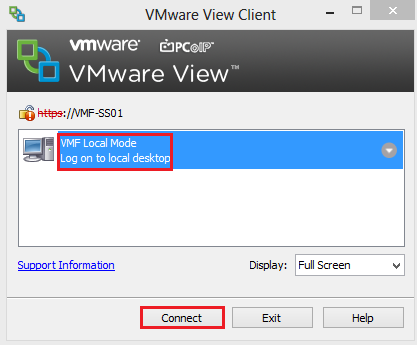
  • Local Mode, if you enable SSL for this, you also require an SSL certificate

Generally speaking you would want to use a Trusted Root Certificate Authority such as Verisign or Thwarte for any Security Servers and/or Load Balancers which are public facing.

If you have a PKI infrastructure internally, with an Enterprise Certificate Authority then you can use these to replace your Self Signed Certificate on your Connection Servers.

In this particular blog post, we aren’t going to cover generating a certificate request from a Trusted Root Authority as VMware have kindly written an excellent KB entitled Using Microsoft Certreq to generate and import a signed certificate into View 5.1

Import Certificates

To enable the creation of a PKI infrastructure on my home lab, I have added the role ‘Active Directory Certificate Services’ to my domain controller VMF-DC01.

We will be using the Web Server certificate for server authentication, however by default we won’t be able to enroll any servers using this as they won’t be trusted.

After you have installed the Active Directory Certificate Services role, run the command ‘certtmpl.msc’ which loads up the default certificate templates.

We want to create a duplicate of the Web Server certificate, by Right Clicking and selecting Duplicate

View Certificates 3

Give it the name VMware View (I know very original) and go to the Request Handling Tab and select ‘Allow private key to be exported’

View Certificates 4

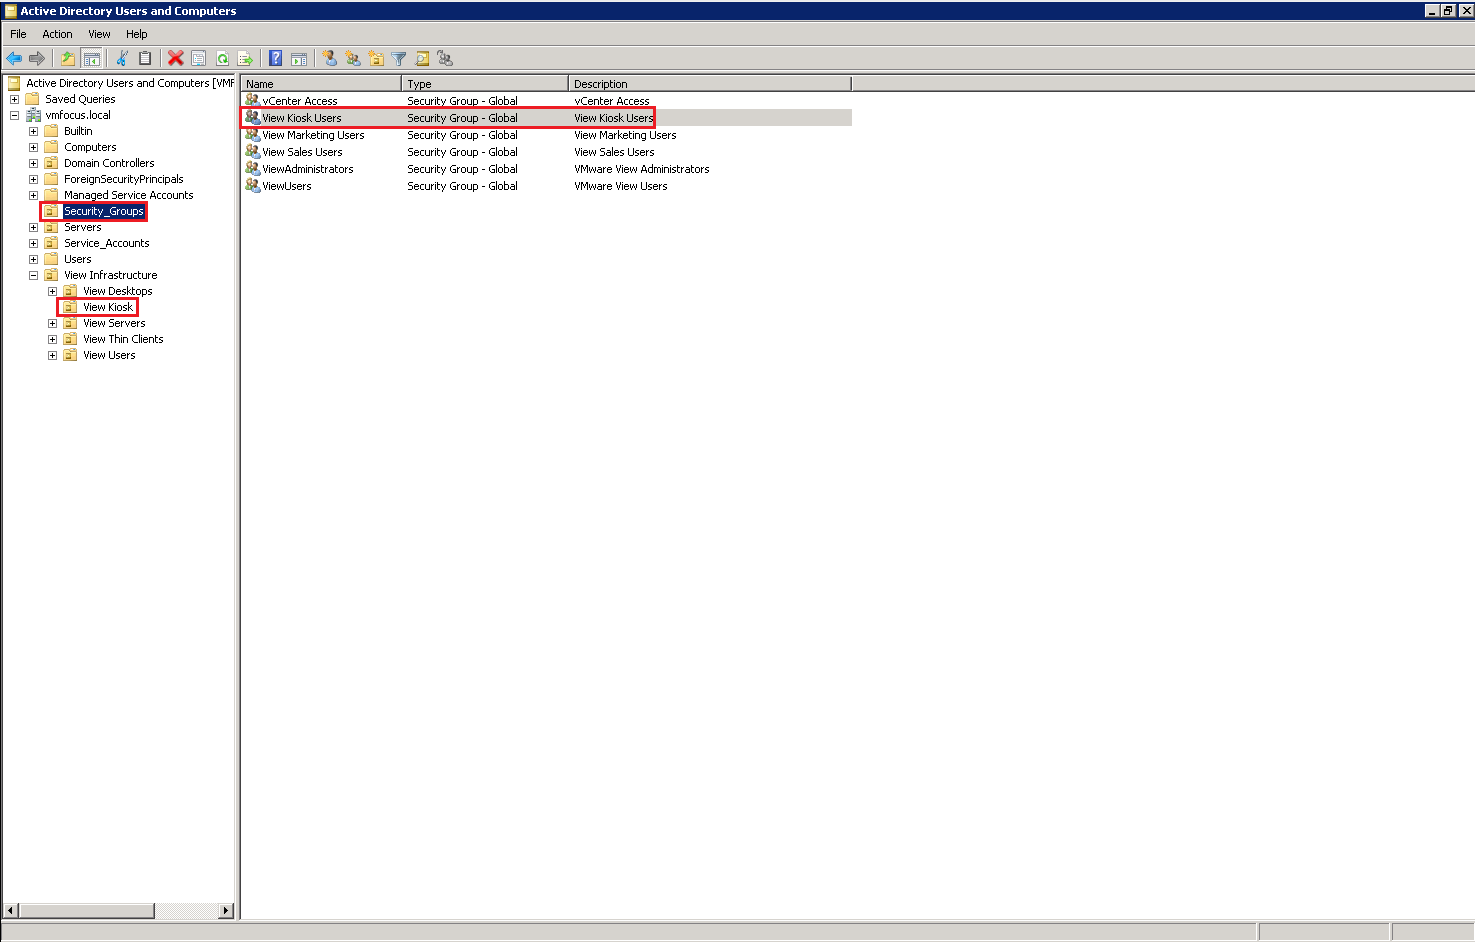
Next onto the Security Tab, I have created a Security Group called ‘View Servers’ and entered the computer accounts VMF-CON01 and VMF-TR01 which are my Connection and Transfer Server.

I have then granted the Read and Enroll rights to the Security Group ‘View Servers’  This is really important as without this when we go to request a Certificate, you won’t have access to any templates.

View Certificates 5

Onto our Connection Server VMF-CON01 and click Start > Run and enter MMC.  Add a Snap In and Choose Certificates and Computer Account > Local Computer

We want to expand Personal and Select Certificates

View Certificates 6

I have already deleted my Self Signed Certificate, I’m feeling that confident!

Right Click Certificates > All Tasks > Request New Certificate

View Certificates 7

Click Next

View Certificates 8

Select Active Directory Enrollment Policy and hit next

View Certificates 9

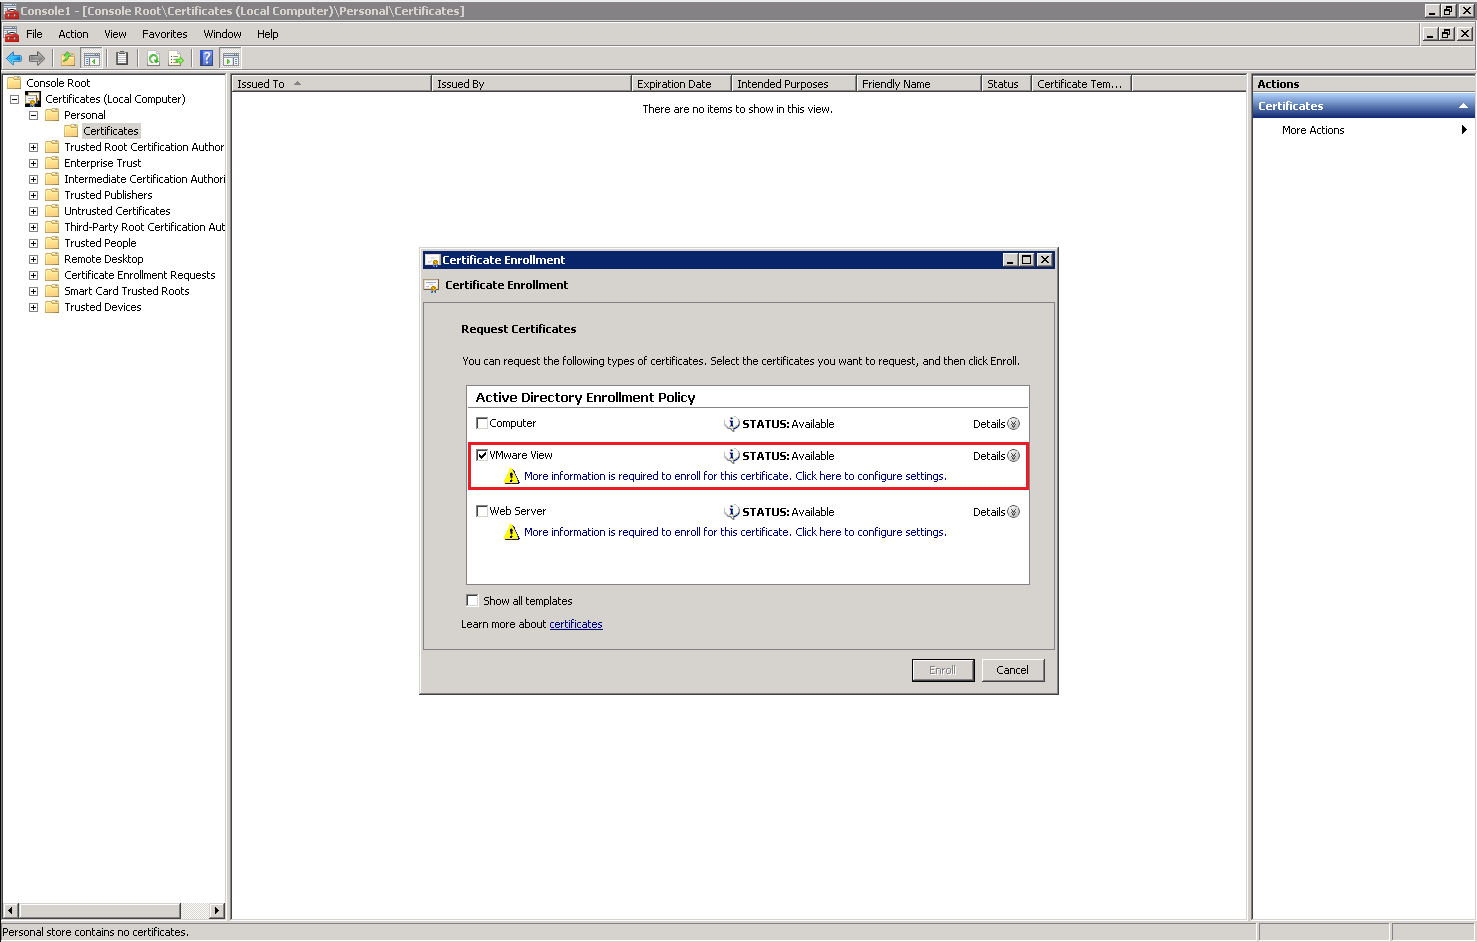
Select VMware View and click on ‘More information is required to enroll this certificate.  Click here to configure settings’.

View Certificates 10

Select Command Name from Type and enter your NetBios name, in my case VMF-CON01 and Add this to the request.

I also recommend adding in the Subject Alternate Names as well, you can achieve this by selecting DNS under ‘Alternative Name’ and entering your FQDN, in my case VMF-CON01.vmfocus.local

Note this needs to match the URL and Server Name in your Connection Server Settings.

View Certificates 11

Just a side note if you don’t follow these settings and enter the FQDN in Common Name and NetBios in the Alternate Name, you will get ‘Server’s certificate does not match the URL’ in View.

View Certificates 17

Click on the General Tab and enter vdm which is a name that View continues to lookup.

View Certificates 13

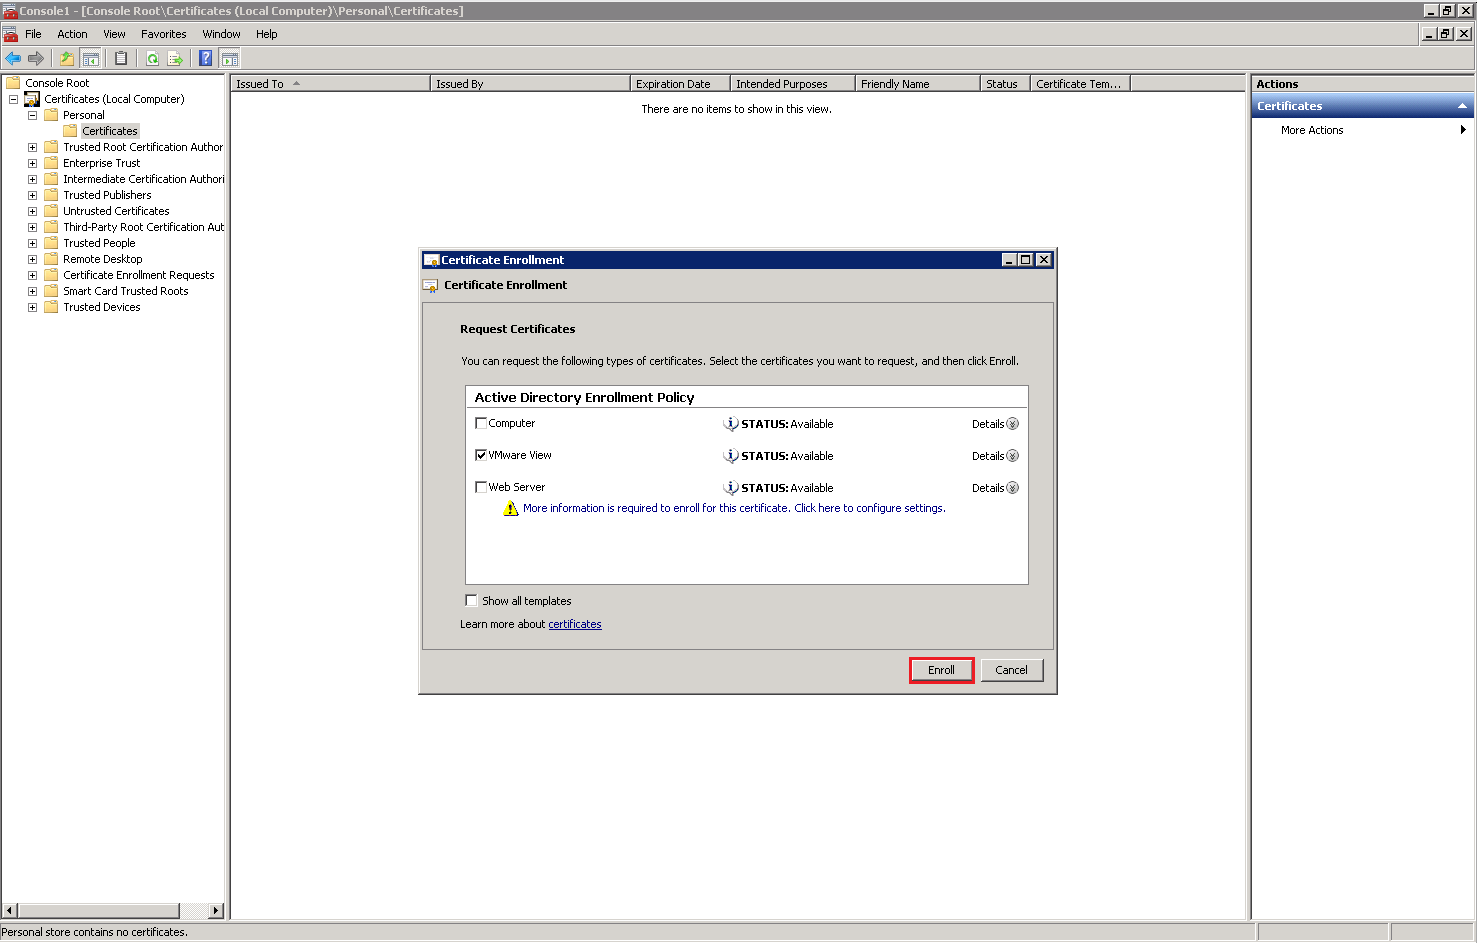
Hit OK to apply and then Click Enroll

View Certificates 14

After you click Finish you will see the installed Certificate

View Certificates 15

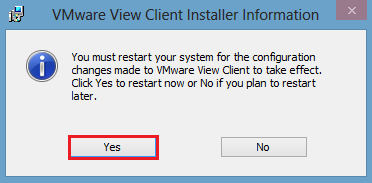
To ensure the View Connection Server uses this Certificate we can either restart the Connection Server or restart the ‘VMware View Connection Server’ service.

I have opted to restart the service, so let’s check the View Administrator Dashboard.  Happy days our Connection Server is green with no problems reported.

View Certificates 16

Turn On Certificate Based Authentication

By default Certificate Based Authentication is enabled for Client Connections.

This can be changed by going to View Configuration > Global Settings > Edit

TOP TIP If you change this setting then all Client Connections are dropped

Identify RSA Instance

Err, I don’t really know what VMware mean by this, I presume it is in relation to Two Factor Authentication.

To identify if you are using Two Factor Authentication, go into View Configuration > Servers > Connection Servers > Edit > Authentication Tab

View RSA 1

Identify Authentication Requirements for RSA and Smart Cards

The authentication requirements for RSA are:

  • Disabled
  • RSA SecurID
  • RADIUS

The authentication requirements for Smart Cards are:

  • Not allowed
  • Optional
  • Required

Felt this objective was a strange one, as it pulls experience and understanding from PKI and Two Factor Authentication which may not be in every View Administrators arsenal.

VMware View – Objective 2.13 Manage User Configurations

Knowledge

  • Configure the profile store
  • Configure Virtual Profile GPOs
  • Configure View Media Services for Clipboard Support

VMware introduced Persona Management  to replace Roaming Profiles, which are the bane of every Server Admins life, can you count how many times you have .old a roaming profile and told the user to login again to receive a new profile due to corruption?.  In fact when I deploy Microsoft infrastructure solutions we no longer use Roaming Profiles, instead we redirect My Documents and Desktop Icons so that the users data is safe and they have a consistent desktop, albeit they may not be able to run all the applications on every workstation they log into.

Anyhow, VMware’s Persona Management is different, in a couple of ways:

  1. When a user logs in, Persona Management only instantly downloads the parts of the profile required.  Everything else is streamed on demand, think of a 10MB PowerPoint presentation on the desktop from a year ago, it doesn’t really need to be downloaded every time someone logs in.
  2. Changes are synced back to the ‘persona repository’ every ten minutes so when a user logs off, it’s much quicker.

Configure The Profile Store

I wasn’t entirely sure what VMware means by this, I can only assume they mean the shared network location in which we are gong to store the Persona Data.

Persona Management relies on the same requirements as Roaming Profiles, I use this Folder Redirection KB to verify the permissions.

I have created a folder on VMF-TR01 called Persona and applied the share permissions above to this.

View Persona 1

Configure Virtual Profile GPOs

To enable Persona Management we need to configure the Group Policy.  We need to import the ADM from the View Connection Server, I covered this in VMware View Objective 1.5 – Prepare Active Directory for installation under Templates.

Edit the GPO and go to Computer Configuration > Policies > Administrative Templates > Classic Administrative Template > VMware View Agent Configuration > Persona Management > Roaming & Synchronization > Manage User Persona > Enabled

View Persona 2

Now that we have Persona Management enabled we need to configure the UNC path for the Persona Repository.

Computer Configuration > Policies > Administrative Templates > Classic Administrative Template > VMware View Agent Configuration > Persona Management > Roaming & Synchronization > Persona Repository Location > \VMFTR01Persona

View Persona 3

We do have loads more GPO settings that can be configured, these are outside the scope of this blog post.  I have however linked the GPO to my View Desktops and created a Test Text File on my Desktop and a Test Documents Folder in My Documents

View Persona 5

I then timed this and after 11 minutes, I checked my Persona share and voila!

View Persona 6

Configure View Media Services for Clipboard Support

The good old copy and paste between your Physical Desktop and the View Desktop.

This is controlled by Group Policies contained in the PCoIP Group Policy, again from the ADM located on your View Connection Server.

The GPO setting is located underComputer Configuration > Policies > Administrative Templates > Classic Administrative Template > VMware View Agent Configuration > PCoIP Session Variables > Overridable Administrator Defaults/Not Overridable Administrator Defaults > Configure Clipboard Redirection.

View Persona 4

We have a number of choices, all of which are straight forward.

  • Disable both directions
  • Enabled both directions
  • Enabled client to server only
  • Enabled server to client only

VMware View – Objective 2.12 Create ThinApp Applications and a ThinApp Repository

Knowledge

  • Create ThinApp applications
  • Create or identify supported file share
  • Assign permissions to the share
  • Verify MSI streaming setting in the package.ini files
  • Identify necessary ThinApp package components to put on the share
  • Assign ThinApp applications to pools

Create ThinApp Applications

As with a few of the other topics, I like to start with what ThinApp is.  ThinApp provides a virtualisation bubble between the Operating System and Application, meaning that they are isolated from each other.  This allows us to recompose a View Desktop without affecting the applications which run on it.

View ThinApp

I mentioned the word ‘bubble’ earlier.  When the application is started a ‘bubble’ is created that contains all of the file system and registry.  These settings can either replace or merge with the Operating System file system or registry.   I like to think of it as the merge or replace using Group Policy for Terminal Servers.

What are ThinApp requirements:

  • 32 Bit run on Windows NT (yeah right) or later 
  • 64 Bit run on Windows XP or later
  • 16 Bit applications can only run on 32 Bit versions of Windows
  • 32 Bit applications can run on 32 Bit or 64 Bit versions of Windows

What are ThinApp Limitations

  • If the Application doesn’t work on the Operating System it won’t work on ThinApp
  • Anti Virus software
  • VPN Clients
  • Printer Drivers
  • 64 Bit applications cannot be virtualised

To create a ThinApp Application we need to start of with a blank/clean Operating System install.  I’m going to use Windows 7 32 Bit for my base OS called VMF-THIN01 with 1GB RAM and a 1 vCPU.  The overall process is:

  • Pre-scan in which all file system and registry are collected
  • Install the application and test, test and err test
  • Post-scan in which all file system and registry are collected
  • Comparison is made between ‘pre-scan’ and ‘post-scan’.
  • Configure the ThinApp package
  • Copy’s the different files to a ‘Project’ directory
  • Build ThinApp package

After applying Windows updates, the first thing I’m going to do is take a Snapshot of VMF-THIN01 as this is our base installation which we can revert back to if required.

View ThinApp 01

After taking the Snapshot we need to download ThinApp 4.7.3 to install on VMF-THIN01.  The latest version at the time of this blog post is VMware-ThinApp-Enterprise-4.7.3-891762.exe 

Launch the .exe and Click Next on Patents List

View ThinApp 02

Accept the EULA and Click Next

View ThinApp 03

Don’t worry at this point, you will think is it installing or not for about five seconds, then you will see the Enter License key Screen. Pop your license key in and then a name that will mean something to you for the ‘License display name’.

View ThinApp 04

Awesome that’s ThinApp installed.

View ThinApp 05

Next, I’m going to take another snapshot, for after the ThinApp installation.

View ThinApp 06

Cool, you will notice a VMware folder on your Start Menu and we want to launch ThinApp Setup Capture (I have created a shortcut on my desktop for easy reference).

View ThinApp 07

We are going to click Next to perform a Prescan of our system.  A Prescan creates a baseline of your clean installation, checking the status of hard drive and registry files.

View ThinApp 08

Click Prescan to launch

View ThinApp 09

This process will take some time, so it might be worthwhile getting a brew.

Cool, so now we need to install the application which we want to be packaged.

View ThinApp 10

I’m going to install with Firefox which I have downloaded to the C: drive of VMF-THIN01.  Nothing special here, I have just installed Firefox as you would on any computer.

Now that Firefox is installed, I’m going to run a Postscan by clicking the Postscan icon.

View ThinApp 11

You will notice that once the Postscan has finished, ThinApp will compare the Prescan and Postscan.

View ThinApp 12

Now that’s finished we need to select the ‘Entry Point’ this is a fancy word that really just means the shortcut to launch the application.  In my case ThinApp knows I have installed Firefox and that the ‘Entry Point’ is Mozilla Firefox.exe

View ThinApp 13

We aren’t going to be using Horizon Application Manager or updating an existing ThinApp Package so click Next

View ThinApp 14

Next you can select the Active Directory Security Groups who can run the application.  I have chose View Sales users and we can also define a ‘Access Denied Message’ for users who don’t have access.

View ThinApp 15

The next choice is about Isolation modes.  What the heck are they? Well the Isolation level made determines the amount of interaction the application can have with the OS.

As Firefox is a well known application which has been written properly, i’m going to select ‘Full write access to non-system directories (Merged Isolation Mode)’

View ThinApp 16

Next we have to decide on our Sandbox location.  The Sandbox captures any changes made to the application such as customization’s   We are going to use the defaults.

View ThinApp 36

Err, I don’t want to send VMware any information, so hit Next

View ThinApp 18

Now this part is really cool, ThinApp allows us to use ThinDirect which plugs in to Internet Explorer so that when a specific website is launched it will open in Firefox.  I’m going to enter http://www.vmfocus.com

View ThinApp 19

Now we need to enter the Inventory Name, shows up in Add/Remove Programs and is shown in the Sandbox Folder. The Project Location is where all the files that make up our Firefox ThinApp package are located.

View ThinApp 20

Next we get to choose our Primary Data Container, this holds all the information to run our ThinApp Package.  For me, I’m going to use Entry Point, generally speaking ThinApp makes the right decision, so I will leave mine as Mozilla Firefox.exe

I’m also going to select MSI Package Generation so that ThinApp will create an ‘msi’ version of Firefox for me.  This means I could use Group Policy to deploy the ThinApp package down to regular desktops, now that is pretty wicked.

In this occasion, we aren’t going to compress the virtual package.

View ThinApp 21

Once we hit Save, ThinApp then performs all the tasks we have requested and Packages Firefox.

View ThinApp 22

Verify MSI Streaming Setting in The package.ini Files

Awesome, we are not at the point where we can Verify MSI Package File, to do this we can click on Edit Package.ini

View ThinApp 23

You will see the MSI Parameters and many other settings that can be customised/altered if required.

View ThinApp 24

I’m happy with all of these settings, so I’m going to Build the Firefox Pacakge.

View ThinApp 25

The Build takes a little while, so it might be an idea to grab another cup of tea!

Excellent news, all finished and Firefox is packaged.

View ThinApp 26

If we access the Project Executable by going to C:Program FilesVMwareVMware ThinAppCapturesMozilla Firefox 18.0.1bin you will see our two files, Firefox Application and the MSI

View ThinApp 27

Create Or Identify Supported File Share & Assign Permissions To The Share

On my Transfer Server VMF-TR01 I have created a Windows File Share called ThinAppPackage with the following permissions:

Domain Computers – Read

Domain Users – Read & Execute

View ThinApp 32

Identify Necessary ThinApp Package Components To Put On The Share

Now we have the packaged Firefox we need to copy all the project files onto VMF-THIN01

Source: C:Program FilesVMwareVMware ThinAppCapturesMozilla Firefox 18.0.1

Destination: \VMF-TR01ThinAppProjectMozilla Firefox 18.0.1

View ThinApp 33

We are also going to copy our package files (Firefox Application and the MSI) onto VMF-TR01

Source: C:Program FilesVMwareVMware ThinAppCapturesMozilla Firefox 18.0.1bin

Destination: \VMF-TR01ThinAppPackageMozilla Firefox 18.0.1

View ThinApp 34

Before we move on, it’s a good idea to test our Firefox installation.  To do this, I have reverted VMF-THIN01 back to a state before we installed ThinApp so that we have a clean Windows 7 desktop again.

View ThinApp 35

I’m going to login to VMF-LM01 as Sales01 as the View Sales Users has access to Mozilla Firefox.  This user has no special rights and is a normal Domain User.

I have created a shortcut on the desktop to \VMF-TR01ThinAppPackageMozilla Firefox 18.0.1 so that I can launch the application. Let’s see if it works.

Voila we have success!

View ThinApp 37

Assign ThinApp Applications To Pools

This seems like a really long blog post, however we are on the final hurdle, which is assigning ThinApp Applications to pools.  Seems like we haven’t been into View Administrator in a long time.

Let’s jump into View Configuration > ThinApp Configuration > Add Repository

View ThinApp 38

This is where we tell ThinApp to find ‘msi’ packages.  Which for me is under \VMF-TR01ThinAppPackage

View ThinApp 39

Next we are going to jump up to Inventory > ThinApps > Scan New ThinApps

View ThinApp 40

Select your ThinApp Repository and I recommend using the Top Level Folder so that you scan all sub folders

View ThinApp 41

Choose your MSI file to scan, in my case I only have Mozilla Firefox 18.0.1.msi

View ThinApp 42

If all goes well then your MSI should be ‘added’

View ThinApp 43

Let’s get this ThinApp assigned to a pool shall we.  Select your ThinApp and choose Add Assignment > Assign Pool

View ThinApp 44

Choose which Pool you want to assign the ThinApp too, I’m rolling with VMF_Local_Mode and hit OK

View ThinApp 45

Excellent our Mozilla Firefox MSI is now ready for use.

View ThinApp 46

Let’s login to a View Desktop as Sales01 and see what we find.

View ThinApp 47

Awesome, we have a Mozilla Firefox shortcut, the browser works and it’s in Programs/Features.

ThinApp Resources

ThinApp is such a broad part of View, that we can’t really cover all aspects in a blog post.  However, I do recommend you use the following resources for extra study aides:

ThinApp Users Guide 4.7

ThinApp Blog

ThinApp 4.7 Package.ini Parameters Guide

VMware View – Objective 2.11 Configure The Environment for Kiosk Mode

Knowledge

  • Utilize vdmadmin (e.g., enable/disable Kiosk Mode, assign client to desktop, etc.)
  • Identify client device’s identification mechanism (MAC, custom name, etc.)

Before we crack on with Kiosk Mode, what’s the point in it? Well Kiosk Mode is for environments where people don’t login, but need access to some data.  An example of this would be my Doctors Surgery.  You go in and enter some details on a touch screen to verify you are who you say you are.  If you get the details right, you are checked in for your appointment.

Most likely Kiosk Mode desktops are going to be heavily locked down, so with this in mind, I would recommend creating an specific Organisational Unit and Security Group in Active Directory for them.

View Kiosk 1

I have created a Windows 7 Virtual Machine called VMF-KIOSK01 specifically to perform the View Kiosk function.

Kiosk Pool

I have created a Manual Floating Pool for VMF-KIOSK01 and granted the Security Group View Kiosk Users entitlement.

Before we go any further I want to test logging into VMF-KIOSK01 as user Kiosk01 to make sure everything is tickety boo.

View Kiosk 2

Well that’s working fine.  Time to leave the GUI behind and head into CLI.

Utilize vdmadmin & Identify Client Device’s Identification Mechanism

vdmadmin is a tool built into the View Connection Server that allows you to perform administrative tasks in CLI such as scripting.

We need to utilize the vdmadmin tool to get our VMF-KIOSK01 working.  Specially we are going to use the -Q option to create kiosk accounts and set parameters in Active Directory.  The complete syntax is as follows (taken from VMware View Administration – View 5.0)

  • vdmadmin -Q -clientauth -add [-b authentication_arguments] -domain domain_name-clientid client_id [-password “password” | -genpassword] [-ou DN] [-expirepassword | -noexpirepassword] [-group group_name | -nogroup] [-description “description_text”]
  • vdmadmin -Q -disable [-b authentication_arguments] -s connection_server
  • vdmadmin -Q -enable [-b authentication_arguments] -s connection_server [-requirepassword]
  • vdmadmin -Q -clientauth -getdefaults [-b authentication_arguments] [-xml]
  • vdmadmin -Q -clientauth -list [-b authentication_arguments] [-xml]
  • vdmadmin -Q -clientauth -remove [-b authentication_arguments] -domain domain_name-clientid client_id
  • vdmadmin -Q -clientauth -removeall [-b authentication_arguments] [-force]
  • vdmadmin -Q -clientauth -setdefaults [-b authentication_arguments] [-ou DN] [ -expirepassword | -noexpirepassword ] [-group group_name | -nogroup]
  • vdmadmin -Q -clientauth -update [-b authentication_arguments] -domain domain_name-clientid client_id [-password “password” | -genpassword] [-description “description_text”]

vdmadmin is located in C:Program FilesVMwareVMware ViewServertoolsbin by default

View Kiosk 3

Run Command Prompt as a user with administrator rights and navigate into the folder locating vdmadmin.

The command we are going to run is

vdmadmin -Q -clientauth -setdefaults -ou (Organisational Unit) -group (Security Group) -noexpirepassword

Which equates too

vdmadmin -Q -clientauth -setdefaults -ou “OU=View Kiosk,OU=View Infrastructure,DC=vmfocus,DC=local” -group “View Kiosk Users” -noexpirepassword

View Kiosk 4

This command ensures that the User Accounts that View will create for Kiosk mode won’t expire.

Now we need to get the MAC Address of the View Desktops, in my case VMF-KIOSK01.  The easiest way to do this is too ping VMF-KIOSK01 and run arp -a from the command line

View Kiosk 5

The next command we are going to run is

vdmadmin -Q -clientauth -add -domain vmfocus -clientid 00:50:56:82:6a:43 -group “View Kiosk Users”

View Kiosk 6

If we check Active Directory we have a new user created called cm-00_50_56_82_6a_43 who is a member of View Kiosk Users

View Kiosk 7

Next we need to enable our View Connection Server to authenticate without needing a password, oh my!

The syntax for this is

vdmadmin -Q -enable -s VMF-CON01

View Kiosk 8

From an administrator perspective, you might want to see which clients are enabled for Kiosk Mode without passwords.  To do this run the following syntax

vdmadmin -Q -clientauth -list

View Kiosk 9

Last of all we need to tell the View Client on the physical hardware to access VMF-KIOSK01 using Kiosk mode.  VMware have included a handy little example batch file which can be found in C:Program FilesVMwareVMware ViewClientbinkiosk_mode.cmd

The easiest thing to do is run this script against the physical machine using a Windows GPO.

For this particular blog post, kudos to Barry Combs & Mike Laverick for the Building End-User Computing Solutions with VMware View

VMware View – Objective 2.10 Configure The Environment For Local Mode

Knowledge

  • Publish linked clone replica to Transfer Server repository
  • Identify Local Mode policies
  • Configure Local Mode policies
  • Ensure client device meets Local Mode requirements (e.g., proper version of View Client, hardware requirements, disk space, end device resource requirements, etc.)
  • Verify transfer server configuration

Local Mode is one of the features of View that I’m most excited about exploring.  In the past I have used XenApp Offline Applications and that was a world of hurt!  I mean how cool is it to be able to take your VDI offline and use it whilst flying or on a train.  Naturally, we do have a few prerequisites, which we will cover off during this port.

View Offline Desktop

Publish Linked Clone Replica To Transfer Server Repository

The good news is we have already covered this over on Objective 2.5 – Configure View Transfer Servers  so we can move straight onto the next item.

Identify Local Mode Policies

By default Local Mode is disabled, it has to be enabled in Global Policies.  These can be found in the View Administrator under Policies.

View Local Mode 1

A quick breakdown of the Local Mode Policies are:

Local Mode: Needs to be enabled to allow Local Mode Desktops

User Initiated Rollback: When a user wants to check there desktop back in, with this feature enabled they can either check the desktop in and all the changes are synced back to View or they can choose to roll there desktop back to the version on View discarding any changes they have made when working offline.

Max Time Without Server Contact: This is the amount of time the user can be offline for.

Target Replication: We can’t always rely on users to ‘check in’ desktops so this feature will try and replciate any changes at a given interval.

User Deferred Replication: Can the user choose not to replicate?

Disk Replicated: By default only the persistent disk is replicated as this contains all of the users information such as desktop icons and my documents.  You can choose to replicate the OS disk as well.

User Initiated Check In: Is the user allowed to check there desktop in?

User Initiated Replication: Is the user allowed to start replicating changes back to View?

View Local Mode 2

Ensure Client Device Meets Local Mode Requirements

We have a few requirements to meet with Local Mode, so let’s rattle through them.

Operating System Requirements

  • Only supported on Windows systems
  • Windows 7 32 or 64 Bit Home, Professional, Enterprise or Ultimate
  • Windows Vista 32 Bit Home, Professional, Enterprise or Ultimate SP1 & Sp2
  • Windows XP Home and Professional SP3

As you can see the physical desktop doesn’t have to be part of the Active Directory domain as ‘home’ version works.

Physical Hardware Requirements

  • CPU needs to be 1.3GHz or faster
  • Disk space required is as much as what the VM can grow to e.g. View Desktop uses 10GB but has 20GB allocated, you need to have 20GB free.
  • 2GB Memory Windows XP and Vista
  • 3GB Memory Windows 7
  • BIOS must support Hardware Virtualisation

Verify Transfer Server Configuration

The only real way to do this is to give the bad boy a whirl!

First thing to do is check your transfer Server is ready to rock and roll under View Configuration > Servers > Transfer Servers make sure that:

  1. Status Ready
  2. Snapshot is Published

View Local Mode 3

At the moment my View Client doesn’t have Local Mode installed, so I’m going to run the View Client Installer with Local Mode, at the time of this blog post, the most upto date version is VMware-viewclientwithlocalmode-x86_64-5.2.1-937772

Hit Next and we want to Modify the installation

View Local Mode 4

Select View Client with Local Mode and hit Next

View Local Mode 5

Click on Install

View Local Mode 6

Click Finish

View Local Mode 7

Unfortunately, Local Mode requires a reboot, so I will see you on the other side!

View Local Mode 8

Before we move forward, a couple of things about Local Mode.

  1. The desktop can only be checked out if it’s powered off.
  2. The desktop can only be checked in if it’s powered off.

I have logged in with a user who has rights to use Local Mode on a View Pool.  The desktop is shut down, we want to click the Down Arrow and Select Check Out

View Local Mode 9

Did you spot the VMware Octopus as my desktop background?

We are going to select OK (however you can change the download location of the desktop from the default if you wish).

View Local Mode 10

You will see the percentage start to increase.

View Local Mode 11

What happens is that View takes a snapshot of your Desktop VM and places a Lock on it so no changes can be made (makes sense as it can’t be used).

View Local Mode 12

Time to grab a cup of tea, as this takes a while.

Excellent the check out has completed, click Connect.

View Local Mode 13

When you login, Windows will need to restart to identify the new hardware it is running on.

View Local Mode 14

That’s it for this objective, I think you will agree with me, Local Mode is proper awesome and takes down many of the barriers that CTO may have had with VDI in the past.