In March 2018 Altaro announced v7.6 of their backup product, I thought it was time to give the product a whirl and provide feedback on my first impressions.
Lab
As those who follow my blog know, I switched to Server 2012 R2 running Hyper-V a while ago. In this configuration I have a HPE DL360 G6 with some local SATA storage as the backup target for my Hyper-V virtual machines.
Installation
Altaro make the claim (see here) that you can be up and running, allowing you to back up your first virtual machine within 15 minutes.
Once I had completed the simple registration form to access the Unlimited Plus Edition for 30 Days, it was time to launch the installer.
A straight forward intuitive installer is completed within a couple of minutes we are ready to launch the management console.
Configuration
As soon as the management console is loaded, we just need to follow the 3 steps outlined below.
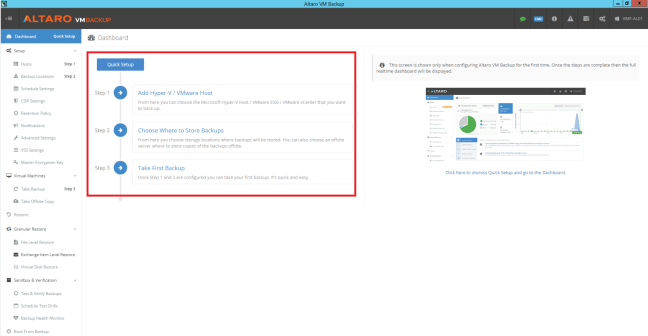
Connecting to the Hvper-V Hosts is a straight forward process, entering the IP Address and credentials you would expect.

After this I entered in the backup location and selected the VM which required backing up and clicked backup.
So far so good, Altaro have validated that backups can be started within 15 minute of installing the software.
CDP Settings
As we know all workloads are not equal and more critical application services require a lower restore point objective. With Altaro, I can set CDP settings as low as 5 minutes. The part which is quite impressive is that they warn you of the impact on the hypervisor of taking such frequent snapshots.

Offsite Backup
Another feature I wanted to validate was integration with Azure Storage Backups to undertake an ‘offsite backup copy’.
After entering the Connection String for one of my Azure Storage Accounts, it was simply a case of dragging and dropping the VM I wanted to protect into the ‘Offsite Location’ bucket and finally provide a Master Encryption Key.
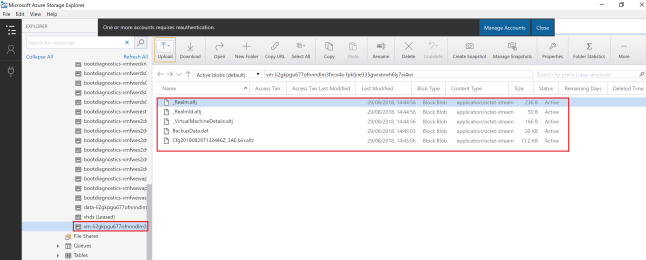
I was interested to see the native format of the ‘Offsite Backup’ to see if this could be used to migrate VM’s to Azure. Using Microsoft Azure Storage Explorer I browsed to the storage account and viewed the VM location.
The Offsite Backup VM isn’t easily identifiable, I’m assuming the VM name is encrypted by the Master Encryption Key and the backup files are held in Altaro format.
Essentially this means that if you had a DR event on-premises and you needed to restore backups from Offsite, you would need to install and configure an Altaro Backup server which isn’t a big deal in itself but just adds to the overall time needed to restore business operations.
Schedules
When administering backups, an area which time and effort is spent is on backup scheduling. I was pleased to see that the schedules are different for CDP and regular one off backups.
In this scenario, I wanted to perform an on-premises backup and then follow this up with an offsite copy. A couple of click and this was ready to go!

A bit of feedback for Altaro is it would be good to be able to name your backup schedules as I could see identifying the right schedule could become cumbersome.
Advanced Settings
Enables you to control features such as De-duplication, Encryption, Exclude ISO’s/Drives and use Change Block Tracking.
Linked back to the Offsite Backups, it would be great if you had the option to backup to Azure as a native VHD (without de-duplication) as you could then spin up your VMs in Azure and use this as a migration tool or for DR scenarios.
Restore
For me, on-premises restores are a given. I’m more interested in restoring archive data from Azure (using Altaro Retention Policy to control this).
Selecting the Restore Icon, I can select Azure Storage Account, again with a decent prompt which states you will be charged for egress data.
 It’s a case now of dragging the backup down your internet pipe to be re-hydrated by Altaro VM Backup on your selected Hyper-V Host.
One of the things I would like to see is a File Level Restore from an Azure Storage Account to avoid restoring an entire VM .
Final Thought
It’s clear that Altaro have invested heavily in a slick user experience to provide simplified backup operations with a clear and concise dashboard that is intuitive.
I’m sure that we will see further enhancements especially around the integration with public cloud.
If you’d like to try the software for your Hyper-V and/or VMware environments, you can download Altaro VM Backup to back up unlimited VMs for 30 days, then enjoy forever free backup for 2 VMs. Download Altaro VM Backup for free here.
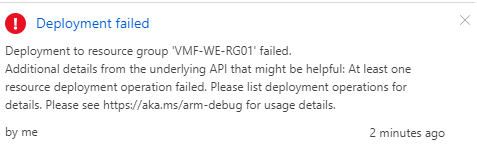
 I have been undertaking a customer deployment and thought I would share this nugget of information which may save you some time.