
So, I finally have my lab all cabled and I have a few spare minutes to start the initial configuration of the vmFocus lab.
What do we do first? Well I always start with networking and making sure that my switch is running the latest firmware. OK, I do have one exception to this, when you check the manufacturer’s website, if you have release 8.9.5 and 9.0.0, I tend to stick with 8.9.5 as it should be more proven.
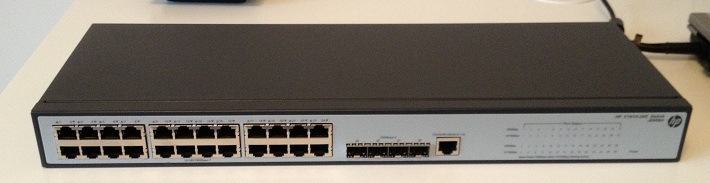
Anyway, back on topic, the HP v1910 24G switch is a beast for the money, some of it’s features are:
– Gigabit
– Layer 2 Managed
– Layer3 Static Routing with 32 routes
– Access Control Lists
– STP, RSTP and MSTP
– 802.3X Flow Control
– VLAN with 256 simultaneous
– Link Aggregation
– Lifetime Warranty
It should be a worthy addition to any home lab.
Firmware Upgrade
When I first opened up the switch, I was surprised by how light it was, but comparing this to Cisco’s which I work with on a daily basis (which cost 20x the amount) doesn’t seem fair.
The HP v1910 will pick up it’s IP address via DHCP, so depending on your environment, either check your DHCP servers newest address lease when you power it on or do a ping sweep of your network using something like IPScan
If you don’t have a DHCP server I would recommend using Antamedia DHCP Server, don’t worry it’s free.
Once you have located the IP address of the HP v1910 open up a web browser and type in the address. Which in my case is http://192.168.37.104. You should hopefully be greeted with this login screen:

I was quite surprised to see a ‘random’ text generator at the login screen but kudos to HP/3COM for the addition. The default username and password is:
Username admin
Password
Once logged in, it should look something like this:

We are going to navigate to Device on the left hand side and then onto Device Management:
Now it’s time to download the latest firmware from HP, at the time of writing this blog the most recent firmware is 1910_5.20.R1512P05 which can be found here. Select this and begin the download
After the download completes select choose file
Select ‘if a file with the same name already exist, overwrite it without any prompt and also ‘reboot after the upgrade is finished’

Click on apply. It will take approximately five minutes for the switch to come back up again, so go grab a cup of coffee before we move onto the next part.
Initial Setup
The first thing we are going to do is change the name of the switch, from HP, to do this select Device from the left hand column and then Basic. Then enter a new name in ‘sysname’. As you can see mine is named SW01 (very imaginative). Don’t forgot to click ‘apply’
System time is perhaps one of the most overlooked items for networks. I can’t stress how important this is, if you are trying to troubleshoot an error and the time stamps are 10-04-00 01:12, leaves you thinking when did the issue occur?
To setup select Device from the left hand column and then System Time and then Net Time.
In this example, we are using the Source Interface as VLAN 1, which is the default VLAN. Our external NTP Servers are:
0.vmware.pool.ntp.org – 31.170.110.148
1.vmware.pool.ntp.org – 46.227.200.71
Select you time zone and click apply, once done you should see Clock Status: synchronized.
Moving down the list we are going to change the password for the admin user, select Device from the left hand column then Users then Modify. Select admin tick Password Modify and then enter your new password
The last thing we are going to do is set a static IP address for the switch, we wouldn’t want to leave it on DHCP would we? To do this select Network from the left menu, then VLAN Interface, then Modify. Select Manual and enter the static IP address.

This may sound crazy, but before you click apply, write down the last octet of the static IP. You wouldn’t believe the amount of times I do this and the moment I click save/apply I get a phone call, colleague asking for help and I forget the damn thing.
Click apply and reconnect to the switch on the new IP address and with the password the admin user we applied earlier.
In the next ‘how to’ we are going to configure some VLAN’s.
