In the previous blog post, I covered creating installing and configuring the Master Target Server so that it could establish communication with the Configuration Server. In this installment, we will be installing and configuring the Process Server.
This might seem a bit strange but the first thing we need to do is download and install vSphere CLI 5.5 onto our Process Server. vSphere CLI can be found here. If you don’t already have a VMware login you will need to create one.

Logon to your Process Server and follow the on screen prompts to install vSphere CLI 5.5. Once installed we need to move onto deploying the Process Server.
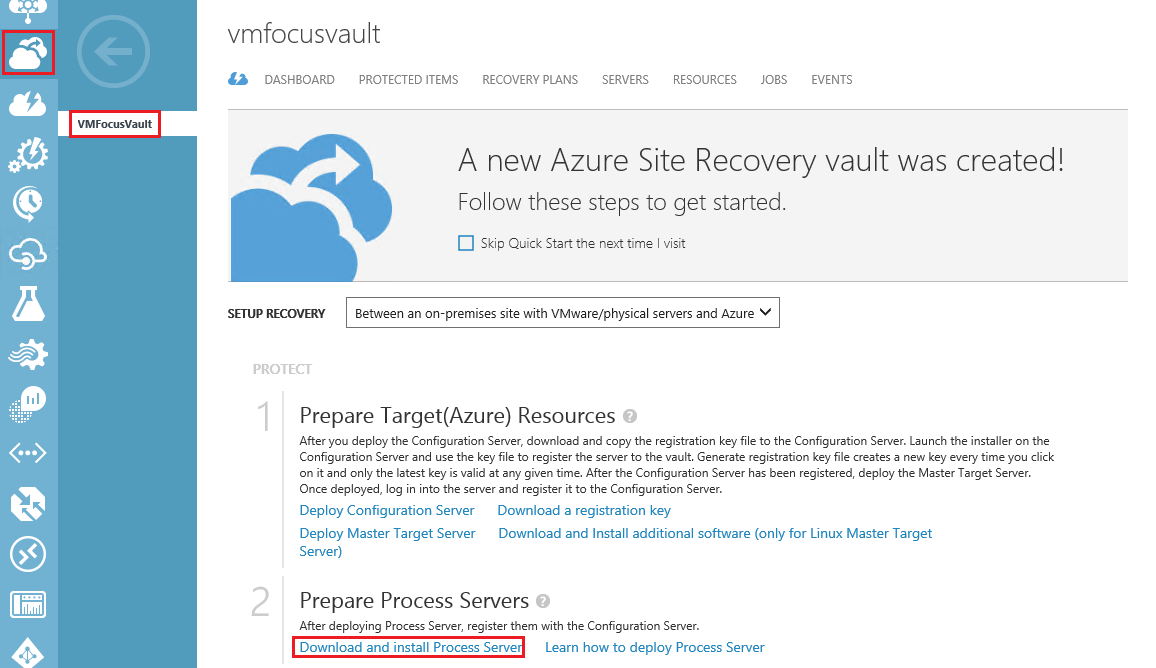
From your Process Server and then sign into Azure Portal. In the Azure Portal the first thing we need to do is go to Recovery Services > VMFocusVault > Download and install Process Server
Extract ProcessServerInstaller_8.4.0_GA zip. You will notice two files, the first one we need to run is ‘Microsoft-ASR_CX_TP_8.4.0.0_Windows_GA_28Jul2015_release’

This file installs the dependencies on which the Process Server relies. Click Install

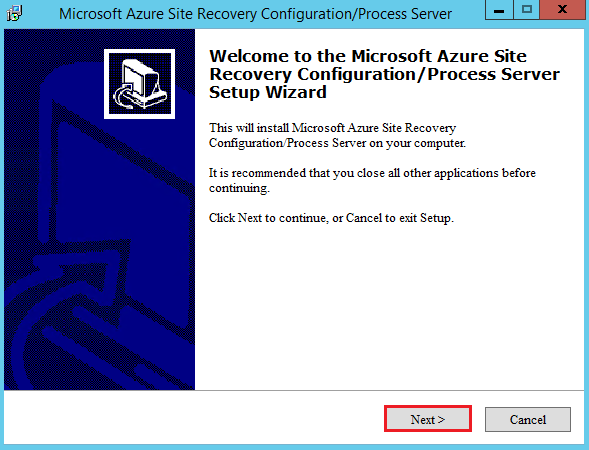
Once the installation finishes we need to run the next file ‘Microsoft-ASR_CX_8.4.0.0_Windows_GA_28Jul2015_release’. Click Next
Select Process Server. Click Next

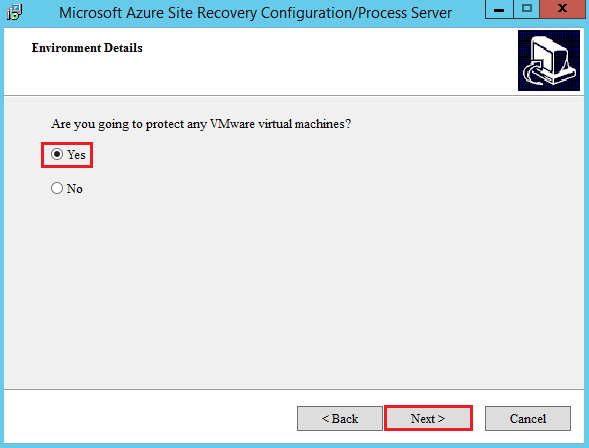
Select Yes in response to ‘are you going to protect any VMware virtual machines?’ Then Click Next
Select the NIC for the Process Server to communicate on. Click Next

I will be communicating over the public internet without a VPN tunnel. Therefore, I need to enter the following details:
- Configuration Server Public IP Address
- Configuration Server Public HTTPS Port
- Configuration Server Passphrase

Select your Hard Drive which has at least 600B of space free and Click Install. Once installed, you need to restart the computer.

Rather than waiting for the connection to be established to the Configuration Server which can take sometime. We can bypass this by clicking on Recovery Services > VMFocusVault > Servers > Refresh

Once refreshed, click on your Configuration Server and verify that your Process Server is shown.

Next we need to add in a vCenter Server. To do this select Recovery Services> VMFocusVault > Add VMware vCenter Servers

Complete the dialogue box below with the details you have entered previously.

Note: vCenter Server and Process Server should be on the same network.
Once updated you should see your vCenter Server listed under Configuration Servers.

In the next blog post we are going to protect some virtual machines!

2 thoughts on “How To: Install & Configure Azure Site Recovery: Part 3”