How To: Install & Configure Azure Site Recovery: Part 4

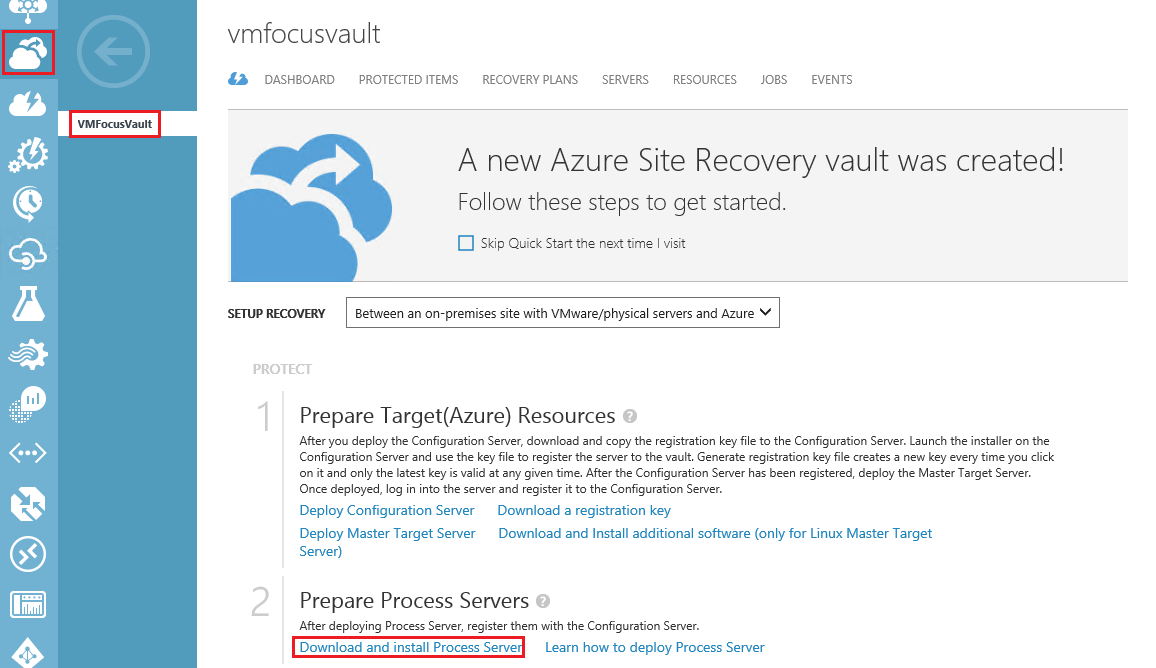
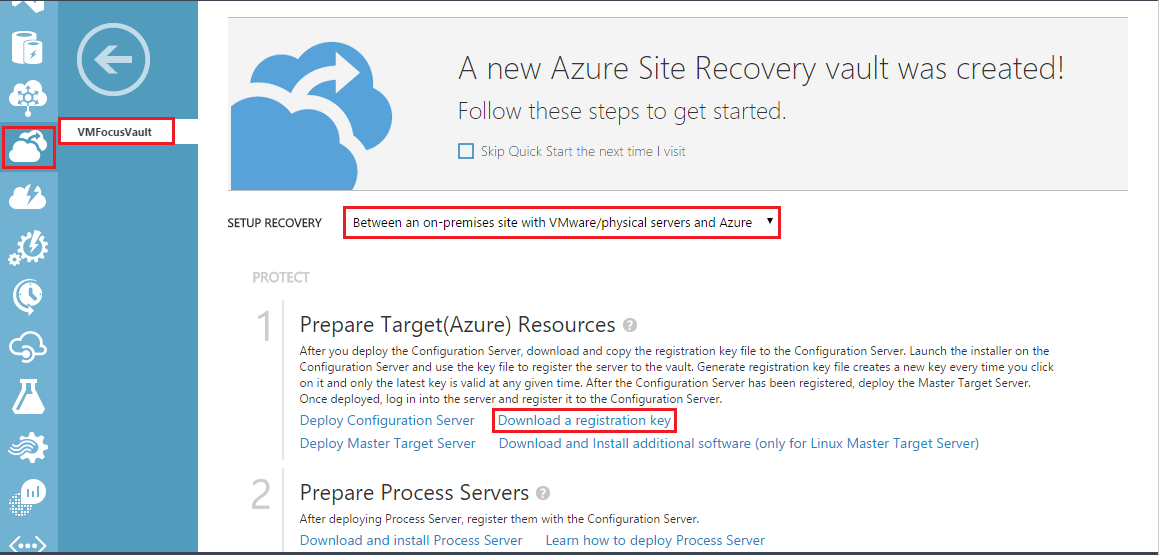
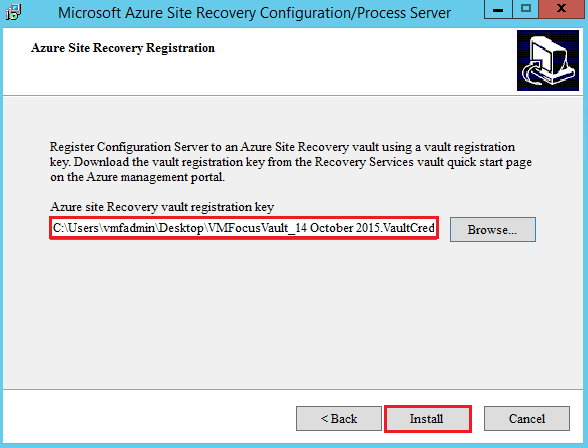
In the previous blog post we configured our on-premises Process Server and the communication between vCenter and the Configuration Server via the Process Server.  In this blog post we are going to protect some virtual machines.

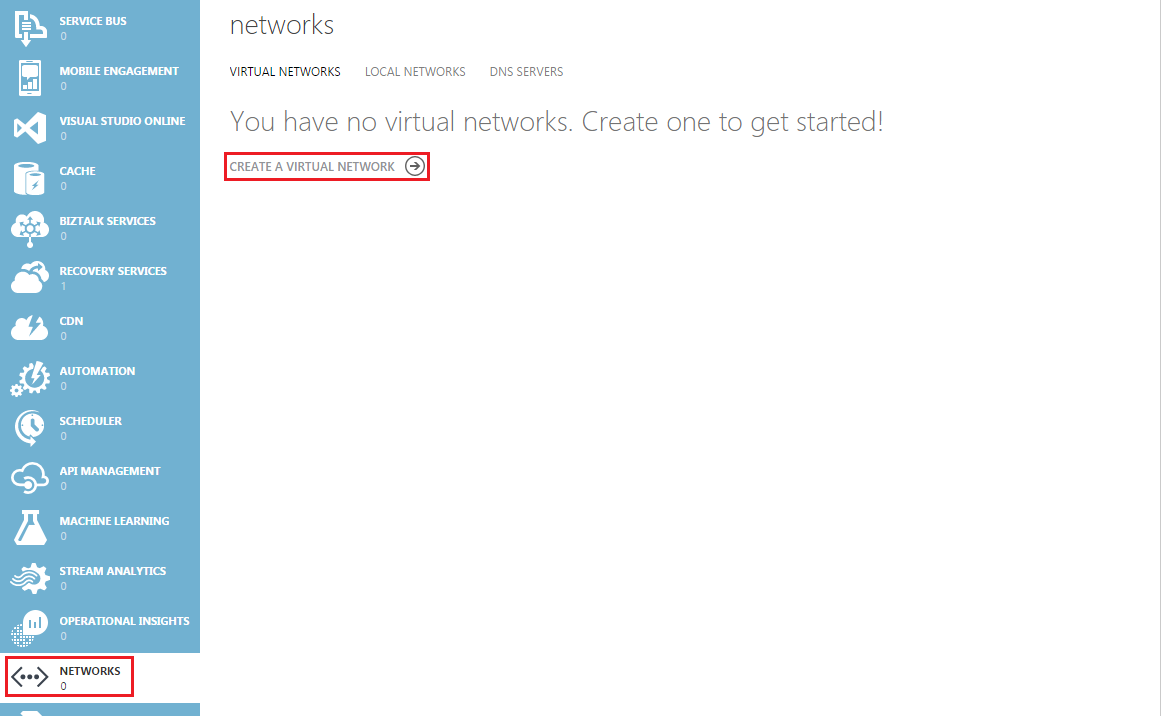
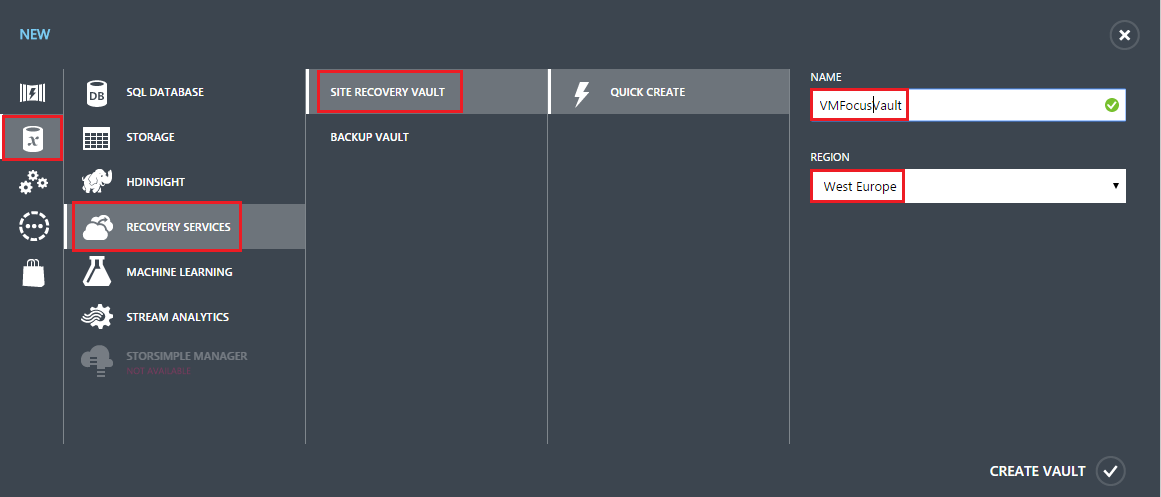
Start by logging into the Azure Portal selecting Recovery Services > VMFocusVault > Protected Items > Protection Groups > Create New Protection Group

Azure 35

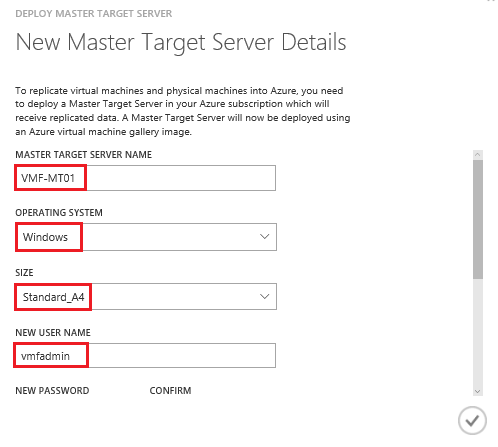
Specify a Protection Group name, as I’m original I’m going with VMF-PG01

Azure 36

Next we need to select the Replication Settings for the Protection Group, choices are:

  • Multi VM Consistency – Each VM within the Protection Group will be consistent with each over
  • RPO Threshold – How much data can we afford to loose, bandwidth needs to be able to cope with this setting
  • Recovery Point Retention – How many recovery points do we want to have available?
  • Application Consistent Snapshot Frequency – Calls VSS to quiescence memory

Select your chosen settings and Click the Tick

Azure 37

Once the Protection Group has finished being created.  Click on the Protection Group and select ‘Add Virtual Machines’

Azure 38

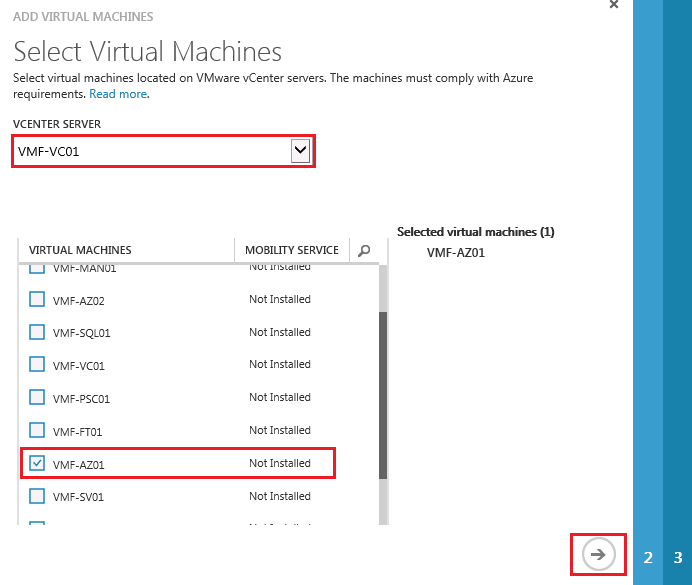
Select the virtual machines you want to protect (in my case VMF-AZ01) and Click the Tick

Azure 39

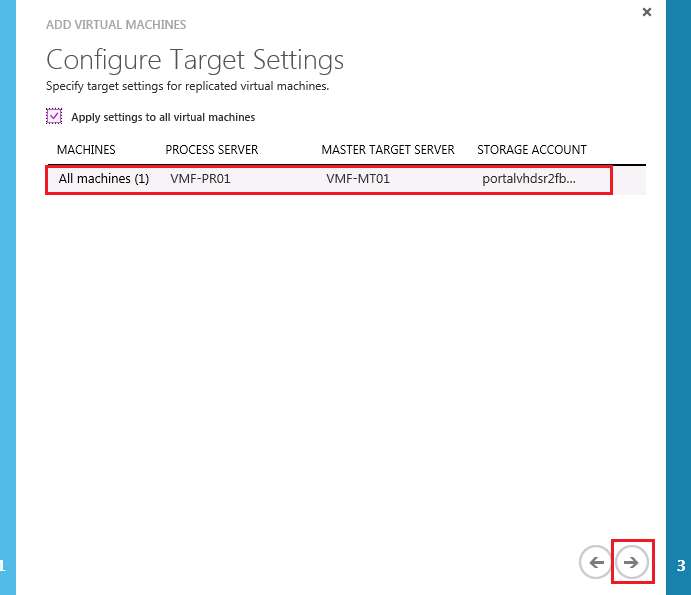
Next select your Process Server, Master Target Server and Storage Account and Click the Tick

Azure 40

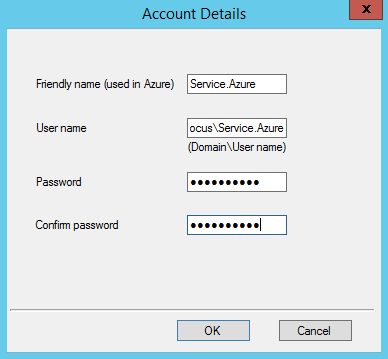
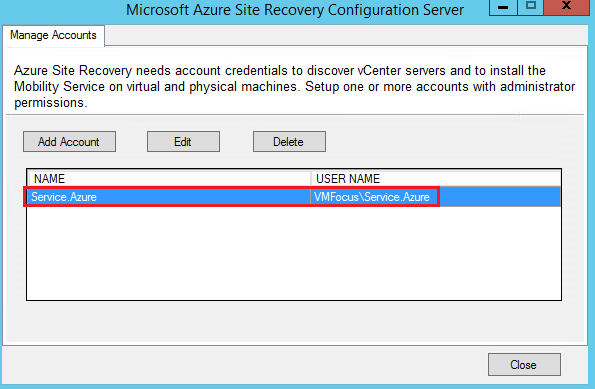
Finally specify the credentials for the Mobility Service to use to perform installation.  Then Click the Tick

Azure 41

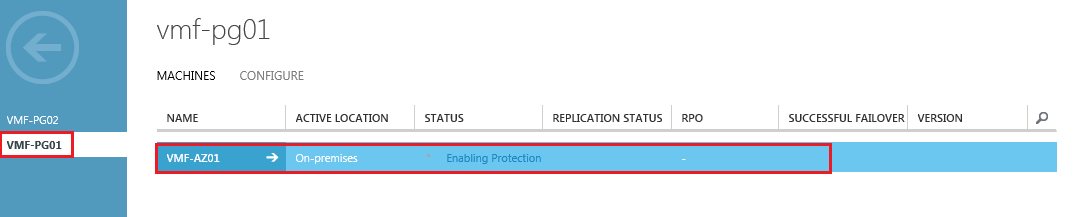
Naturally, it will take sometime for the initial replication to complete.  However this can be monitored by selecting the Protection Group.

Azure 42


Quite a few cups of tea later and my on-premises vSphere virtual machines are now protected within Azure Site Recovery.  Now I want to configure the virtual machines so that they use the correct virtual networks within Azure.

Select your Protection Group then click on your VM

Azure 43

Select Configure from the top bar

Azure 44

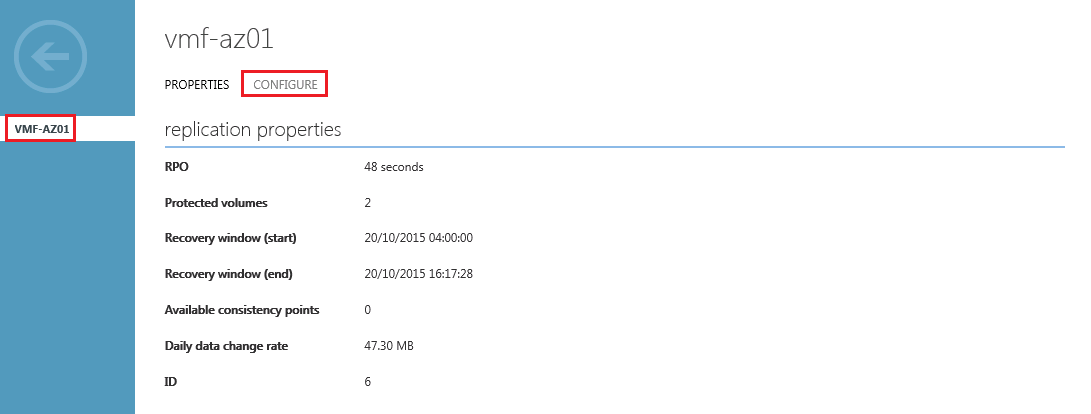
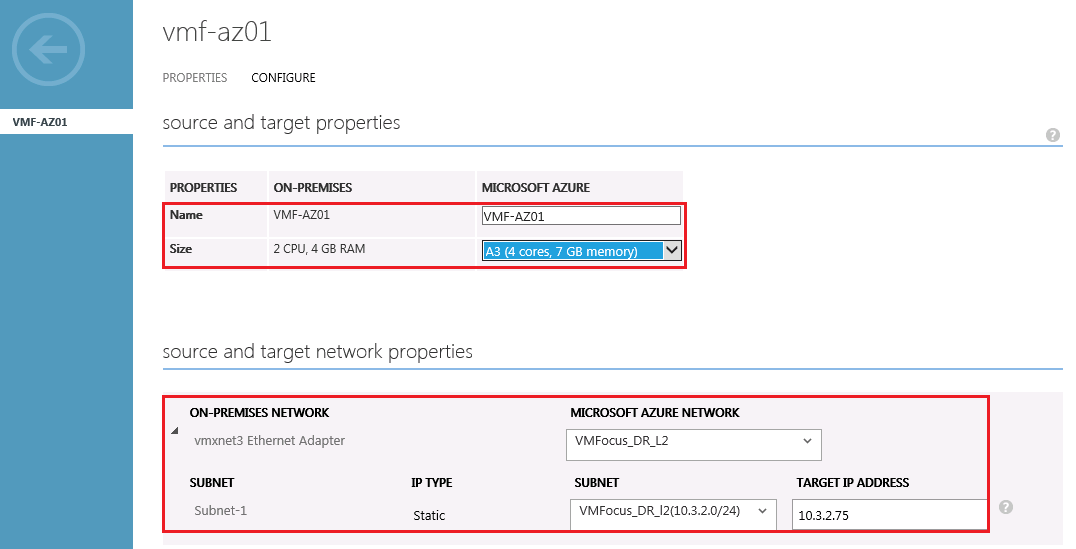
This is the heart of the configuration of where our protected on-premises VM will sit in Azure.  The items we can configure are:

  • Name – These can be altered on-premises to Azure.  Not entirely sure of the use case for this, but it’s an option
  • Properties – The target VM in Azure when it is hydrated.  Note that you cannot change between VM’s between series once failed over to Azure so make sure you choose the right one.
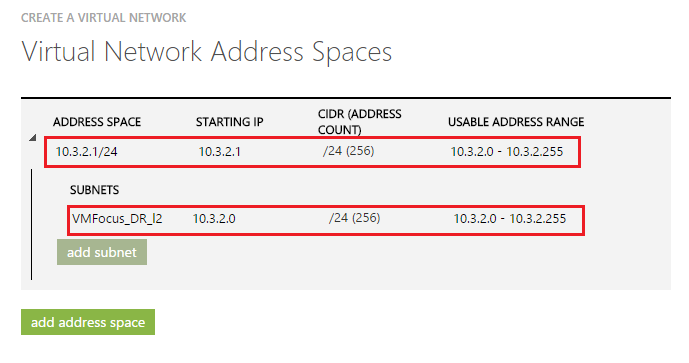
  • Network – The target Azure Network and IP address for virtual machine

Azure 45

Now we have configured the protection for our virtual machines, in the next post we are going to failover to Azure.

How To: Install & Configure Azure Site Recovery: Part 3

In the previous blog post, I covered creating installing and configuring the Master Target Server so that it could establish communication with the Configuration Server.  In this installment, we will be installing and configuring the Process Server.

This might seem a bit strange but the first thing we need to do is download and install vSphere CLI 5.5 onto our Process Server.  vSphere CLI can be found here.  If you don’t already have a VMware login you will need to create one.

Azure 22

Logon to your Process Server and follow the on screen prompts to install vSphere CLI 5.5.  Once installed we need to move onto deploying the Process Server.

From your Process Server and then sign into Azure Portal.  In the Azure Portal the first thing we need to do is go to Recovery Services > VMFocusVault > Download and install Process Server

Azure 21

Extract ProcessServerInstaller_8.4.0_GA zip.  You will notice two files, the first one we need to run is ‘Microsoft-ASR_CX_TP_8.4.0.0_Windows_GA_28Jul2015_release’

Azure 23

This file installs the dependencies on which the Process Server relies.  Click Install

Azure 24

Once the installation finishes we need to run the next file ‘Microsoft-ASR_CX_8.4.0.0_Windows_GA_28Jul2015_release’.  Click Next

Azure 25

Select Process Server.  Click Next

Azure 26

Select Yes in response to ‘are you going to protect any VMware virtual machines?’ Then Click Next

Azure 27

Select the NIC for the Process Server to communicate on.  Click Next

Azure 28

I will be communicating over the public internet without a VPN tunnel.  Therefore, I need to enter the following details:

  • Configuration Server Public IP Address
  • Configuration Server Public HTTPS Port
  • Configuration Server Passphrase

Azure 29

Select your Hard Drive which has at least 600B of space free and Click Install.  Once installed, you need to restart the computer.

Azure 30

Rather than waiting for the connection to be established to the Configuration Server which can take sometime.  We can bypass this by clicking on Recovery Services > VMFocusVault > Servers > Refresh

Azure 19

Once refreshed, click on your Configuration Server and verify that your Process Server is shown.

Azure 31

Next we need to add in a vCenter Server.  To do this select Recovery Services> VMFocusVault > Add VMware vCenter Servers

Azure 32

Complete the dialogue box below with the details you have entered previously.

Azure 33

Note: vCenter Server and Process Server should be on the same network.

Once updated you should see your vCenter Server listed under Configuration Servers.

Azure 34

In the next blog post we are going to protect some virtual machines!

How To: Install & Configure Azure Site Recovery: Part 2

In the previous blog post, I covered an creating virtual networks and Azure vault followed by installing the Configuration Server.  Now we move onto the Master Target Server,

Back over to the Azure portal.  We now need to access Recovery Services > VMFocusVault > Deploy Master Target ServerAzure 15

Give your Master Target Server a name, select the OS, choose the size (I’m rolling with A4) and enter in your credentials. Next select your Configuration Server and give the Master Target Server an IP address.

Azure 16

Time for a cup of tea as it will take a while for the Master Target Server to be created.

Make sure you take note of the external IP address of our Master Target Server as we will need to RDP onto it in order to complete the configuration tasks.

The external IP can be found under Virtual Machines > Select VM > Dashboard Azure 17

Log onto your Master Target Server, the first thing you will see is a PowerShell script being executed, make sure to leave this running.

The Host Agent Config dialogue box will appear after a little while.  Enter in the IP Address of your Configuration Server, Port Number (443) if on the same subnet and the Passphrase.   Finally hit OK.

Azure 18

Rather than waiting for the connection to be established to the Configuration Server which can take sometime.  We can bypass this by clicking on Recovery Services > VMFocusVault > Servers > Refresh

Azure 19

If everything has gone correctly you should see the Master Target Server connected to your Configuration Server.

Azure 20

In the next blog post, we will move onto configuring the on-premises Process Server.

How To: Install & Configure Azure Site Recovery: Part 1

In the previous blog post, I covered an introduction to Azure Site Recovery and the components that make up the solution.  In this post I will cover the initial configuration in the Azure Portal.

If you don’t have one already, I would suggest signing up for an Azure Free Trial, this includes £125 worth of credits.

Once you are logged into the Azure Portal, the first thing we want to do is create out virtual networks.  I’m going to create two:

  • VMFocus_DR_L2 – Layer 2 network extension from on-premises, to keep same IP Address
  • VMFocus_DR_L3 – Layer 3 network, to force VM’s to change IP Address

Select Networks > Create a Virtual Network

Azure 01

Provide a name and select the location for the network

Azure 02

Next enter in your DNS Servers and and VPN details.  I’m not federated against my local domain, nor do I have any domain controllers deployed so for now I will leave this part blank.

Finally complete your address space and subnets then wait for the network to be created.

Azure 03

Next we need to create a vault for recovery services.   The process is straight forward.  Select Recovery Services > Site Recovery Vault > Quick Create > Enter Name & Region

Azure 04

Now that the Site Recovery Vault is created.  We can move onto deploying our Configuration Server.

Select Quick Start and select your Recovery Type.  In this deployment, I will be using VMware to Azure.  Next select Deploy Configuration Server

Azure 05

Enter the required details ensuring that the required Azure Virtual Networks is selected.

Azure 06

As I will be replicating data over the public internet, we need to take note of the external IP address of our Configuration Server.  This can be found on the Virtual Machine status panel.

The next step is to download a registration key.  This is found on the Recovery Services > Select your Vault > Download Registration Key

Azure 07

Log into your Configuration Server and the automatic deployment process will prompt you to start the installation process.  Click Next and Accept the MySQL license terms.

Azure 08

Enter your MySQL credentials and click next.

Azure 09

Select your proxy settings and hit next.  Now we need to install our Configuration Server Key.  Browse to the saved location and select the key.

Azure 10

Click Finish to exit Setup.

This next part is really important, ensure that you capture the passphrase for the Configuration Server.

Azure 12

Onto credentials now.  We need to add an account that has the credentials to install the ‘Mobility Service’ onto virtual machines.   I have created an account called Service.Azure as per the dialog box below.

Azure 13

Always best to ensure that your account displays correctly.

Azure 14

In the next blog post we will move onto deploying the Master Target Server.

Azure Site Recovery: An Introduction

When Microsoft released Azure Site Recovery, I have to say it caught my attention since it claimed to be a single solution which can orchestrate, and automate the protection, and recovery of on-premises physical servers and virtual machines based on Hyper-V or VMware with replication, failover and failback to Azure.

Azure Site Recovery v0.1

Components of Azure Site Recovery

  • On-Premises Process Server – This receives replication data from the Mobility Service (in-guest agent)  using disk based cache.  It is used to compress and encrypt data on-premises before sending it over internet/VPN/Express Route to the Master Target server in Azure
  • On-Premises Mobility Service – This can be pushed out automatically by the Process Server or performed manually.  Essentially it is an IO splitter that takes a write to disk, holds it in memory and sends it across to the Process Server
  • Azure Configuration Server – This is the brains, it co-ordinates communication between all components both on-premises and in Azure.  Each Configuration Server can support up to 100 source virtual machines.
  • Azure Master Target – Receives incoming replication traffic from the on-premises Process Server. Each protected VM is added as a VHD using ‘blob’ storage.
  • Replication – Azure Site Recovery uses streaming ‘a synch’ replication.  It’s worth noting that maximum throughput is 80Mbps when using Site to Site VPN or any form of normal internet connection.
  • Licensing – Is per protected VM

The diagram below shows the relationship between all the components.

Azure Site Recovery Components v0.1

What Are The Gotcha’s?

The gotcha’s I’m aware of at the moment are as follows:

  • Currently you are unable to perform test failovers.  The work round is to create ‘test VM’s’ failover to Azure and then destroy them.
  • You are unable to seed data into or out of Azure Site Recovery.  Thought needs to be how long it will take to protect virtual machines and failback to on-premises
  • Protected VM’s are limited to those supported in Azure
  • Protected VM’s can only migrate within their series type e.g. A1 to A4, but they cannot move into D series.

I’m sure Microsoft are working on these and will provide updates in the near future.

In my next blog post, I will start configuring Azure Site Recovery Manager with on-premises VMware virtual machines.